Introduction to Spooky Graveyard Pudding Cups
When the leaves turn and the air gets a little crisp, it’s the perfect time to indulge in some spooky treats. Enter the Spooky Graveyard Pudding Cups—a dessert that’s as fun to make as it is to eat! This Halloween-themed delight isn’t just about looking good; it packs a flavorful punch that guarantees smiles all around.
Why Spooky Graveyard Pudding Cups are a Halloween Hit
Let’s face it: Halloween is one of the best excuses we have to embrace our creativity, especially in the kitchen. The spooky graveyard pudding cups can be a fantastic centerpiece for your Halloween gathering or a fun project to whip up with friends or family. What could be more entertaining than crafting your own spooky landscape, complete with creepy tombstones made of chocolate and gummy worms slithering through the graveyard?
These pudding cups are versatile—they can be made with your favorite pudding flavors and require minimal ingredients. Most importantly, they are straightforward to assemble. Kids and adults alike will love layering the ingredients and placing eerie decorations. Plus, you can feel good about getting everyone involved in a fun kitchen activity—according to a study from The National Institute of Health, cooking together can strengthen relationships and build lasting memories.
One of the best parts of spooky graveyard pudding cups is how customizable they are. Whether you prefer a classic chocolate pudding or something a bit more daring, like butterscotch or pumpkin pie pudding, the sky’s the limit. Want to add some flair? Consider garnishing with edible glitter or using sprinkles that resemble a nighttime sky—it’s all about creating your special blend of flavors and textures!
Keep in mind that this treat isn’t just about the presentation. The combination of creamy pudding, crunchy toppings, and chewy candies offers a delightful medley of textures that satisfy those Halloween cravings. Whether you are hosting a cozy gathering or a boisterous Halloween bash, these pudding cups are sure to impress.
So, grab your spooky supplies, and let’s dive into crafting these frightfully delicious spooky graveyard pudding cups!
Ingredients for Spooky Graveyard Pudding Cups
To whip up a batch of spooky graveyard pudding cups, you’ll want to gather a few essential components. These are the foundation for your deliciously eerie dessert:
Essential components for your pudding cups
- Chocolate pudding: This serves as the base of your cup, providing a rich, velvety texture that perfectly mimics soil.
- Crushed chocolate cookies: Think of Oreos or a similar crunchy treat to create that dirt-like topping.
- Gummy worms: A spooky touch that adds fun and whimsy to your graveyard theme.
- Candy tombstones: You can find these at most stores or make your own with chocolate or fondant!
Optional ingredients for creative twists
Want to get a little more adventurous? Here are some optional ingredients to elevate your spooky graveyard pudding cups:
- Whipped cream: Adds an airy finish and can be shaped into spooky ghosts.
- Sprinkles: Go for Halloween-themed sprinkles for extra flair.
- Turkey bacon bits: Crumble them for a unique, “grassy” texture on top, giving a surprising crunch!
Feel free to mix and match these ingredients. The fun is in the creativity, so why not explore flavors and textures? For more inspiring ideas, check out the creative options on Taste of Home. Your graveyard pudding cups will surely be the hit of the party!
Step-by-step Preparation of Spooky Graveyard Pudding Cups
Creating spooky graveyard pudding cups is an enjoyable and creative endeavor that’s perfect for Halloween festivities or a fun treat for any occasion. These delightful dessert cups are not only easy to make but also visually appealing, making them a hit among younger audiences. So let’s dive into the step-by-step preparation!
Mix the chocolate pudding
Start your spooky adventure by mixing the chocolate pudding. You can use either a ready-to-go box mix or make it from scratch using unsweetened cocoa powder, sugar, and milk. If you are pressed for time, the boxed version is a fantastic shortcut. Here’s how to do it:
-
Ingredients for boxed pudding:
-
2 cups of milk
-
1 package of chocolate pudding mix
-
Instructions:
-
In a medium-sized bowl, whisk the chocolate pudding mix and milk together until it’s well combined.
-
Allow it to sit for about 5 minutes to thicken. If you prefer a more decadent flavor, consider adding a dash of vanilla extract.
Once your pudding is ready, set it aside and let it cool while you prepare the next element of your dessert.
Prepare the cookie “dirt”
To give your spooky graveyard pudding cups that eerie look, you’ll need to create some cookie “dirt.” This simple yet satisfying task involves crushing chocolate cookies to resemble soil.
-
Ingredients for cookie dirt:
-
1 package of chocolate sandwich cookies (like Oreos)
-
Instructions:
-
Place the cookies in a zip-lock bag and seal it tightly.
-
Use a rolling pin or a meat mallet to crush the cookies into fine crumbs.
-
Pour the cookie crumbs into a bowl for easy assembly later.
This chocolate “dirt” will serve not only as decor but also as a delightful textural contrast to the smooth chocolate pudding.
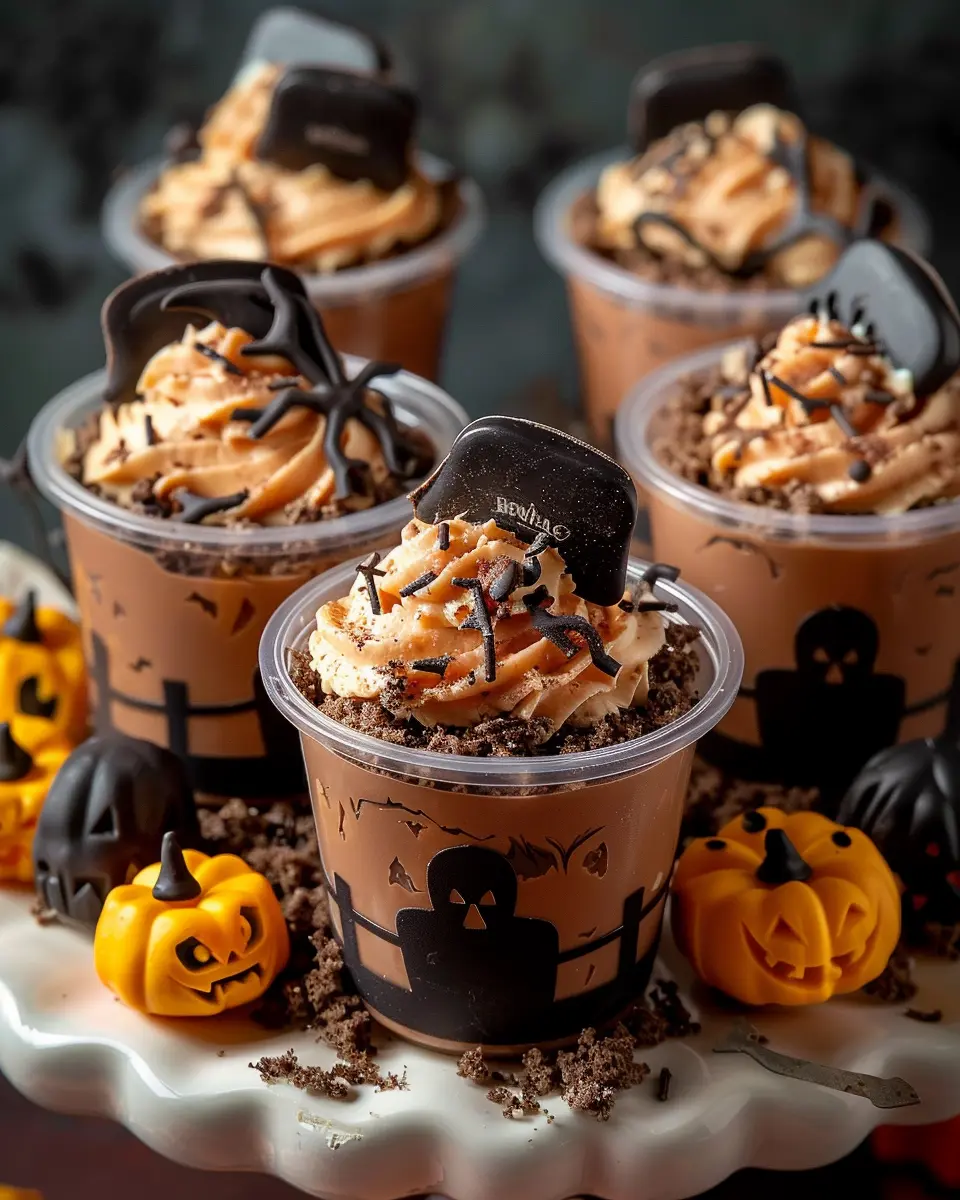
Decorate the grave markers
No graveyard would be complete without its grave markers! For your spooky graveyard pudding cups, you can create DIY headstones from various candies, which will enhance both the look and flavor of your dessert.
-
Ingredients for grave markers:
-
Gray and black fondant or small graham crackers
-
Edible markers or icing for decoration
-
Instructions:
-
Using edible markers, write spooky messages like “RIP” or “Boo” on the fondant shapes or graham crackers.
-
If using fondant, shape small pieces into headstone designs for added creativity.
This decoration step allows for plenty of personal expression—get creative!
Assemble the pudding cups
Now for the fun part—assembling your spooky graveyard pudding cups! This step is where all your hard work comes together.
- Instructions:
- Start by layering your chocolate pudding into clear cups, making sure to fill them about halfway.
- Add a generous layer of the cookie “dirt” on top of the pudding to mimic soil.
- Carefully insert your decorated grave markers into the cookie layer, standing them upright.
Repeat the layering until the cups are filled, being sure to leave some space at the top for more cookie “dirt” if desired.
Chill and present your spooky treat
Once assembled, it’s time for your spooky cups to chill. This will help the flavors meld together beautifully!
- Instructions:
- Cover the pudding cups with plastic wrap and place them in the refrigerator for at least an hour.
- When you’re ready to serve, garnish with a sprinkle of cookie crumbs on top to give them a freshly dug look.
Present your spooky graveyard pudding cups on a tray, and watch your friends’ faces light up in delight as they dig into this ghoulishly delicious dessert.
By following these steps, you’ll create an engaging Halloween experience, not to mention a treat that tastes incredible! Enjoy the compliments from family and friends as they devour your hauntingly beautiful creations. For more dessert ideas and creative presentations, check out Food Network or AllRecipes.
Variations on Spooky Graveyard Pudding Cups
Alternative flavors for pudding
While the classic chocolate pudding works beautifully for spooky graveyard pudding cups, don’t be afraid to experiment with different flavors to add a unique twist! Some delightful options include:
- Vanilla Pudding: Top it with crushed cookies for a ghostly look.
- Pumpkin Spice Pudding: Perfect for fall, this option adds warmth and flavor.
- Butterscotch Pudding: Its rich color pairs nicely with dark chocolate cookie crumbs.
- Strawberry or Raspberry Pudding: These fruity options add a vibrant color that contrasts beautifully against the darker decorations.
By swapping out your pudding flavors, you can surprise your guests and make your dessert even more memorable. Here’s a helpful pudding flavor guide for additional ideas!
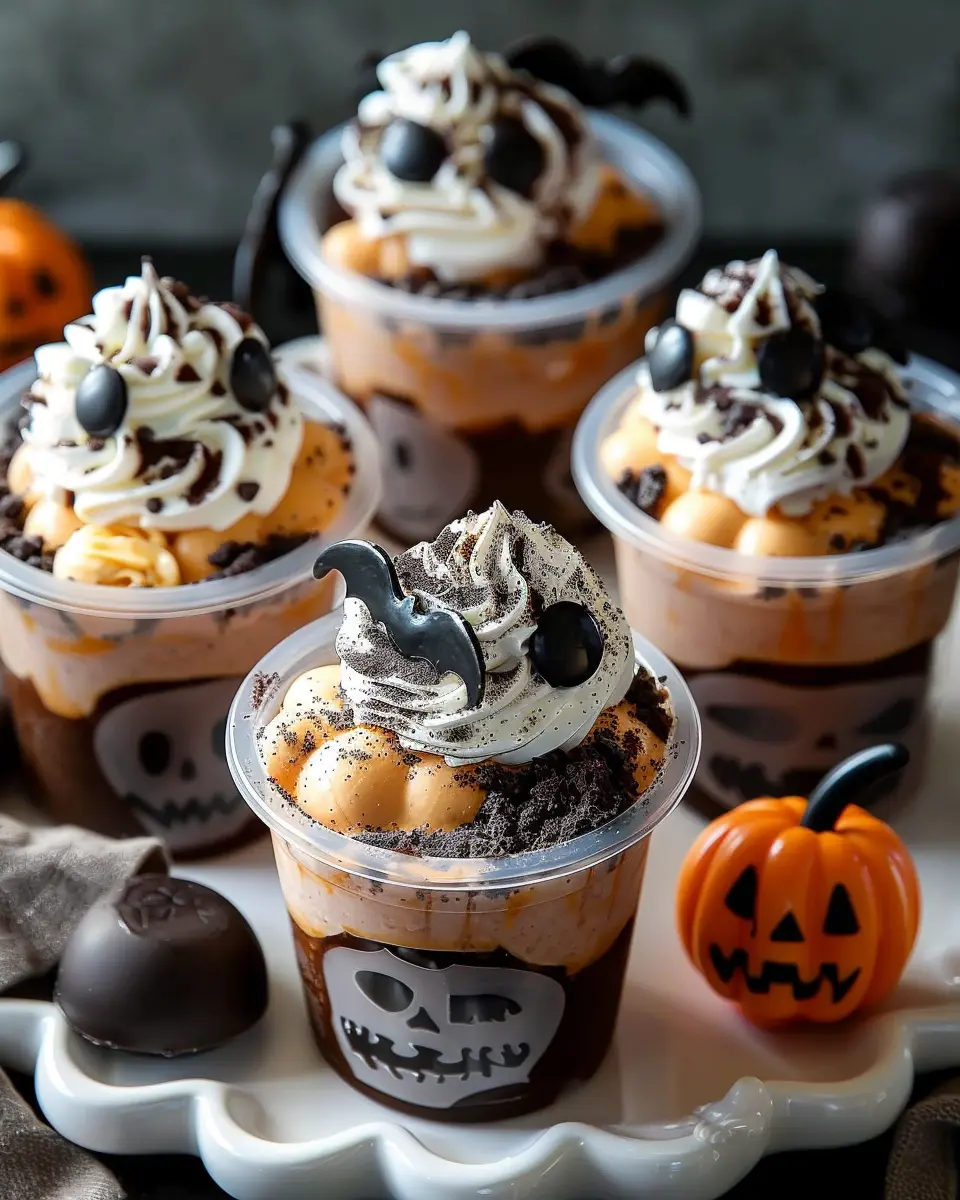
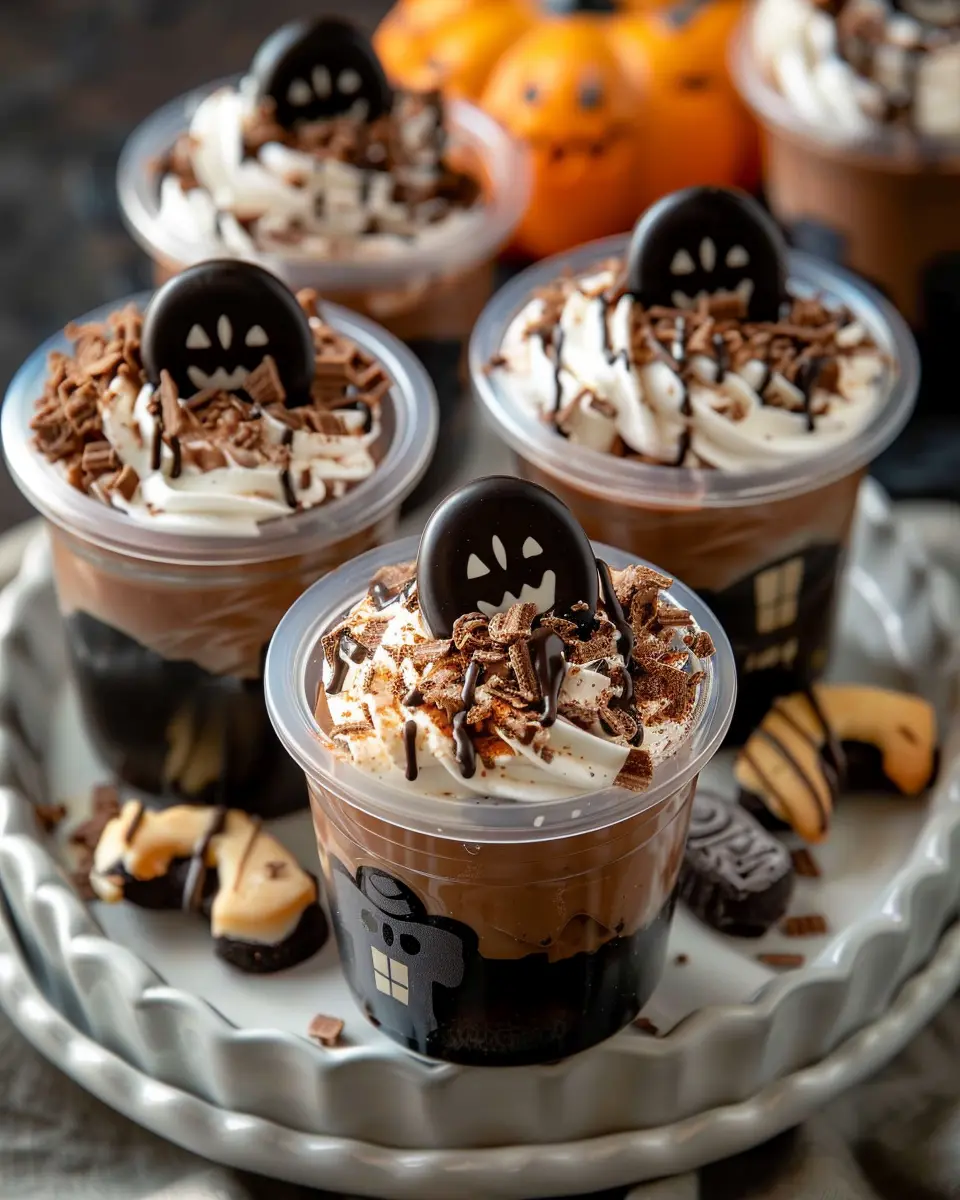
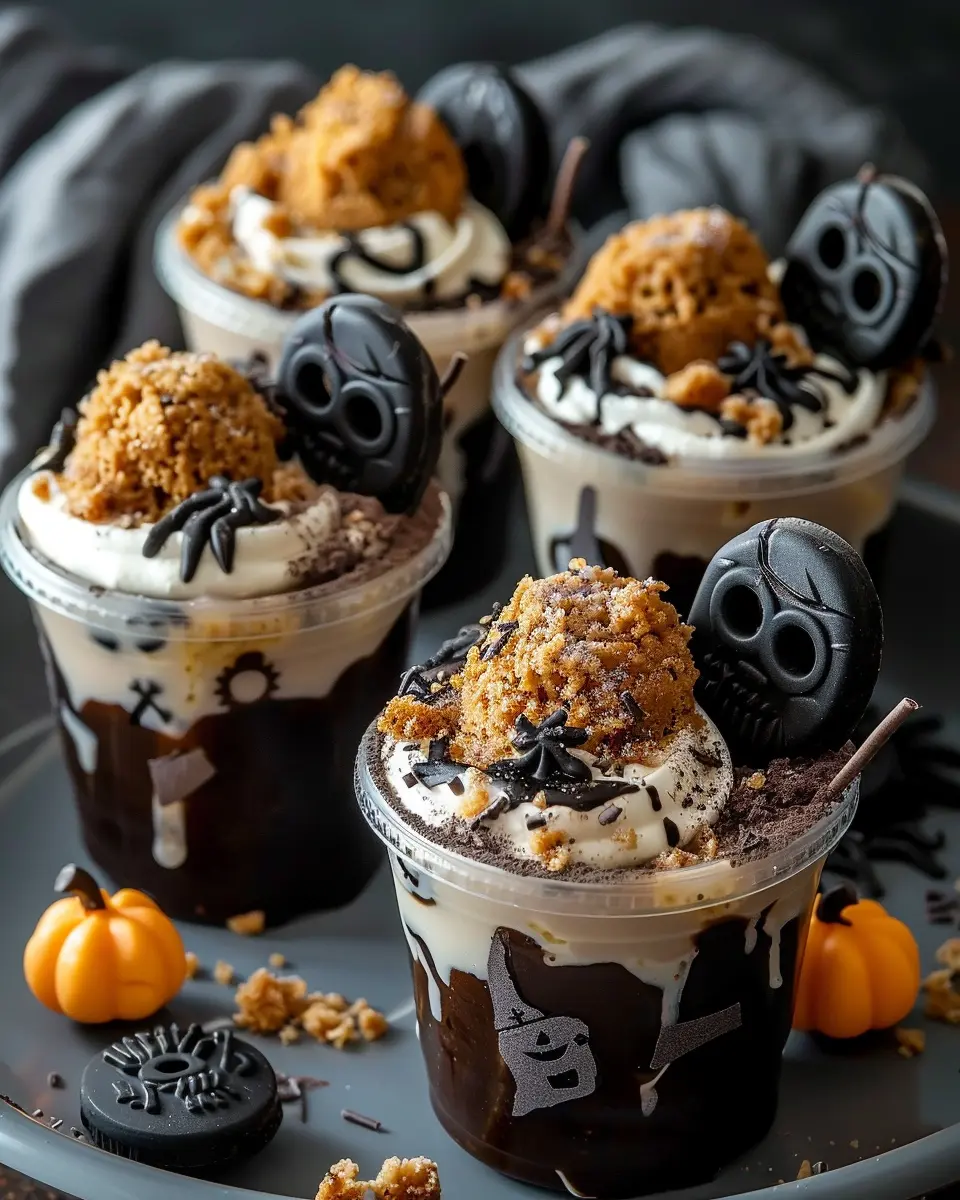
Creative decorations for a personalized touch
Your spooky graveyard pudding cups can become even more enchanting with personalized decorations. Here are some entertaining ideas to ignite your creativity:
- Gummy Worms: Placing a few gummy worms peeking out makes it look extra eerie.
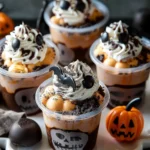
- Edible Candy Graves: Use chocolate tombstone candies you can create from chocolate melts—add a little icing for inscriptions!
- Ghostly Whipped Cream Toppers: Spray whipped cream on top to resemble fluffy ghosts, and use chocolate chips for eyes.
Don’t hesitate to tap into your imagination using items readily available at your local grocery store. After all, the fun is in the details! Wouldn’t it be great to create a spooky dessert that tells a story while satisfying your sweet tooth? So gather your friends and transform your pudding cups into a hauntingly delightful experience.
Cooking Tips and Notes for Spooky Graveyard Pudding Cups
Avoiding common pitfalls
Making spooky graveyard pudding cups can be a fun and creative experience, but a few common pitfalls can dull your hauntingly delicious vibe.
- Overmixing: When preparing your pudding, be sure not to overmix, as this can lead to a less creamy texture. Stir just until combined for that velvety finish.
- Crumbled Toppings: If you’re using cookies for the “dirt,” always crush them just before serving. This prevents them from absorbing moisture and losing their crunch, which adds that delightful texture contrast.
Enhancing the flavor profile
To elevate your spooky graveyard pudding cups, consider these flavor-enhancing tricks:
- Add Spices: A pinch of cinnamon or nutmeg can add unexpected warmth to your pudding mixture, enhancing the overall flavor while keeping it festive.
- Flavor Infusion: For a twist, try infusing your milk with flavors like vanilla or caramel beforehand. Just warm the milk slightly with your chosen flavor and let it steep before making your pudding mix.
Feel free to check out more tips on enhancing dessert flavors for greater inspiration. Let your creativity shine and enjoy making these frightfully delightful treats!
Serving Suggestions for Spooky Graveyard Pudding Cups
Presentation Ideas for Halloween Parties
When it comes to showcasing your spooky graveyard pudding cups, creativity is your best friend. Use clear cups or mason jars to let those eerie layers shine through. Top each cup with crushed chocolate cookies to mimic dirt, and decorate with gummy worms, candy bones, or edible flowers for that extra frightful flair. Don’t be shy—dim the lights and place them on dark platters to amp up the spooky atmosphere. A spooky label or a little sign proclaiming “Beware!” can also add an interactive touch that guests will love.
Pairing Options for a Complete Dessert Spread
To create a standout dessert table, consider pairing your spooky graveyard pudding cups with festive sweets. Think about including pumpkin spice cupcakes, Halloween-themed cookies, or even caramel apple slices to balance the rich creaminess of the pudding. To quench everyone’s thirst, serve chilled apple cider or fun Halloween-themed drinks like “Witch’s Brew” lemonade. This combination not only fits the Halloween theme but also offers a variety of flavors that will keep your guests returning for seconds. Check out Good Housekeeping for additional classic Halloween dessert ideas!
Time Breakdown for Spooky Graveyard Pudding Cups
Preparation Time
Creating the spooky graveyard pudding cups is a breeze! You’ll only need about 15 minutes to gather ingredients and assemble your pudding cups. This quick prep time allows you to focus more on the fun presentation rather than tedious cooking.
Chill Time
The magic happens during the chill stage! Allow your pudding cups to chill in the refrigerator for at least 2 hours. This step is essential for thickening and enhancing those rich flavors. Plus, it makes your dessert even more refreshing.
Total Time
In total, you’re looking at around 2 hours and 15 minutes from start to finish. This means you can whip these up before a Halloween party or movie night without feeling rushed. With a little planning, you’ll have a delightful and spooky treat ready to impress your friends!
For more inspiration, check out Food Network’s Halloween recipes for creative ideas to complement your spooky celebration!
Nutritional Facts for Spooky Graveyard Pudding Cups
Calories per serving
When it comes to indulging in spooky graveyard pudding cups, you’ll be pleased to know that each delightful serving contains approximately 250 calories. This makes them a fun yet manageable treat, perfect for Halloween gatherings or an autumn evening spent in with friends.
Nutritional breakdown
Delving deeper into the nutritional content, these pudding cups boast a balance of sweetness and creaminess with the following benefits:
- Carbohydrates: Around 30 grams, providing a quick energy boost.
- Protein: Approximately 5 grams, thanks to the layers of whipped cream and optional toppings like turkey bacon for that extra crunch.
- Fat: With about 10 grams, they deliver that creamy texture we all love, especially from the pudding mix and cream.
For more detailed information, you might want to check out resources like the USDA FoodData Central, which offers extensive food data for those keen on tracking their nutrition.
So, whether you’re serving these at a party or enjoying them solo, these spooky graveyard pudding cups combine indulgence with a touch of fun and festivity!
FAQs about Spooky Graveyard Pudding Cups
Creating spooky graveyard pudding cups is not only a fun activity but also an entertaining treat for your next gathering. However, you might have some questions. Let’s dive into the FAQs!
Can I make these pudding cups in advance?
Absolutely! One of the best things about spooky graveyard pudding cups is that you can prepare them a day in advance. Just layer your pudding, crushed cookies, and favorite candies in the cups, then cover them tightly with plastic wrap. When it’s time to serve, just add the decorations on top to keep them looking fresh and festive. This pre-prepping can save you valuable time on the day of your event!
What are the best candies for decorating?
When it comes to decorating your spooky graveyard pudding cups, think creatively! Here are some candy suggestions that will add that perfect Halloween touch:
- Chocolate gravestones: Chocolate molds or cookie tombstones offer a dramatic effect.
- Gummy worms: They’re a classic for that creepy touch as they can peek out from the “dirt.”
- Candy eyeballs: These add a fun and spooky element.
- Sprinkles: Look for Halloween-themed sprinkles that can add color and vibrancy.
Get inspired by Pinterest or visit a local candy store to find more unique options!
How can I make these pudding cups healthier?
If you’re aiming for a healthier version of spooky graveyard pudding cups, try these substitutions:
- Use low-sugar or plant-based pudding mixes.
- Swap traditional whipped cream for Greek yogurt for added protein.
- Choose whole-grain cookies for the dirt layer.
- Add layers of fruit like mashed bananas or strawberries for natural sweetness.
With a little creativity, you can enjoy a healthier twist while still keeping the spooky spirit alive.
For more Halloween-inspired recipes, check out sources like Healthline for tips on healthier treats, or EatingWell for fun, festive ideas!
Conclusion on Spooky Graveyard Pudding Cups
Making and sharing spooky graveyard pudding cups is not just a delicious treat; it’s a fun-filled experience that brings people together. Whether you’re hosting a Halloween party or enjoying a cozy night in, these pudding cups spark creativity in the kitchen as well as delightful conversations with friends and family. Kids love getting involved, making this an ideal family activity. Plus, with just a few simple ingredients, you can whip up something that looks fancy without the fuss! So, gather your ingredients, get your loved ones involved, and enjoy the festivities. Don’t forget to check out resources like Food Network for more themed ideas. Happy haunting!
PrintSpooky Graveyard Pudding Cups: A Fun and Indulgent Treat for All
Delight in these fun and indulgent Spooky Graveyard Pudding Cups, perfect for any Halloween gathering!
- Prep Time: 15 minutes
- Total Time: 45 minutes
- Yield: 4 servings 1x
- Category: Dessert
- Method: Chilling
- Cuisine: American
Ingredients
- 2 cups chocolate pudding
- 1 cup crushed Oreo cookies
- 10 gummy worms
- 1 package of candy tombstones
- 1 cup whipped cream
Instructions
- Prepare the chocolate pudding according to package instructions.
- Layer the chocolate pudding in cups.
- Add a layer of crushed Oreo cookies on top.
- Top with whipped cream and place gummy worms and tombstones to create a spooky scene.
- Chill in the refrigerator for 30 minutes before serving.
Notes
- Feel free to use vanilla pudding instead for a different flavor.
- Add additional decorations like spooky sprinkles for extra fun!
Nutrition
- Serving Size: 1 cup
- Calories: 300
- Sugar: 25g
- Sodium: 200mg
- Fat: 15g
- Saturated Fat: 8g
- Unsaturated Fat: 5g
- Trans Fat: 0g
- Carbohydrates: 35g
- Fiber: 2g
- Protein: 4g
- Cholesterol: 30mg
Keywords: spooky, graveyard, pudding cups, Halloween, dessert