7 Flavorful Reasons to Bake
Why Baking is Worth It
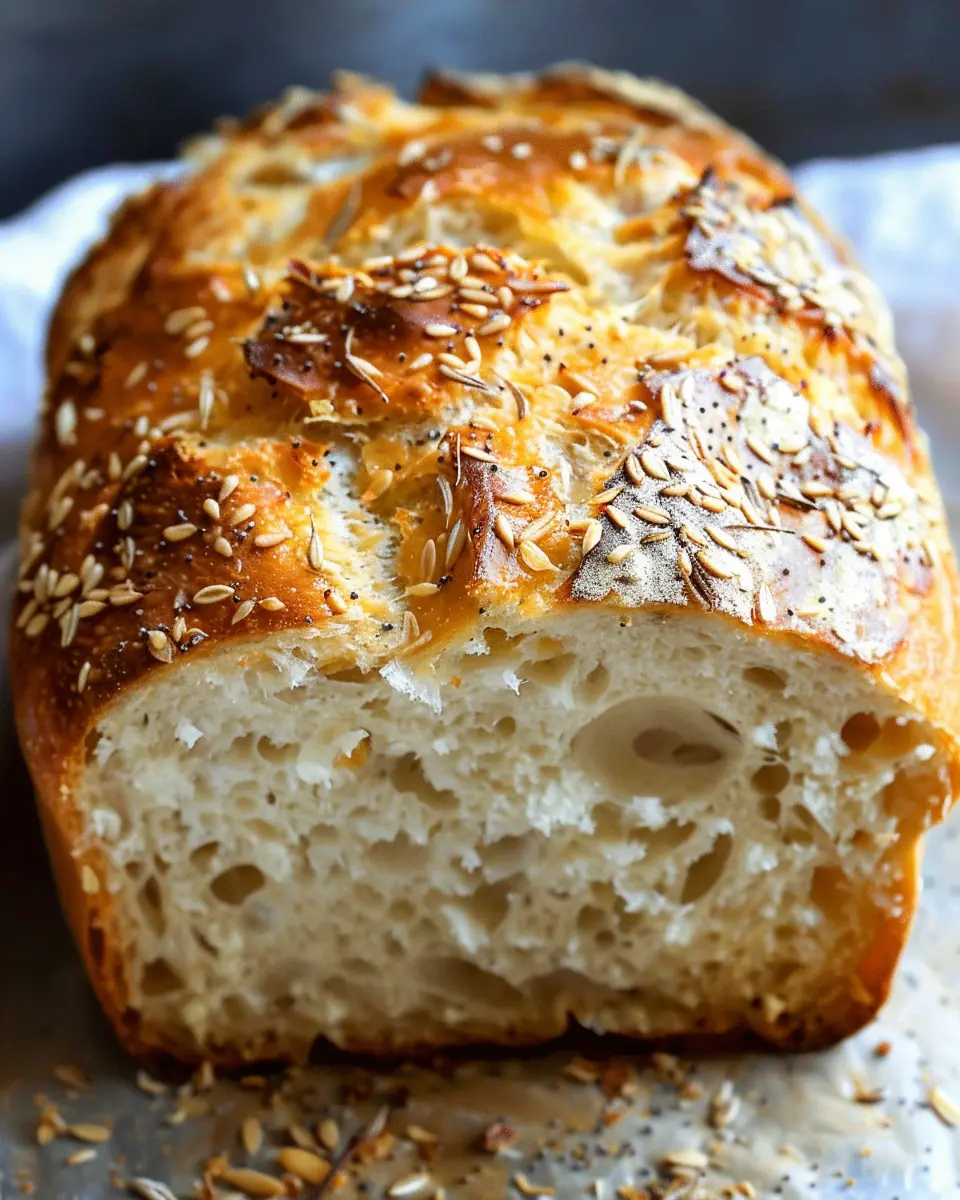
When settling into the culinary world, few activities can rival the joy of baking. It’s more than just putting together flour and eggs; it’s a creative process that can transform your kitchen into a welcoming haven. If you’re still on the fence, let’s explore the 7 flavorful reasons to bake this stunning loaf today!
-
Mindful Moments: Baking provides a therapeutic escape from the daily grind. Kneading dough can be an almost meditative experience, allowing you to be present and focused.
-
Delicious Customization: You have full control over the flavors! Want to add Turkey Bacon or Chicken Ham for a savory twist? Go for it! Craving sweetness? Toss in chocolate chips or spices to suit your mood.
-
Better Ingredients: Baking at home means saying goodbye to preservatives and artificial ingredients. You can choose wholesome, fresh elements for a more nutritious treat.
-
Cost-Effective: Savvy bakers know that DIY often beats buying ready-made products, both in taste and cost. Check out this USDA guide on food costs for interesting trends in baking ingredients.
-
Impress Friends and Family: There’s something magical about bringing out a loaf of freshly baked bread or a delightful pastry. It’s an instant way to elevate your gathering and leave everyone raving about your skills.
-
Bonding Activity: Baking is a wonderful way to connect with loved ones, whether you’re teaching a friend or baking alongside kids. Plus, kitchen shenanigans are always entertaining.
-
The Scent of Home: There’s nothing that compares to the aroma of baked goods wafting through your home. It creates an inviting atmosphere that draws people in and fosters warmth.
Next time you consider baking, remember these reasons. Whether you want to treat yourself or bring joy to others, the process is laden with flavor and meaningful moments. So, don your apron and grab those ingredients — let’s make this loaf unforgettable!
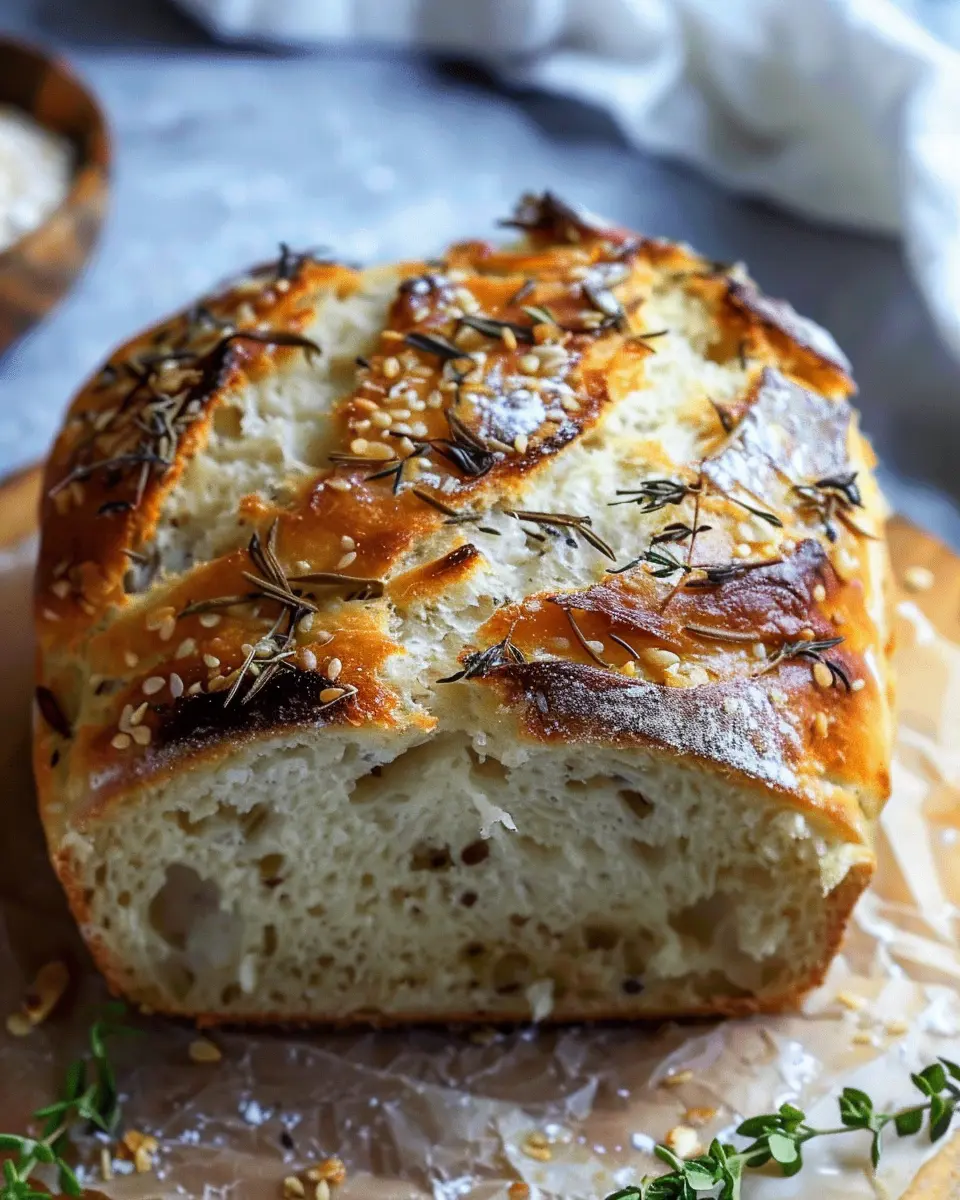
Ingredients for Garlic Herb Braided Bread
When life gets busy, creating something special in the kitchen can feel like a luxury. The Garlic Herb Braided Bread is not just beautiful; it’s a delightful way to bring a burst of flavor to your meals. Here’s what you’ll need for this vibrant loaf:
- Flour: 4 cups of all-purpose flour for a soft, inviting texture.
- Yeast: 2 tablespoons of active dry yeast for that perfect rise.
- Water: 1½ cups of warm water (around 110°F) to activate the yeast.
- Olive Oil: ¼ cup for moisture and richness.
- Garlic: 4 cloves, minced, to infuse that aromatic flavor.
- Herbs: 1 tablespoon each of fresh rosemary and thyme, or one teaspoon dried.
- Salt: 2 teaspoons to balance the flavors.
- Sugar: 1 tablespoon for feeding the yeast and enhancing sweetness.
- Egg Wash: 1 egg, beaten, for a golden crust finish.
Combining these ingredients not only maximizes flavor but also plays a crucial role in the bread’s texture and appearance. Are you ready to elevate your baking game? For an in-depth look at baking techniques, check out King Arthur Baking’s resources for more tips and tricks! With just a few simple ingredients, you’ll discover seven flavorful reasons to bake this stunning loaf today. Happy baking!
Step-by-Step Preparation of Garlic Herb Braided Bread
Baking garlic herb braided bread is an art that marries flavor and visual appeal. If you’re up for it, let’s dive into the details to create this stunning loaf that not only tantalizes your taste buds but also serves as a showstopper at any gathering.
Gather Your Ingredients
To start our flavorful journey toward homemade garlic herb braided bread, you’ll need to gather the following ingredients:
- 4 cups all-purpose flour
- 1 packet (2 ¼ teaspoons) active dry yeast
- 1 cup warm water (about 110°F)
- 1 tablespoon sugar
- 1 teaspoon salt
- ¼ cup olive oil
- 4-5 cloves of garlic, minced
- 2 tablespoons fresh herbs (like rosemary or thyme), finely chopped
- Optional: Parmesan cheese for a delightful twist
Having everything on hand before you begin will make the process smoother and more enjoyable. Check out this guide on ingredient preparation to get started!
Activate the Yeast
Next, it’s time to give our yeast a wake-up call. In a small bowl, combine the warm water, sugar, and yeast. Let it sit for about 5–10 minutes until it becomes bubbly and has a frothy appearance. This might seem unimportant, but activating your yeast correctly is key to achieving that airy texture we all crave in bread.
Combine Dry and Wet Ingredients
Once the yeast is active, it’s time to combine your ingredients. In a large mixing bowl, combine the all-purpose flour and salt. Make a well in the center and pour in the activated yeast mixture, along with the olive oil, minced garlic, and chopped herbs. You’ll soon be on your way to understanding the 7 flavorful reasons to bake this gorgeous loaf.
Stir the mixture with a wooden spoon until it forms a shaggy dough. Don’t worry about perfection; we’ll be kneading it shortly!
Knead the Dough
Time to get your hands a little messy! Transfer the dough to a lightly floured surface and knead it for about 8-10 minutes until it becomes smooth and elastic. This is where the magic happens—kneading helps develop gluten, which will give your bread its structure.
While you’re kneading, you can also think about fun variations. Consider adding roasted garlic or crushed red pepper for a spicy kick.
Let it Rise
Now that we’ve got a lovely, smooth dough, place it in a greased bowl and cover it with a damp cloth or plastic wrap. Set it aside in a warm spot to rise for about 1–2 hours, or until it has doubled in size. If you’re impatient, try placing it in a slightly warmed oven (turn it off before adding the dough).
Shape the Loaf
Once the dough has risen, punch it down gently to release the air. Divide the dough into three equal pieces and roll them into long strands, around 12–14 inches long. Braid these strands together carefully, creating a beautiful, intertwined loaf. As you work, feel free to channel your inner artisan baker—this is one of the most satisfying steps!
Second Rise Before Baking
After braiding, place your loaf onto a parchment-lined baking sheet. Cover it again and let it rise for another 30-45 minutes. This second rising step ensures your bread will be fluffy and light, making it all the more enjoyable.
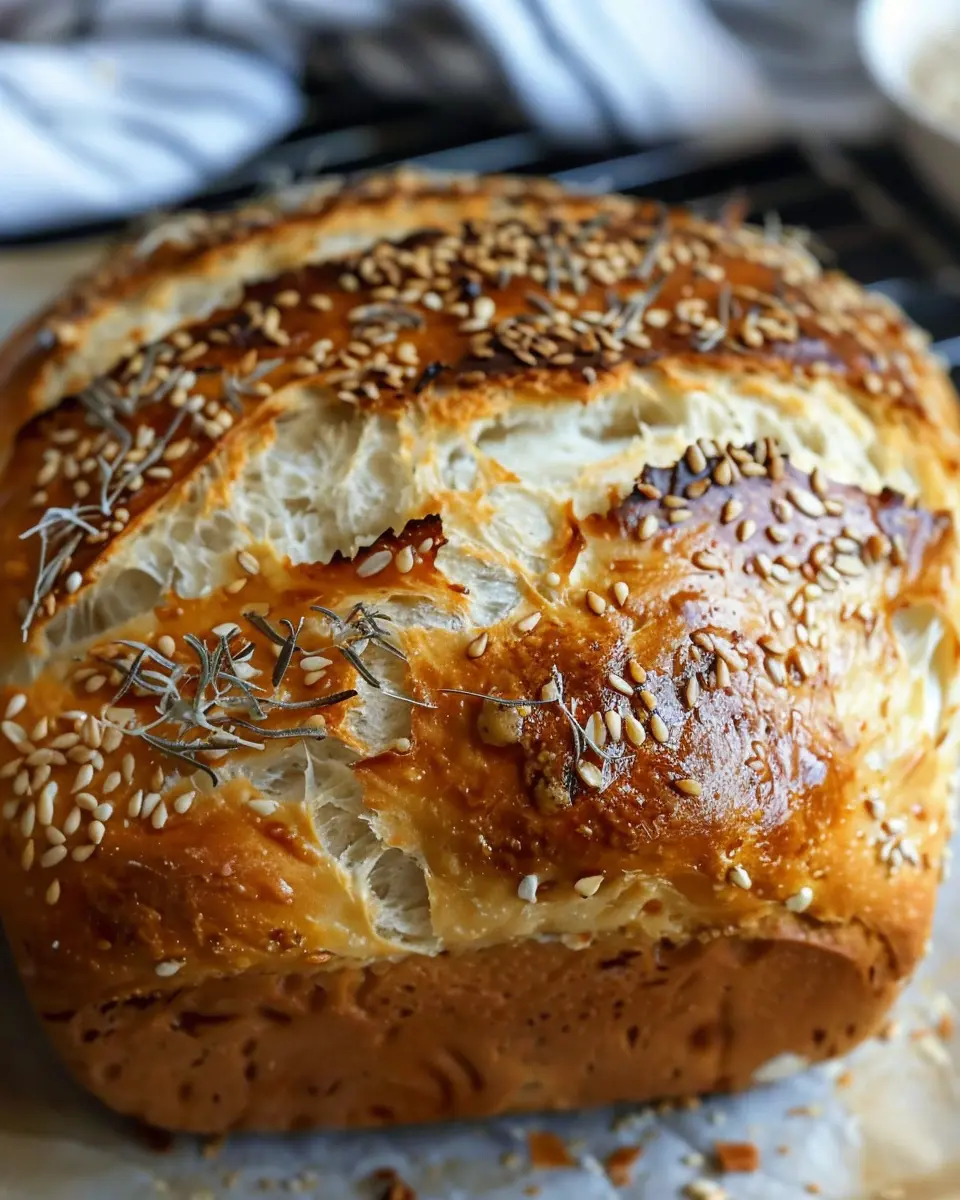
Bake the Bread
Finally, it’s time for the grand reveal! Preheat your oven to 375°F (190°C). Once heated, bake the braided bread for about 25-30 minutes or until it turns golden brown on top and sounds hollow when tapped. If you want to elevate the experience, consider sprinkling Parmesan cheese on top before baking.
Once baked, let the bread cool on a wire rack, and you’ll be ready to slice into this garlic herb masterpiece. Serve it warm or as part of your favorite meal; it’s sure to impress!
With just a bit of time and patience, you’ve transformed simple ingredients into a stunning loaf that tastes as great as it looks. Enjoy baking!
Variations on Garlic Herb Braided Bread
Adding Cheeses or Other Herbs
One of the best things about Garlic Herb Braided Bread is that it’s an inviting canvas for your favorite ingredients. Picture this: adding a generous layer of mozzarella or sharp cheddar inside your braided loaf. The cheese melts beautifully, creating delightful gooey pockets that you won’t want to miss. Feeling adventurous? Consider incorporating some crumbled feta or goat cheese for a tangy twist, or mix in herbs like rosemary or thyme to deepen the flavor.
You can even infuse your butter with additional herbs or spices like crushed red pepper flakes or Italian seasoning. By experimenting with various combinations, you’ll find 7 flavorful reasons to bake this stunning loaf that suit your taste buds perfectly.
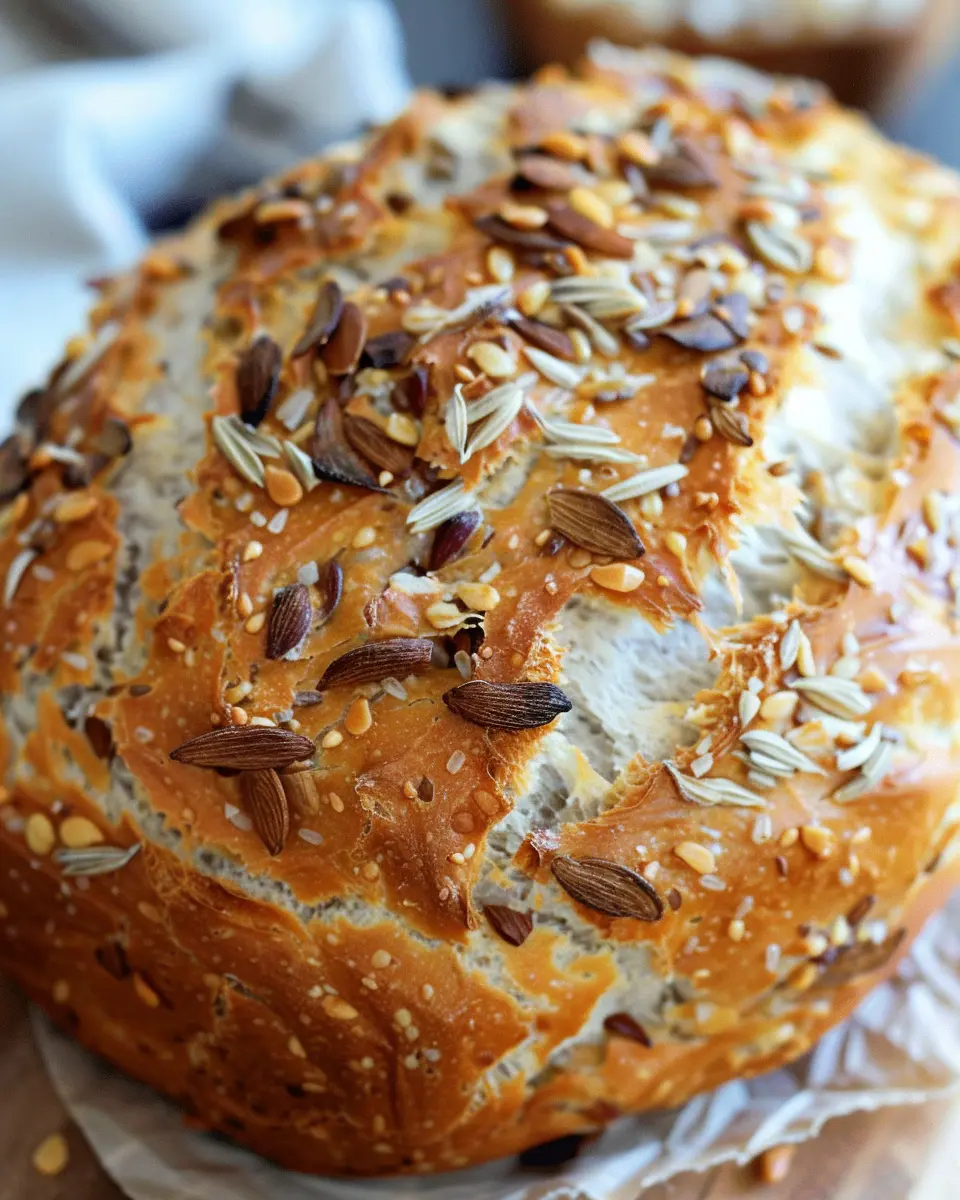
Alternative Shapes and Toppings
Who says you have to stick to a braid? Get creative with the shape! Try forming rolls out of the dough for individual servings, or even create a wreath shape for a festive touch. If you’re gearing up for a gathering, this could be a showstopper centerpiece.
As for toppings, while a simple sprinkle of sea salt gives the bread a delightful crust, you could also consider brushing it with a garlic-infused oil or adding sesame seeds and fresh parsley before baking. Not only do these toppings add flavor, but they also make your loaf visually stunning.
Whether you enjoy it as a tasty side for soups, or as a base for sandwiches with turkey bacon or chicken ham, the possibilities are endless. Bake this loaf today and discover just how dynamic Garlic Herb Braided Bread can be!
For more creative bread ideas, check out this bread baking guide that walks you through bread techniques and tips.
Cooking Tips and Notes for Garlic Herb Braided Bread
Baking this Garlic Herb Braided Bread is not just about following a recipe; it’s about experiencing the joy of creating something special. Here are some helpful tips to make your baking adventure a success!
Use Fresh Ingredients
Always opt for fresh garlic and herbs, as they bring the best flavor to your bread. If you can find fresh herbs at a local farmer’s market or grocery store, they’ll elevate your bread beyond expectations.
Knead with Love
Take your time while kneading the dough. The more you knead, the better your bread will rise. Aim for about 8 to 10 minutes for a smooth texture. If you’re unsure if the dough is ready, do the “windowpane test”: stretch a piece of dough; if it holds together without tearing, you’re good to go!
Braiding Made Easy
Don’t stress about getting the braid perfect. Embrace the imperfections! A rustic braid adds character to your loaf.
Flavorful Pairing
Consider serving your Garlic Herb Braided Bread with a rich dipping oil or a savory spread like hummus. You could even enjoy it alongside a nice tomato basil soup for a comforting meal.
These simple tips can enhance your experience and make your bread-baking journey a little more magical. Now you’re ready to enjoy the 7 flavorful reasons to bake this stunning loaf today! For more expert baking advice, check out resources like King Arthur Baking or Food Network.
Serving Suggestions for Garlic Herb Braided Bread
Garlic Herb Braided Bread is more than just a treat for the eyes; it’s a culinary delight that pairs beautifully with a variety of dishes. Here are some serving suggestions that will elevate your loaf experience!
Perfect Pairings
- Soups and Stews: This bread is the ultimate companion for a hearty bowl of minestrone or chicken noodle soup, adding that delightful texture contrast.
- Salads: Try it alongside a fresh garden salad or a warm quinoa salad for a complete meal. The bread’s savory notes complement crisp greens perfectly.
- Dips and Spreads: Think creamy hummus or tangy tzatziki. Simply tear off a piece and dip—it’s pure bliss!
Make It a Meal
- Light Sandwiches: Use slices of this braided bread for a satisfying sandwich with turkey bacon and fresh veggies or chicken ham with your favorite condiments.
- Breakfast Toast: Top with avocado and poached eggs for a leisurely brunch that impresses, while being a breeze to prepare.
With these suggestions, you’ll find 7 flavorful reasons to bake this stunning loaf today! The options are limitless, and each bite is sure to be memorable. For inspiration, try exploring various dips like this homemade pesto or check out the benefits of pairing food with fresh herbs here. Enjoy your baking adventure!
Time Breakdown for Baking Garlic Herb Braided Bread
Preparation Time
Start off your baking adventure with about 20 minutes of preparation. This includes gathering all your ingredients and measuring everything out, which sets you up for success. The kneading portion is enjoyable and serves as a great stress reliever. So, put on your favorite music, and let’s get rolling!
Rise Time
For this delightful Garlic Herb Braided Bread, you’ll need approximately 1 hour for the dough to rise. During this time, it doubles in size, enriching those flavors while you can take a breather or prep your favorite spreads.
Baking Time
Once shaped and ready, pop the bread in the oven for 25-30 minutes. Paradise is just a waft of savory aromas away! When it’s golden brown, your stunning loaf will be ready to impress everyone at the table.
By now, you can see exactly why there are 7 flavorful reasons to bake this bread today! Isn’t it amazing how much flavor you can pack into just a few simple steps? For more tips on bread baking, check out resources from King Arthur Baking or The Bread Lab.
Nutritional Facts for Garlic Herb Braided Bread
When it comes to indulging in a delicious, homemade Garlic Herb Braided Bread, it’s important to know its nutritional profile. Here’s a quick look at what you can expect:
Calories
A single serving of this delightful bread typically contains around 200 calories. It’s a satisfying treat that won’t break your daily calorie bank, making it perfect for both casual snacking and meal accompaniment.
Protein
This bread boasts approximately 5 grams of protein per serving, thanks to the wheat flour and any added toppings you choose. Incorporating a protein-rich spread, like hummus or Greek yogurt, can elevate your nutrition game even further.
Sodium
With about 300 milligrams of sodium, this bread offers a flavorful experience without going overboard on salt. If you’re watching your sodium intake, consider adjusting the salt in the recipe to suit your needs.
Curious about the other 7 flavorful reasons to bake this stunning loaf? Get ready to impress your friends and family with a recipe that’s as nutritious as it is delicious! If you want to dive deeper into the benefits of garlic in your diet, check out this article from Healthline.
FAQs about Baking Garlic Herb Braided Bread
Baking is as rewarding as it is fun, and if you’re considering trying your hand at garlic herb braided bread, you might have a few questions. Let’s address some common queries to help you navigate the process smoothly!
Can I use whole wheat flour?
Absolutely! You can substitute all-purpose flour with whole wheat flour for a heartier, more nutritious loaf. However, keep in mind that whole wheat flour absorbs more liquid, so you may need to slightly adjust the amount of water in your recipe. Starting with about 1-2 tablespoons less might do the trick. This swap introduces a delightful flavor and a boost in fiber!
How do I store leftover bread?
Storing your leftover garlic herb braided bread properly is key to keeping it fresh. For short-term storage, wrap the bread in a clean kitchen towel and place it in a breadbox or a paper bag at room temperature. This method retains moisture without making the crust soggy. If you’re looking at longer storage, consider placing the bread in an airtight container or using aluminum foil for a week or so. If you want to keep it even longer, read on to our next point!
Can I freeze the garlic herb braided bread?
Yes, you can absolutely freeze your scrumptious bread! To freeze, wrap it tightly in plastic wrap followed by aluminum foil to prevent freezer burn. When you’re ready to enjoy it again, simply thaw the loaf at room temperature for a few hours or overnight. For an added touch, pop it in the oven for a few minutes after thawing to refresh the crust. Perfect for those spontaneous moments when you realize “7 flavorful reasons to bake” can feel like a perfect idea any day!
For more tips, check out King Arthur Baking and elevate your baking game!
Conclusion on Baking Your Bread
Baking your bread at home is an exhilarating experience that opens up a world of delightful possibilities. With 7 flavorful reasons to bake, from the rich aromas wafting through your kitchen to the satisfaction of creating something delicious, you won’t miss store-bought options. The health benefits of knowing every ingredient and having control over your seasonings are exhilarating too! Imagine sharing a freshly baked loaf featuring Turkey Bacon or Chicken Ham with family and friends. It’s not just about nourishment; it’s about creating memories. So go ahead, roll up your sleeves, and let your inner baker shine!
For more ways to elevate your culinary skills, check out resources like King Arthur Baking or America’s Test Kitchen for tried-and-true tips. Happy baking!
Print7 Flavorful Reasons to Bake a Stunning Loaf with Turkey Bacon and Chicken Ham
Discover the delicious reasons to bake this stunning loaf featuring turkey bacon and chicken ham.
- Prep Time: 15 minutes
- Cook Time: 50 minutes
- Total Time: 1 hour 5 minutes
- Yield: 1 loaf 1x
- Category: bread
- Method: baking
- Cuisine: American
- Diet: low-carb
Ingredients
- 2 cups all-purpose flour
- 1 teaspoon baking powder
- 1/2 teaspoon salt
- 1 cup turkey bacon, chopped
- 1 cup chicken ham, diced
- 1/2 cup shredded cheese
- 3 large eggs
- 1/2 cup milk
Instructions
- Preheat your oven to 350°F (180°C).
- In a mixing bowl, combine flour, baking powder, and salt.
- In another bowl, whisk together eggs and milk.
- Stir the wet ingredients into the dry ingredients until just combined.
- Fold in the turkey bacon, chicken ham, and cheese.
- Pour the batter into a greased loaf pan.
- Bake for 45-50 minutes, or until a toothpick comes out clean.
- Let it cool before slicing and serving.
Notes
- For added flavor, consider mixing in herbs like rosemary or thyme.
- Serve warm with butter for a comforting meal.
Nutrition
- Serving Size: 1 slice
- Calories: 180
- Sugar: 1 g
- Sodium: 480 mg
- Fat: 10 g
- Saturated Fat: 3 g
- Unsaturated Fat: 5 g
- Trans Fat: 0 g
- Carbohydrates: 14 g
- Fiber: 1 g
- Protein: 12 g
- Cholesterol: 100 mg
Keywords: baking, turkey bacon, chicken ham, loaf, recipe