Introduction to Apple Crisp
Apple crisp is more than just a delicious dessert; it’s a warm embrace on a chilly evening, a nostalgic nod to family gatherings, and a celebration of the harvest season. This delightful dish combines tender baked apples with a sweet, crumbly topping that makes it a standout in the dessert world. What makes apple crisp particularly beloved is its incredible versatility. Whether you prefer tart Granny Smith apples for a zesty kick or sweet Honeycrisps for a smoother flavor, there’s a type of apple that suits everyone’s taste. You can even mix varieties to create a delightful medley!
In addition to its diverse flavor profiles, what sets apple crisp apart is its simplicity. With just a handful of basic ingredients, you can whip up a homemade treat that feels gourmet. The ease of preparation makes it perfect for busy young professionals. Just toss some chopped apples with sugar and spices, top with a crumbly oat mixture, and pop it in the oven. In no time, your kitchen will be filled with the enticing aroma of cinnamon and baked apples, urging you to indulge in a comforting slice.
Did you know that the concept of baking fruit with a topping originated in the 19th century? It was a practical, economical dish that made use of seasonal fruits. As trends have shifted, apple crisp has remained a timeless favorite, with many variations emerging like the inclusion of nuts or even a scoop of ice cream on top. Websites like Serious Eats provide an excellent resource for exploring those creative twists!
So, have you ever wondered how many apple-based recipes can come from this one beloved dessert? From classic versions to innovative creations, the possibilities are endless. And while enjoying a warm bowl of apple crisp with friends or family, you’ll not only savor the delightful flavors but also create memories that last a lifetime. It’s these moments that truly make apple crisp more than just another dessert—it’s an experience!
Stay tuned for a delicious recipe that’s sure to impress at your next gathering!
Ingredients for Apple Crisp
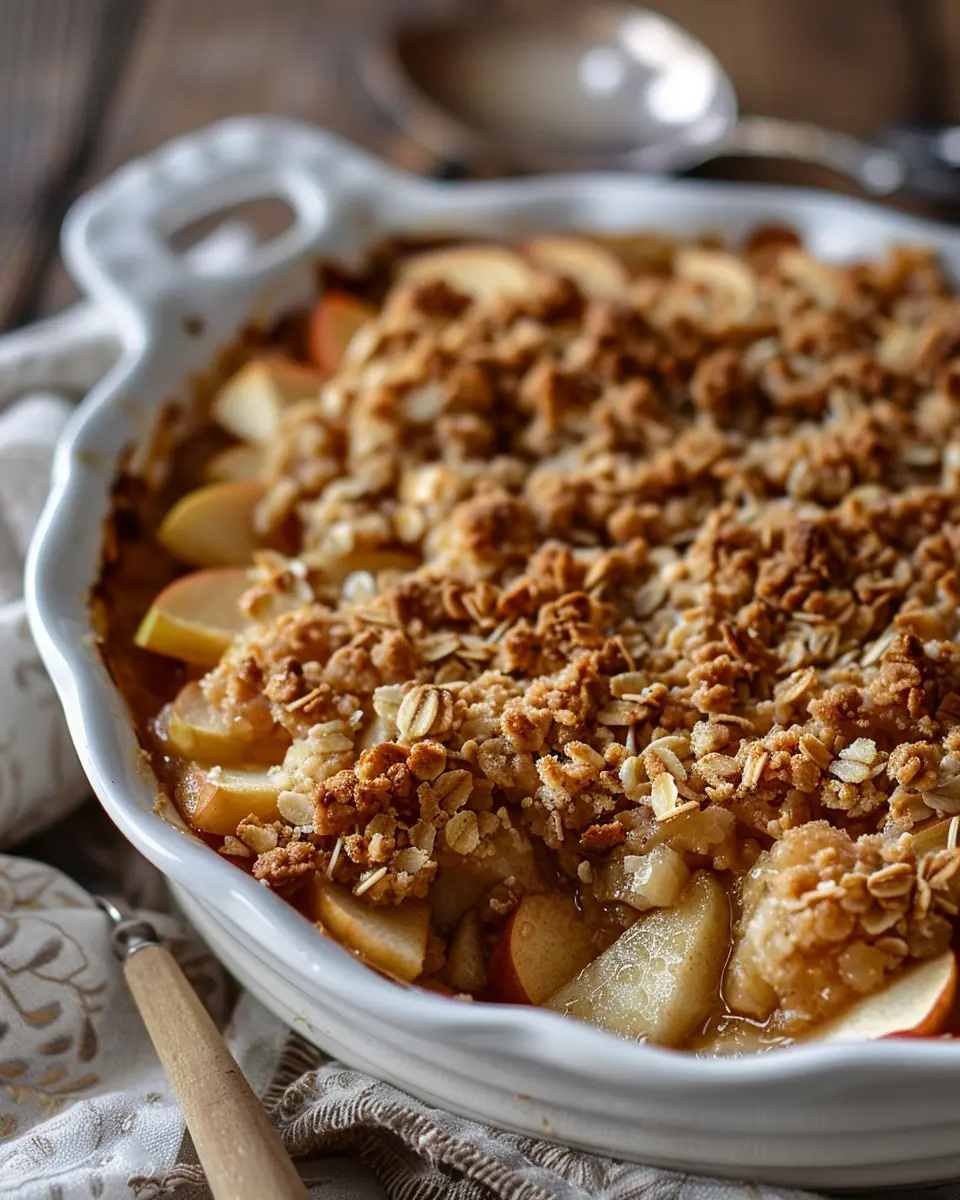
Essential ingredients for the perfect apple crisp
Creating a delicious apple crisp starts with selecting the right ingredients. First up, you’ll need a mix of apples to achieve that perfect tartness and sweetness balance. Varieties like Granny Smith and Honeycrisp work wonderfully together! Here are the must-have ingredients:
- Apples: About 6 cups, peeled and sliced.
- Granulated Sugar: ½ cup to sweeten the apples.
- Lemon Juice: 1 tablespoon to enhance flavor and prevent browning.
- Oats: 1 cup for that delightful chewy texture.
- Brown Sugar: ¾ cup adds richness to the topping.
- All-Purpose Flour: ½ cup for the crisp’s structure.
- Butter: ½ cup, melted—use unsalted for better flavor control.
Optional ingredients for variations
Feel free to get creative with your apple crisp! Here are some optional ingredients that can elevate your dish:
- Nuts: Walnuts or pecans add crunch and nuttiness.
- Spices: A touch of cinnamon or nutmeg can add warmth and depth.
- Golden Raisins: For a sweet surprise that pairs beautifully with apples.
With these ingredients in hand, you’re on your way to making a comforting, homemade apple crisp that’s perfect for any gathering. Want to explore more about apple varieties? Check out this guide for insights!
Preparing Apple Crisp
Making a delicious apple crisp is a delightful way to enjoy the crispness of fall while indulging in something truly comforting. Not only is this dessert easy to prepare, but it fills your home with a wonderfully sweet aroma that’s sure to make everyone feel warm and cozy. Let’s dive into the simple steps to make this classic dish.
Preheat the Oven and Prepare Your Baking Dish
Before you dive into the mixing and stirring, it’s essential to get your oven preheating. Set it to 350°F (175°C), allowing it to reach the right temperature while you prep the ingredients.
Next, grab a baking dish—something around 9×9 inches works perfectly. Grease it lightly with butter or non-stick cooking spray. If you don’t have a specific size, that’s okay! Just make sure the dish is roughly equivalent; not every home chef has identical kitchenware. This little step can make all the difference in preventing your apple crisp from sticking and ensure easy serving.
Make the Crumble Topping
Now for the fun part: creating that crunchy topping! Here’s what you’ll need for a delectable crumble topping:
- 1 cup rolled oats
- 1 cup all-purpose flour
- ½ cup brown sugar
- ½ cup granulated sugar
- 1 teaspoon cinnamon
- ½ cup cold butter (cut into small chunks)
In a medium bowl, combine the rolled oats, flour, sugars, and cinnamon. Rub in the cold butter with your fingers or use a pastry cutter until the mixture resembles coarse crumbs. This is where your hands get to shine! Don’t worry if it gets a little messy; think of it as an adventure in the kitchen.
For more about the science behind the perfect crumble, check out Serious Eats.
Prepare the Apple Filling
Now that we’ve got the topping, let’s move on to the star of the show: the apples! You’ll want about 6-8 medium-sized apples. We recommend a mix of sweet and tart varieties—Granny Smith and Honeycrisp are excellent choices.
- Peel and slice the apples into thin wedges and toss them in a large bowl.
- Add in about ¾ cup of sugar, 2 tablespoons of lemon juice, and 1 teaspoon of cinnamon. Mix well to ensure that all the apples are coated.
As you mix, you may find yourself wondering, “Why lemon juice?” It keeps the apples from browning and adds a bright flavor that balances the sweetness.
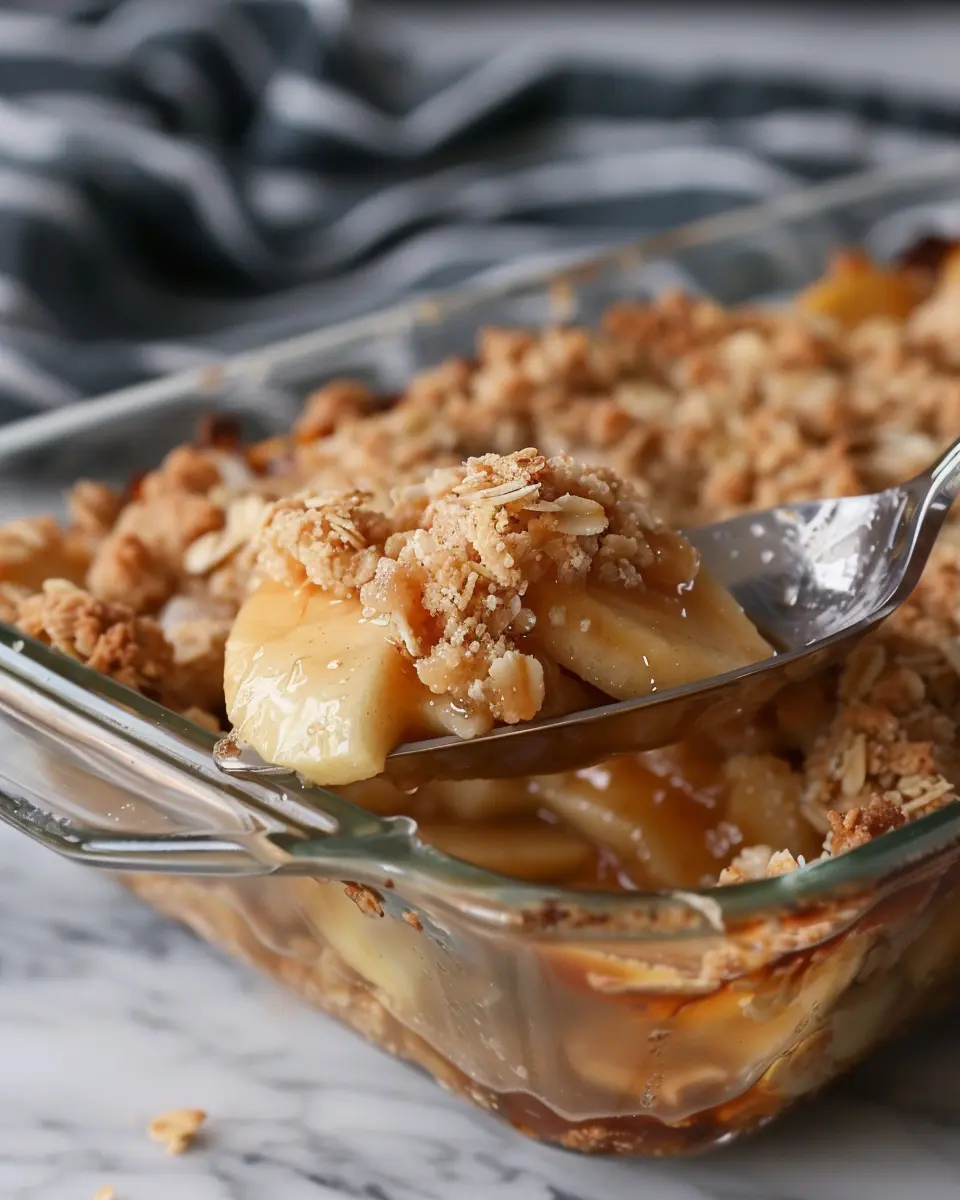
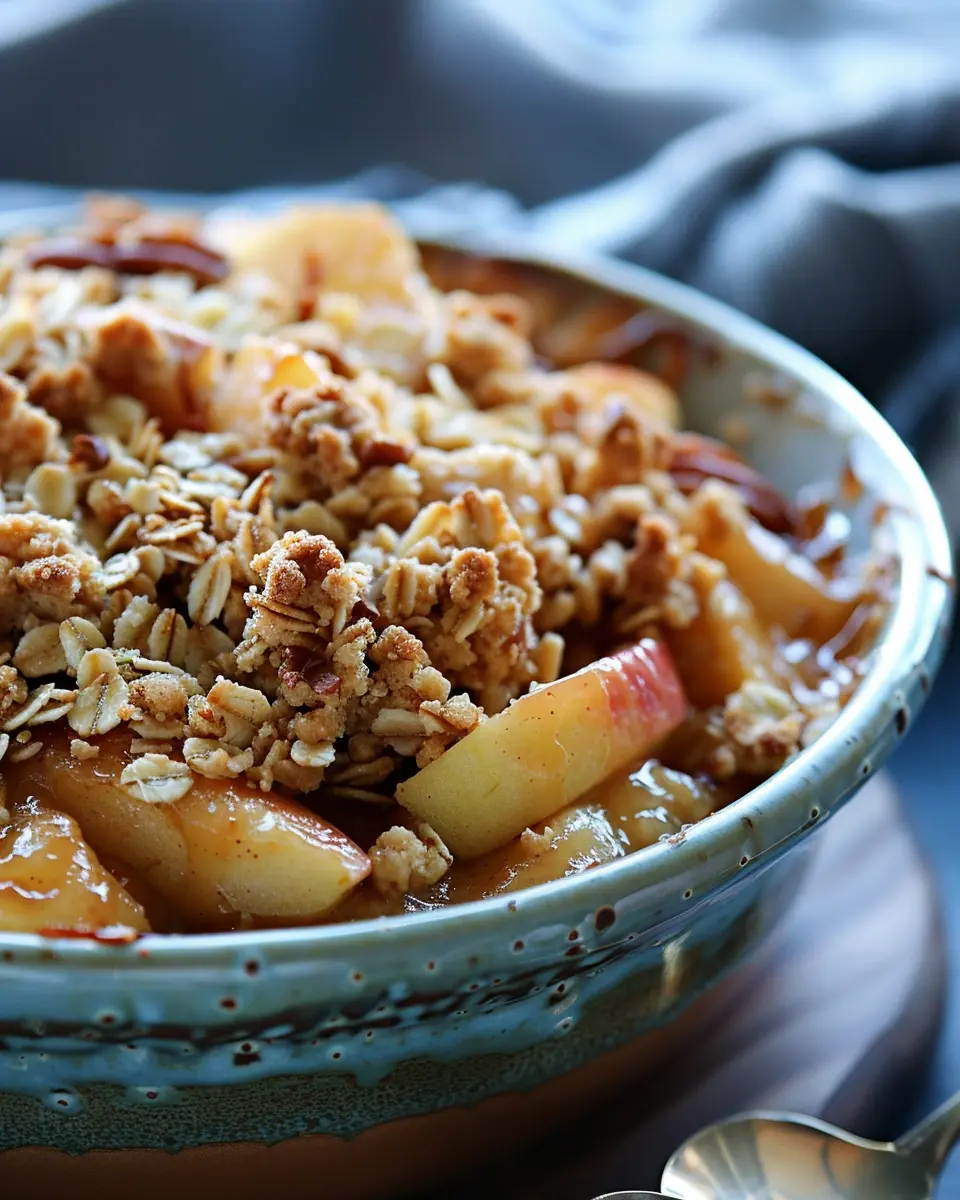
Combine and Layer the Apple Filling and Topping
Now it’s time to bring it all together! In your greased baking dish, layer the apple filling evenly at the bottom. Spread it across, ensuring that every bit of deliciousness is accounted for.
Next, sprinkle the crumble topping over the apples. Don’t be shy! This is where you can make the apple crisp as thick and crunchy as you like. The uneven distribution allows for some parts to become beautifully golden and crispy while others are chewier—just the way we like it!
Bake Until Golden and Fragrant
With everything layered, pop your dish in the preheated oven. Bake for 40-45 minutes or until the crisp is bubbling and the topping turns a lovely golden brown. The smell will be absolutely intoxicating, wafting through your home and making your mouth water.
Keep an eye on the crisp during the last few minutes; you want it golden but not burnt. Once it’s ready, let it cool for about 10 minutes before serving. This resting time lets the filling set a bit, so when you scoop it out, it holds its shape beautifully!
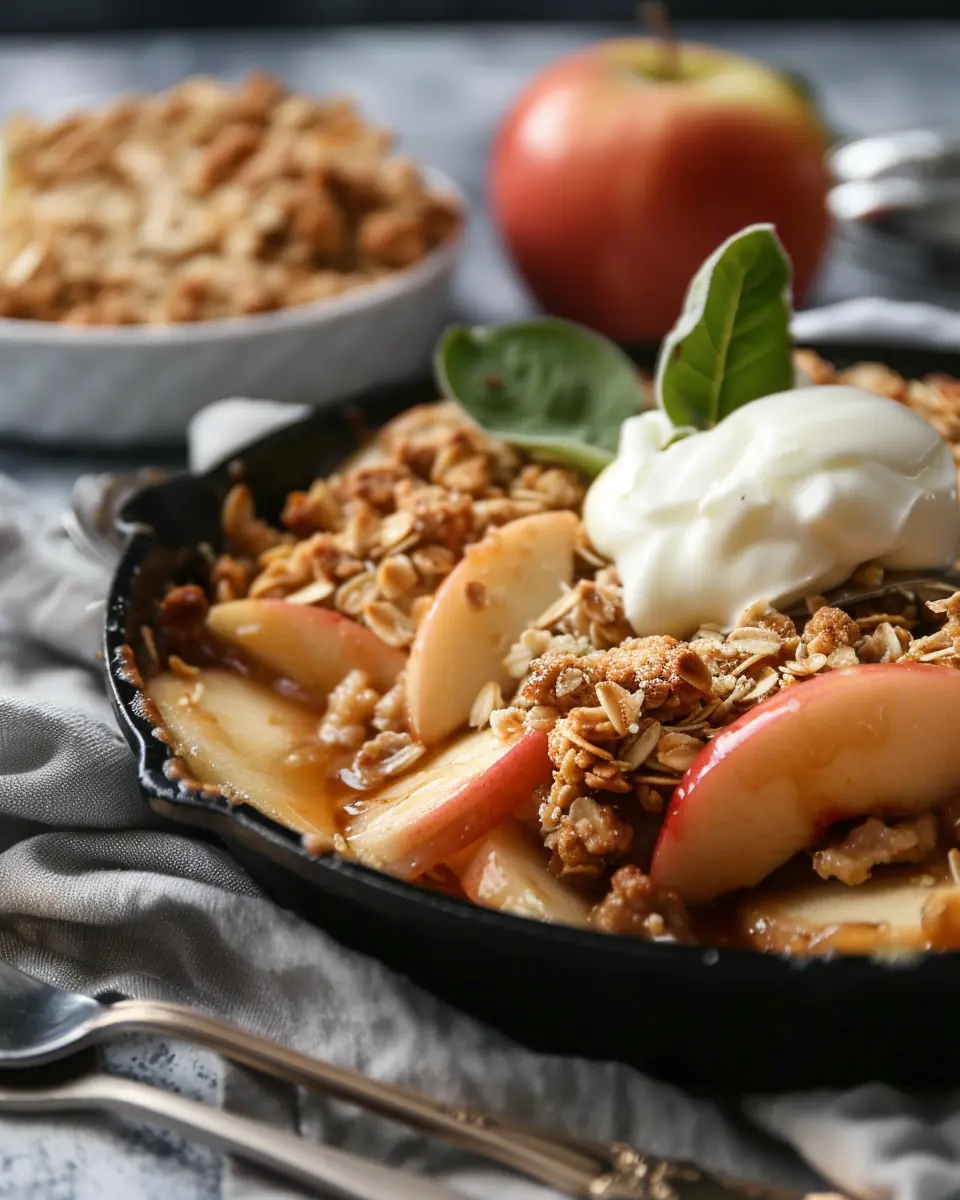
Serving it warm, perhaps with a scoop of vanilla ice cream or a drizzle of caramel sauce, creates the ultimate treat. Get ready to enjoy your homemade apple crisp—it’s worth the effort!
Variations on Apple Crisp
Gluten-Free Apple Crisp
If you’re following a gluten-free diet, don’t worry! Gluten-free apple crisp can be just as delicious. Substitute traditional flour with almond flour or a gluten-free baking mix. You can also use certified gluten-free oats for the topping. This ensures you won’t miss out on that beloved crunch. Check out resources like Beyond Celiac for more gluten-free baking tips.
Apple Crisp Without Oats
For those who prefer a different texture or have dietary restrictions related to oats, apple crisp without oats is a fantastic option. Substitute the oats with crushed nuts like walnuts or pecans. Not only do they add a delightful crunch, but they also provide healthy fats and a nutty flavor that complements the apples beautifully. You might even want to experiment with coconut flakes for a tropical twist!
Slow-Cooker and Instant Pot Variations
Embrace the convenience of your kitchen gadgets with crockpot apple crisp or Instant Pot apple crisp.
-
Crockpot Apple Crisp: Combine your sliced apples and a simple mix of sugar and cinnamon in the crockpot. Top it with your favorite crisp mixture and let it cook on low for 4-6 hours. The result? A perfectly soft and gooey treat!
-
Instant Pot Apple Crisp: For a quicker fix, toss your apple mixture into the Instant Pot with a bit of water, then layer your crisp topping. Cook on high pressure for about 5 minutes, and voilà! You’ve got a comforting dessert ready in record time.
These variations not only cater to dietary preferences but also fit seamlessly into your busy lifestyle. So why not try one today?
Cooking notes for Apple Crisp
Tips for selecting the best apples
When it comes to making a delightful apple crisp, choosing the right apples is key. For the perfect balance of sweetness and tartness, opt for a mix of varieties. Try combining Granny Smith apples for tartness with Honeycrisp or Fuji apples for sweetness. This fusion not only enhances the flavor but also adds a lovely texture. Remember, fresher apples yield better results, so visit your local farmer’s market or join a community-supported agriculture (CSA) program to source the best fruits.
Make-ahead and freezing instructions
Want to get a jumpstart on your apple crisp? You can prepare the apple filling a day in advance. Just toss sliced apples with lemon juice and spices, store in an airtight container, and refrigerate. If you’re considering making a large batch, you can freeze the assembled crisp! Place it in a freezer-safe dish, cover tightly, and it’ll keep for up to three months. When you’re ready to indulge, bake straight from the freezer—just add an extra 10-15 minutes to the baking time.
For more tips on freezing fruits and desserts, check out the USDA’s freezing guide.
Serving suggestions for Apple Crisp
When it comes to serving your delicious apple crisp, the fun doesn’t stop once it’s out of the oven. There are some delightful ways to elevate this classic dessert that can impress your friends and family!
A la mode: serving with ice cream
Who can resist a scoop of creamy vanilla ice cream on a warm bowl of apple crisp? It’s the perfect combination of hot and cold that makes each bite truly sensational. You could even try flavors like caramel or cinnamon ice cream for an extra twist! Plus, it’s an easy way to add more indulgence and texture to the dish.
Adding homemade caramel sauce
Drizzling some homemade caramel sauce over your apple crisp creates a mouthwatering treat that takes it to the next level. The rich, buttery sweetness complements the tart apples beautifully. If you’re feeling crafty in the kitchen, you can whip up a simple caramel sauce in just 15 minutes! Just combine sugar, butter, and cream, and you’ll have a luscious topping ready to pour.
For a complete experience, why not serve your apple crisp alongside a warm cup of tea or coffee? It’s an ideal way to wind down after a busy day. Enjoying this dessert during a cozy gathering can be a wonderful way to create lasting memories with loved ones.
Time Details for Apple Crisp
When you’re craving a warm, comforting dessert, this apple crisp is a perfect choice! Knowing how much time you’ll need can help streamline your cooking process and make it even more enjoyable.
Preparation Time
Set aside about 15-20 minutes to gather your ingredients and prep the apples. It’s a great time to unwind and maybe listen to some music or a podcast while you slice and dice.
Baking Time
Once it’s in the oven, your apple crisp will need about 35-40 minutes to bake to golden perfection. Keep an eye on it, as the delicious aroma will have your taste buds tingling!
Total Time
In total, you’re looking at around 55-60 minutes from start to finish. This makes it an ideal dish to whip up on a cozy weekend night when you want to impress your friends or family.
For tips on selecting the best apples for crispness, check out this guide!
Nutritional information for Apple Crisp
When indulging in a delicious apple crisp, it’s essential to understand what you’re savoring. Let’s break it down:
Calories
A standard serving of apple crisp contains approximately 200–300 calories, depending on the recipe variations and added ingredients like nuts or ice cream.
Carbohydrates
You’ll find that apple crisp is a carbohydrate-rich dessert, typically offering around 30–40 grams per serving. This mostly comes from the natural sugars in apples and the oats in the topping.
Fiber Content
One of the perks of enjoying apple crisp is its fiber content. Each serving provides about 3–5 grams of dietary fiber, thanks to the oats and the fruity goodness of apples. Fiber is crucial for digestive health, making this treat a bit more wholesome!
For a deeper dive into nutrition, check out resources like Nutrition.gov and explore the benefits of different fruits in your diet. Remember, enjoying apple crisp in moderation can be part of a balanced lifestyle, so take a slice and savor the moment!
FAQs about Apple Crisp
Can I use other types of apples?
Absolutely! While classic apple crisp is often made with Granny Smith apples for their tartness, you can experiment with other varieties. Try using Honeycrisp for a touch of sweetness or Fuji apples for a crunchy texture. Mixing different types can give your crisp a delightful depth of flavor. Interested in exploring various apple types? Check out this guide on apple varieties.
What’s the best way to store leftover apple crisp?
If you find yourself with leftover apple crisp (which is rare — it’s that good!), it’s best to store it in an airtight container. At room temperature, it can last a day, but for longer freshness, keep it in the refrigerator. Just make sure to cover it well. Reheating it in the oven will crisp up the topping again, giving you that freshly baked taste, which is something you definitely want!
Can apple crisp be made ahead of time?
Totally! If you’re planning for a gathering or a cozy evening, you can prepare the filling and topping separately ahead of time. Just mix and store them in sealed containers in the fridge. On the day you’re ready to serve, simply combine them and bake. This way, you can enjoy all the deliciousness of homemade apple crisp without the last-minute rush in the kitchen. Plus, your kitchen will smell fantastic — it’s like having a warm hug from the oven!
By addressing these common questions, I hope you feel more confident about your apple crisp journey. Happy baking!
Conclusion on Apple Crisp
Recap of Why Apple Crisp is a Must-Try Dessert
In a world filled with dessert options, apple crisp stands out as a truly heartwarming choice. Its irresistible combination of tender, spiced apples and a crunchy topping creates the perfect harmony of texture and flavor. Plus, it’s incredibly easy to whip up, making it ideal for busy young professionals. Did you know that baking can be a great stress reliever? According to the American Psychological Association, engaging in creative activities reduces anxiety and boosts mood. So, whether you’re hosting friends or treating yourself, this classic dessert is guaranteed to impress and uplift. Grab those apples and let’s get baking!
For more delicious dessert ideas, check out Food Network and explore their extensive recipe collection.
PrintApple Crisp Delight: Easy Recipe for a Cozy Dessert Experience

Enjoy a warm and delightful apple crisp that is easy to make and perfect for cozy gatherings.
- Prep Time: 15 minutes
- Cook Time: 45 minutes
- Total Time: 1 hour
- Yield: 8 servings 1x
- Category: Dessert
- Method: Baking
- Cuisine: American
- Diet: Vegetarian
Ingredients
- 6 cups sliced apples
- 1 cup granulated sugar
- 2 teaspoons cinnamon
- 1 cup all-purpose flour
- 1 cup rolled oats
- 1/2 cup unsalted butter, melted
Instructions
- Preheat your oven to 350°F (175°C).
- In a large bowl, combine sliced apples, granulated sugar, and cinnamon. Mix well and spread into a baking dish.
- In another bowl, mix flour, oats, and melted butter until crumbly. Spread over the apples.
- Bake for 45 minutes or until golden brown and bubbly.
- Let cool slightly before serving.
Notes
- Serve with vanilla ice cream on top for an extra treat.
- Feel free to use different varieties of apples for varied flavor.
Nutrition
- Serving Size: 1 serving
- Calories: 250
- Sugar: 20g
- Sodium: 150mg
- Fat: 10g
- Saturated Fat: 5g
- Unsaturated Fat: 2g
- Trans Fat: 0g
- Carbohydrates: 40g
- Fiber: 3g
- Protein: 2g
- Cholesterol: 15mg
Keywords: Apple Crisp, Dessert, Easy Recipe, Cozy Dessert