Introduction to Cherry Snowballs
What are Cherry Snowballs and why should you try them?
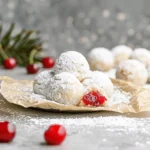
Ever noticed how certain desserts can instantly transport you back to childhood? Cherry Snowballs are one of those treats. These delightful little confections combine the bright flavor of cherries with a fluffy, snow-like texture that’s not only visually appealing but also irresistibly delicious.
So, what exactly are Cherry Snowballs? Picture this: sweet, tart cherries enveloped in a soft, creamy filling, all rolled in coconut to create a delightful contrast of flavors and textures. They’re essentially a party for your taste buds! Whether you’re hosting a festive gathering or simply want to indulge in a sweet treat at home, these bites of joy serve as the perfect dessert. Plus, they are a crowd-pleaser! According to a survey by Bakery Trends, fruity desserts are among the most favored choices at parties.
Here’s why you should give Cherry Snowballs a try:
-
Versatility: They can be served at any occasion — from summer picnics to holiday feasts. Their vibrant color and unique texture make them stand out on dessert tables.
-
Ease of Preparation: You’d be surprised at how simple they are to whip up! Even if you’re just starting in the kitchen, it’s hard to mess these up.
-
Healthier Alternatives: You can adjust the ingredients to cater to dietary needs. Want a less sugary version? Swap the sugar for a natural sweetener or substitute cherries with another fruit.
Cherry Snowballs allow you to combine creativity with culinary skills. Plus, the preparation process can be a fun activity, especially if you involve friends or family. Who wouldn’t want to get their hands a little messy while making something this cute and tasty?
Before you start gathering ingredients, consider pairing these little bites with a refreshing drink like coconut water or a homemade lemonade, which beautifully complements their flavors. Think about the joy you’ll bring to those who indulge in these treats — it’s a win-win!
Ready to dive into the recipe? Let’s make those Cherry Snowballs come to life!
Ingredients for Cherry Snowballs
Key ingredients you’ll need
To whip up delightful Cherry Snowballs, you’ll want to gather these essential ingredients:
- Fresh or frozen cherries: Pitted for ease; fresh is great if you have access!
- All-purpose flour: This will form the base of your cookies.
- Butter: Softened to create that melt-in-your-mouth texture.
- Powdered sugar: For sweetness and added fluffiness.
- Vanilla extract: A splash adds depth to your flavor profile.
- Salt: Just a pinch to balance the sweetness.
These basics will take you a long way in creating your snowball treats that will impress friends and family!
Optional ingredients for extra flair
If you want to elevate your Cherry Snowballs, consider incorporating:
- Almond extract: A lovely complement to cherries.
- Chopped nuts: Walnuts or almonds add delightful crunch.
- Coconut flakes: Roll your snowballs in these for a tropical twist.
Feeling adventurous? Check out this article for more ideas on how to customize your cookies for a truly unique dessert experience!
Preparing Cherry Snowballs
If you’re on the lookout for a delightful dessert that’s both fun to make and delicious to eat, then look no further than Cherry Snowballs. These soft, fluffy, and vividly colored confections are sure to win over any crowd. In this section, we’ll walk you through each step of the preparation process, ensuring your baking experience is as enjoyable as the result. Let’s dive in!
Gather and Prep Your Ingredients
Before you start any cooking adventure, it’s always best to gather your ingredients. Here’s what you’ll need for these cherry delights:
-
For the Cherry Filling:
-
1 cup of pitted cherries (fresh or frozen)
-
1/4 cup of sugar
-
1 tablespoon of lemon juice
-
1 tablespoon of cornstarch or arrowroot powder
-
For the Snowball Dough:
-
2 cups of all-purpose flour
-
1 cup of unsalted butter (softened)
-
1/2 cup of powdered sugar
-
1 teaspoon of vanilla extract
-
A pinch of salt
-
1/2 cup of slivered almonds (optional, for crunch)
As you gather your ingredients, avoid the stress of last-minute runs to the store by double-checking your pantry. Fresh cherries offer the best flavor, but frozen will still work just fine if that’s what you have.
Make the Cherry Filling
Now, let’s move on to the delicious cherry filling—this is where the magic happens! In a medium saucepan, combine your pitted cherries, sugar, and lemon juice over medium heat. Cook this mixture until the cherries soften and start releasing their juices, which typically takes about 5-8 minutes. Stir in the cornstarch until well combined. If you want to elevate the flavor even further, consider adding a dash of almond extract—trust me, you won’t regret it!
Once everything is beautifully combined, remove it from the heat and let it cool while you work on your dough. This filling is not just a delicious surprise but also packs a nutritional punch with antioxidants. For more tips on the health benefits of cherries, check out Healthline.
Prepare the Snowball Dough
Next up is the dough for your Cherry Snowballs. In a large mixing bowl, cream together the softened butter and powdered sugar until light and fluffy—about 3-5 minutes should suffice. Add in the vanilla extract and a pinch of salt, blending it all well. Gradually incorporate the flour until the mixture forms a soft dough.
If you decide to include slivered almonds, now’s the time to fold them in. Not only do they add a delightful crunch, but they also complement the sweet cherries beautifully!
Form the Snowballs
With your dough prepared, it’s time to bring your Cherry Snowballs to life! Start by preheating your oven to 350°F (175°C). Once preheated, take a small scoop of the dough (about a tablespoon) and flatten it in your hand. Place about a teaspoon of the cherry filling in the center, then carefully fold the dough over it and roll it into a ball. Repeat the process until all your dough and filling are used.
Don’t worry if they aren’t perfect spheres; that’s part of their charm! These sweet, round forms will become even more delightful during baking.
Bake and Cool the Cherry Snowballs
Place your formed Cherry Snowballs on a baking sheet lined with parchment paper, ensuring there’s enough space between them to allow for slight expansion. Bake in your preheated oven for about 15-20 minutes, or until the edges are lightly golden.
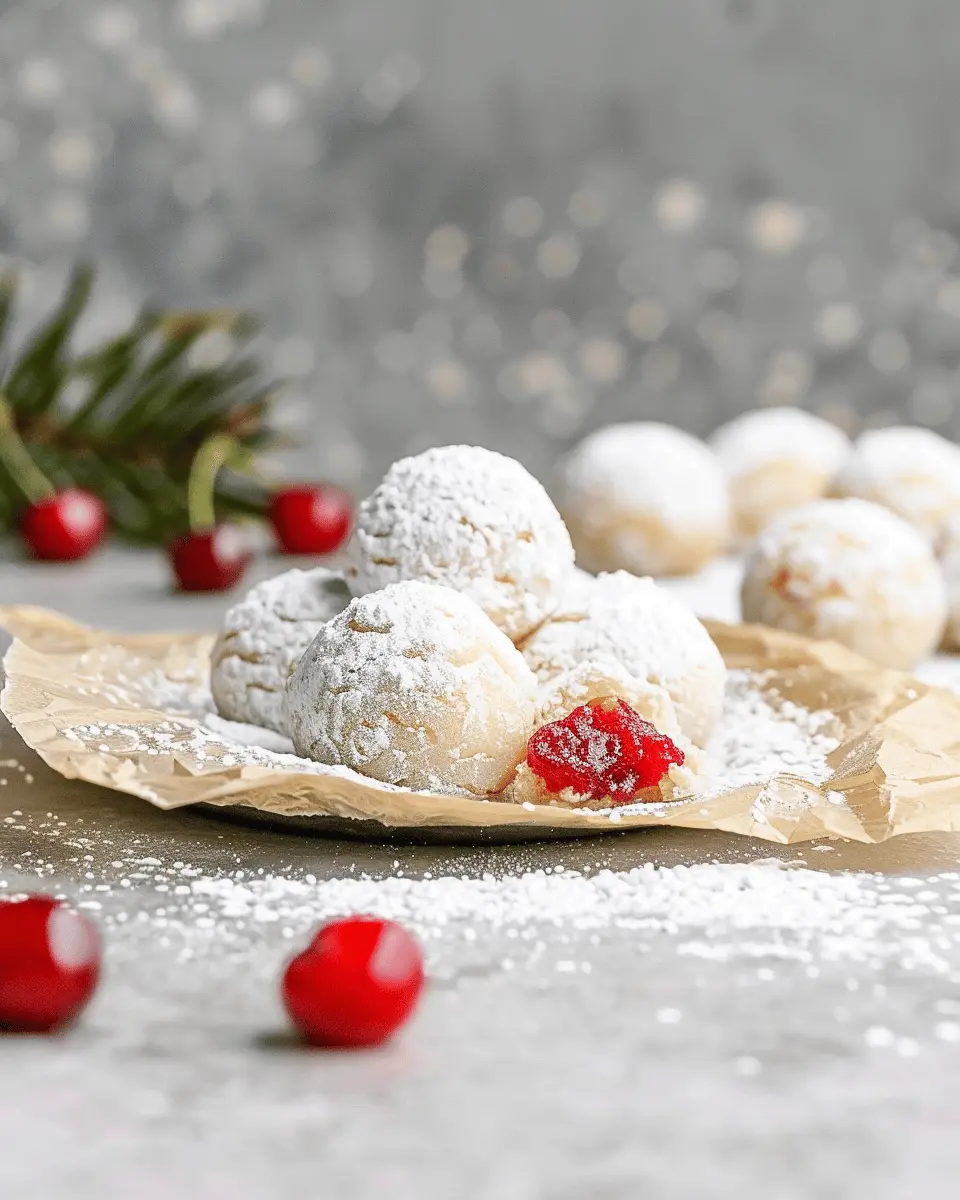
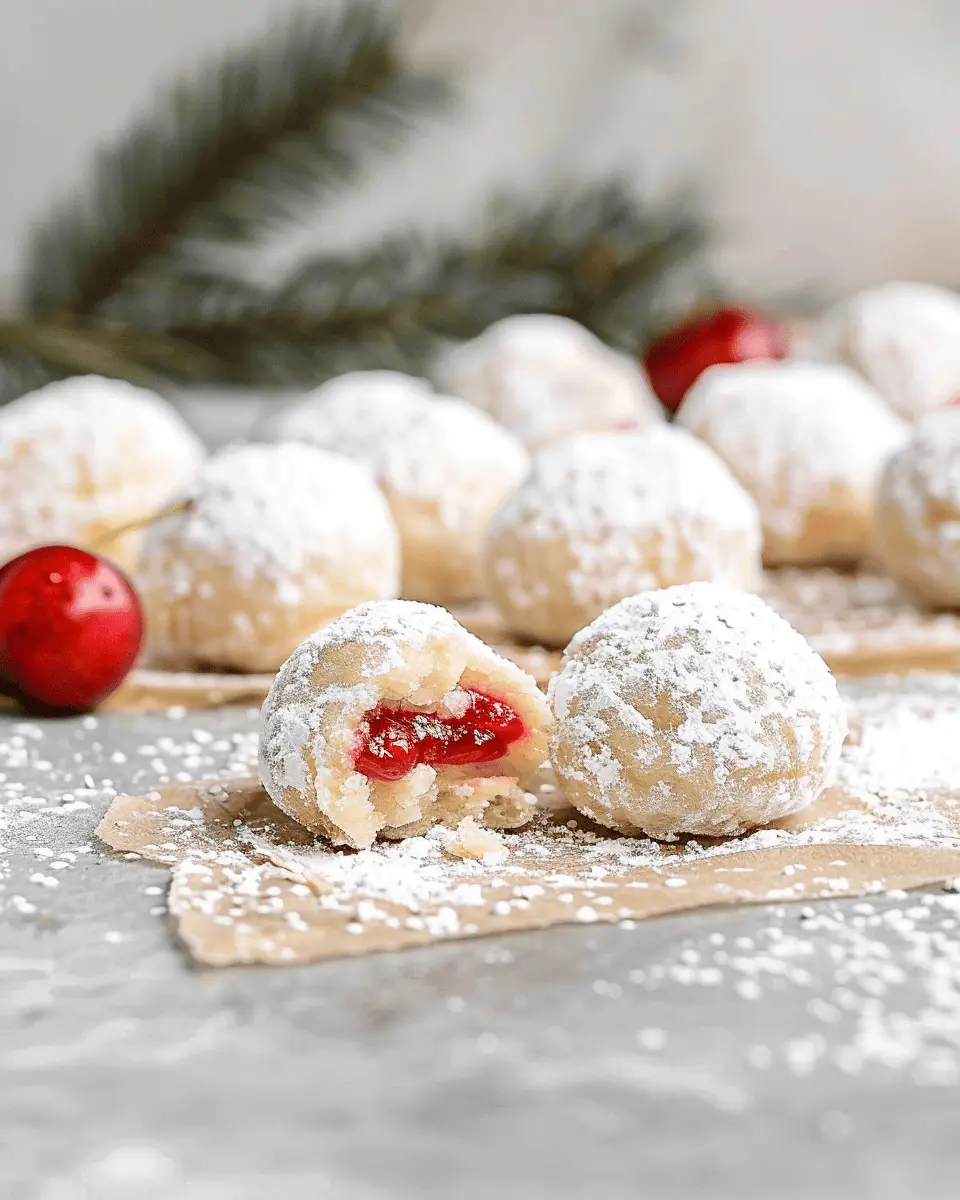
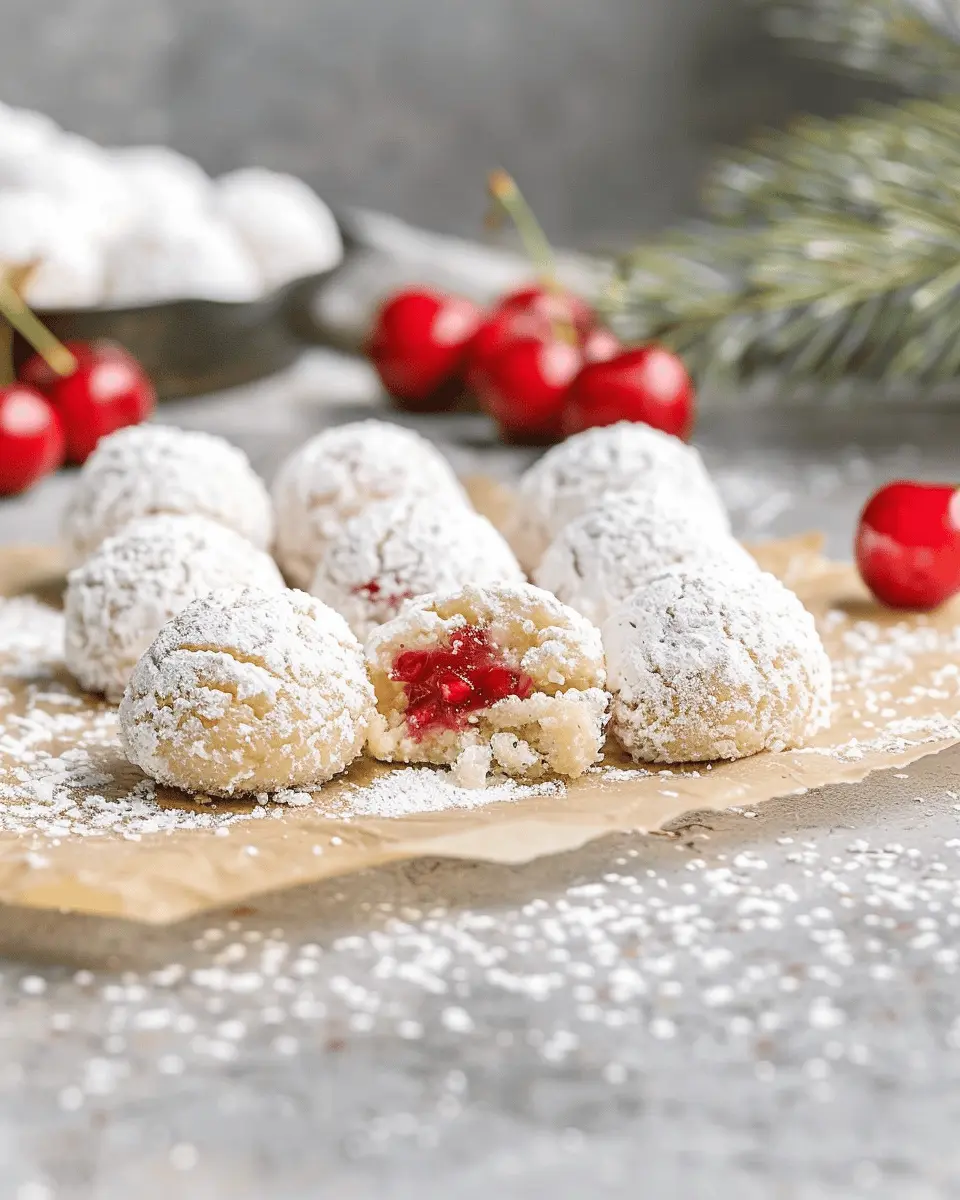
Once done, allow them to cool on a wire rack before enjoying. The cooling process is crucial to ensuring the flavors meld perfectly and the texture is just right. Feel free to dust them with powdered sugar before serving for that classic winter wonderland look!
Now that you’re all set for these delicious Cherry Snowballs, you’re not just baking—you’re creating a delightful winter treat! These will surely become a staple in your collection. Happy baking!

Variations on Cherry Snowballs
When it comes to Cherry Snowballs, there’s really no limit to creativity. If you’re looking to switch things up a bit, here are some delightful variations sure to impress your friends and family.
Cherry Snowballs with Coconut Flakes
Imagine the delightful contrast of sweet cherries and the tropical essence of coconut! To create this variation, simply add 1 cup of toasted coconut flakes to your Cherry Snowball mixture. Not only does this enhance the flavor, but the coconut also adds a nice texture. For a fun twist, roll the finished snowballs in extra coconut flakes for that extra flair.
Tips:
- Use unsweetened coconut for a more sophisticated taste.
- If you love textures, consider adding chopped macadamia nuts for an added crunch.
Cherry Snowballs with Chocolate Drizzle
For the chocolate lovers out there, this variation is bound to hit the sweet spot. After rolling your Cherry Snowballs in powdered sugar, prepare a simple chocolate drizzle by melting dark chocolate (or your favorite chocolate) and drizzling it over the top. This not only adds richness to your treats but also gives them a polished look—perfect for parties or even as a sweet surprise for yourself!
Tips:
- Try adding a pinch of sea salt on top of the chocolate for an enticing sweet-and-salty combo.
- For a healthier option, use dark chocolate with a high cocoa content.
Don’t be shy to experiment with these ideas and let your creativity flow. Cherry Snowballs can easily transform into your new favorite dessert with just a few tweaks! For more inspiration, check out resources like Food Network or Bon Appétit.
Cooking Tips and Notes for Cherry Snowballs
Common Mistakes to Avoid
When making Cherry Snowballs, it’s easy to get caught up in the excitement. Here are a few common pitfalls to steer clear of:
- Overmixing: Mixing your batter too much can lead to dense cookies. Aim for just combined for that light, fluffy texture.
- Skipping Chilling: Don’t rush the chilling time! Chilling your dough for at least 30 minutes helps the cookies hold their shape.
- Incorrect Baking Time: Keep an eye on your cookies—they should be lightly golden but still soft in the center.
Storage Tips for Leftovers
If you’re lucky enough to have leftover Cherry Snowballs, here’s how to store them:
- Airtight Container: Place your cookies in an airtight container to keep them fresh. You can layer them with parchment paper to avoid sticking.
- Refrigeration: For prolonged freshness, store them in the refrigerator. They can last up to a week this way!
- Freezing: Want to save some for a rainy day? Freeze the baked cookies and take them out as needed. Just pop them in the oven for a few minutes to freshen up.
These tips can enhance your Cherry Snowballs experience! For more cooking insights, check out Food Network for additional recipes and techniques that can elevate your culinary skills.
Serving Suggestions for Cherry Snowballs
Pairing with Dessert Sauces
When serving Cherry Snowballs, consider drizzling them with a rich chocolate sauce or a tangy raspberry coulis. These sauces complement the tartness of the cherries beautifully and elevate the dessert experience. You could even try a simple vanilla sauce for an understated elegance. For a twist, serve them with a dollop of whipped cream or a scoop of vanilla ice cream—what better way to impress guests with your creativity!
For more inspiration, check out this guide on dessert sauces that offers endless possibilities.
Creative Ways to Present Cherry Snowballs at a Gathering
Presentation is key when it comes to dessert, especially for your Cherry Snowballs. Here are a few ideas to impress your friends:
- Tiered Cake Stand: Arrange the snowballs on a tiered cake stand for a stunning visual effect.
- Individual Cups: Serve each snowball in a mini dessert cup; add a sprig of mint on top for a pop of color.
- Garnishes: Sprinkle some powdered sugar or colorful edible glitter on top before serving, and watch eyes light up!
These creative touches not only make your dessert more appetizing but also spark conversation among your guests. Plus, you’ll be remembered as the host with the most!
For more entertaining tips, visit this entertaining blog.
Time Breakdown for Cherry Snowballs
Preparation time
Making your Cherry Snowballs begins with a delightful prep session of about 15-20 minutes. You’ll gather your ingredients, chop the cherries, and get everything in place. Taking this time upfront helps your baking process go smoother—trust me, your future self will thank you!
Baking time
Once your mixture is ready, pop those Cherry Snowballs in the oven for approximately 12-15 minutes. The goal is to achieve a beautifully golden hue while keeping that soft and chewy center that everyone loves.
Total time
In total, you’re looking at around 30-35 minutes from start to finish. It’s a quick yet rewarding recipe that’s perfect for a last-minute dessert or an afternoon sweet treat. So, are you ready to make some delicious Cherry Snowballs? Give it a try, and you might find them becoming a new favorite!
For more insights into baking times, check out resources like the King Arthur Baking and their comprehensive guides to various baking techniques.
Nutritional Facts for Cherry Snowballs
Calories per serving
Each serving of Cherry Snowballs contains approximately 150 calories, making them a guilt-free dessert option for those with a sweet tooth. With a balance of rich flavors and a satisfying texture, these treats are perfect for an afternoon snack or indulgent dessert without overloading on calories.
Key nutrients to note
When you indulge in Cherry Snowballs, you’re not just treating yourself; you’re also nourishing your body with some key nutrients:
- Vitamin C: Cherries are packed with vitamin C, which supports your immune system and skin health.
- Fiber: This helps with digestion and keeps you feeling full longer, perfect for maintaining energy levels.
- Antioxidants: Cherries are rich in antioxidants, which may reduce inflammation and lower the risk of chronic diseases.
Overall, incorporating Cherry Snowballs into your diet can be a delightful way to enjoy a nutritious treat. For more insights on the health benefits of cherries, check out this article from Healthline on their exceptional nutritional profile!
FAQs about Cherry Snowballs
How can I make Cherry Snowballs without eggs?
Absolutely! If you’re looking to whip up Cherry Snowballs without eggs, you can easily replace them with alternatives. Consider using applesauce or mashed bananas in a 1:1 ratio to add moisture while keeping the cookies chewy. Another fantastic option is flaxseed meal: mix one tablespoon of ground flaxseed with two and a half tablespoons of water. Let it sit for about five minutes to form a gel-like consistency, and then add it to your dough. Both options keep your treats egg-free while maintaining that delightful texture.
What types of cherries work best in this recipe?
When making Cherry Snowballs, fresh or frozen cherries work wonderfully. Sweet cherries, such as Bing or Rainier, add a lovely balance of flavor. If you’re in the mood for a tart twist, opt for sour cherries like Montmorency. A tip for using frozen cherries: make sure to thaw and drain them before incorporating them into your dough, as this prevents excess moisture that could lead to soggy cookies. Check out this article from the Cherry Marketing Institute for more insight on cherry varieties!
Can I freeze Cherry Snowballs?
Yes, you can! Cherry Snowballs freeze surprisingly well, making them a perfect make-ahead treat. Just bake your cookies and let them cool completely, then store them in an airtight container or freezer bag. They’ll stay fresh in the freezer for up to three months. When you’re ready to enjoy, simply thaw them at room temperature or pop them in the oven for a few minutes to revive that scrumptious warmth. Trust me, there’s nothing quite like a home-baked cookie on a cozy afternoon!
Conclusion on Cherry Snowballs
Recap of why Cherry Snowballs are a must-try
To wrap it all up, Cherry Snowballs are more than just a dessert; they bring an explosion of flavor and a touch of elegance to any gathering. These delightful treats encapsulate the sweet-tart essence of cherries, complemented by a soft, melt-in-your-mouth texture that leaves you wanting more.
- Versatile: Perfect for festive occasions or as a sweet snack.
- Quick to make: With simple ingredients, they’re easy to whip up.
- Flavorful twist: The combination of cherries and creaminess is simply irresistible.
If you haven’t yet tried making Cherry Snowballs, give them a go! You might just find your new favorite recipe. For more delicious ideas, check out Food Network’s dessert section or explore the endless cherry recipes available at AllRecipes. Happy baking!
PrintCherry Snowballs: Easy and Indulgent Treats for Every Occasion
Delicious Cherry Snowballs are the perfect indulgent treat for any occasion, combining the sweetness of cherries and the fluffiness of coconut.
- Prep Time: 15 minutes
- Cook Time: 15 minutes
- Total Time: 30 minutes
- Yield: 24 cookies 1x
- Category: Dessert
- Method: Baking
- Cuisine: American
- Diet: Vegetarian
Ingredients
- 1 cup cherries, pitted and chopped
- 2 cups powdered sugar
- 1 cup unsweetened shredded coconut
- 1 cup butter, softened
- 2 cups all-purpose flour
- 1 teaspoon vanilla extract
Instructions
- Preheat your oven to 350°F (175°C).
- In a large bowl, cream together the butter and powdered sugar until smooth.
- Add the chopped cherries and vanilla extract, mix well.
- In another bowl, combine the flour and shredded coconut, then gradually blend into the cherry mixture.
- Shape into small balls and place them on a baking sheet lined with parchment paper.
- Bake for 12-15 minutes or until golden.
- Let cool and roll in additional powdered sugar if desired.
Notes
- For extra flavor, consider adding almond extract.
- These treats can be made ahead of time and stored.
Nutrition
- Serving Size: 1 cookie
- Calories: 120
- Sugar: 10g
- Sodium: 30mg
- Fat: 8g
- Saturated Fat: 5g
- Unsaturated Fat: 2g
- Trans Fat: 0g
- Carbohydrates: 15g
- Fiber: 1g
- Protein: 1g
- Cholesterol: 20mg
Keywords: Cherry Snowballs, dessert, treats