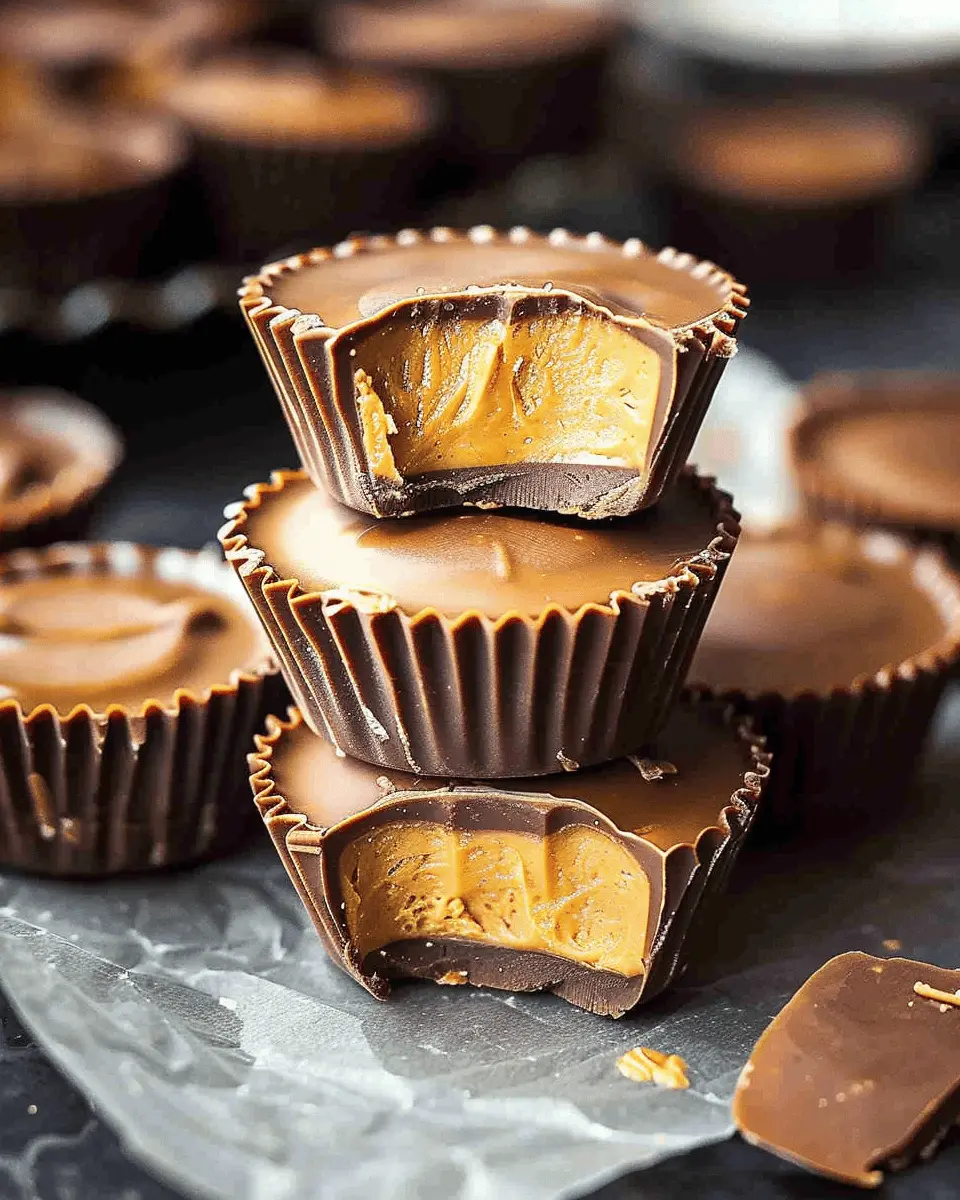
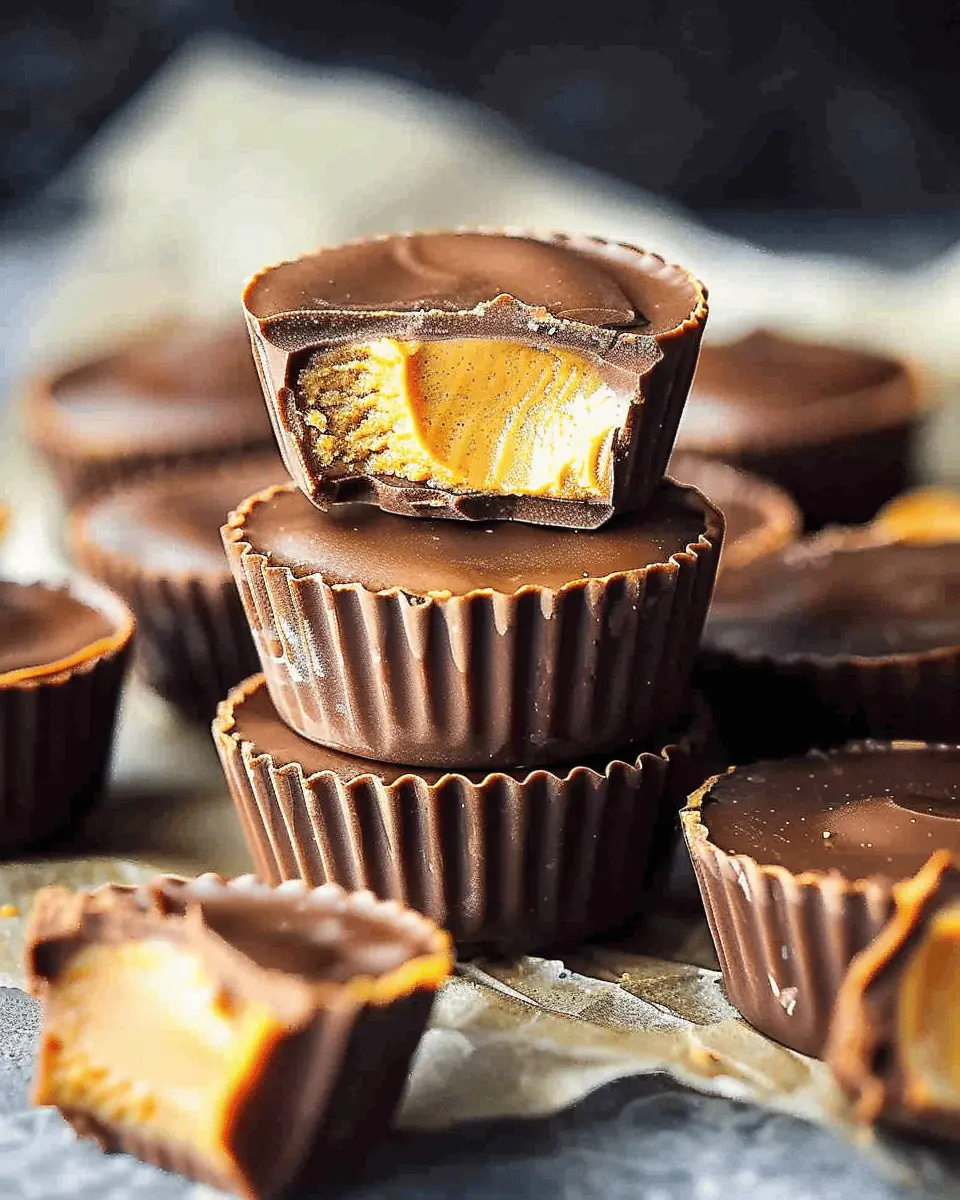
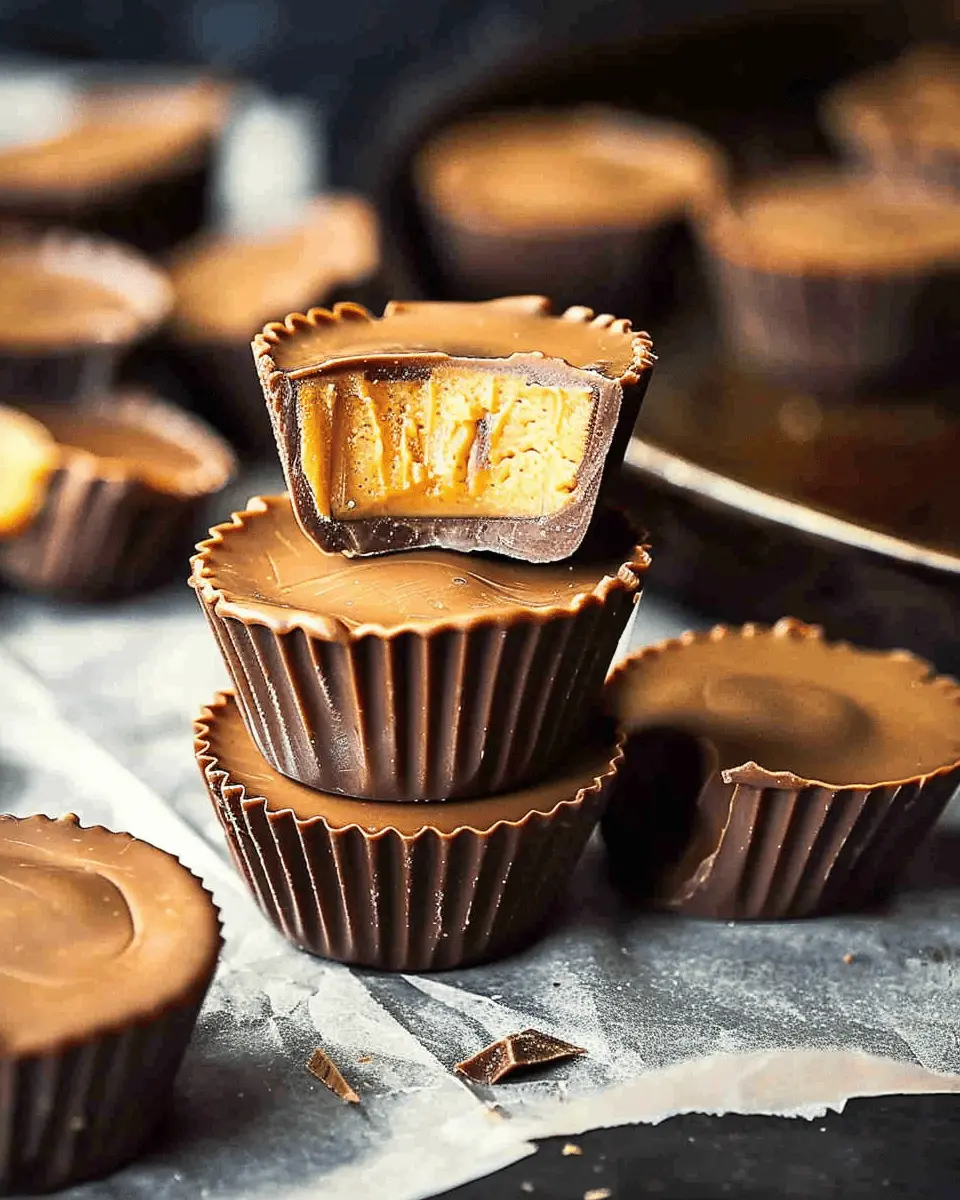
Introduction to Homemade Reese’s Peanut Butter Cups
Have you ever taken a bite of a Reese’s Peanut Butter Cup and thought, “I could make this at home”? Well, you’re not alone! With the undeniable combination of creamy peanut butter and smooth chocolate, the allure of homemade Reese’s Peanut Butter Cups is hard to resist. Making your own is not just a fun kitchen adventure, but it also allows you to customize flavors and ingredients for a truly unique treat.
Why Make Your Own Reese’s Peanut Butter Cups?
There are several compelling reasons to dive into the world of homemade confections:
-
Quality Control: Retail versions are often packed with preservatives and additives. When you whip up your own, you choose the finest ingredients. Use organic peanut butter and fair-trade chocolate to enhance not just the taste but also the nutrition of your treats.
-
Custom Flavors: Are you a fan of dark chocolate? Prefer a hint of sea salt on top? When making your homemade Reese’s Peanut Butter Cups, the flavor possibilities are endless. You can experiment with different nut butters, sweeteners, or add-ins like crushed pretzels or crispy rice for that extra crunch.
-
Cost-Effective: Let’s face it, store-bought versions can add up quickly, especially if you indulge frequently. Making them at home can save you money in the long run, especially when you want to share with friends and family.
-
A Fun Activity: Whether you’re cooking solo, or with friends, making your own candy is a great way to spend an afternoon. It’s a chance to unleash your creativity and impress your loved ones with homemade gifts. Plus, who doesn’t love sampling their creations every step of the way?
Creating homemade Reese’s Peanut Butter Cups isn’t just a recipe; it’s an experience that brings joy to your kitchen. So grab those ingredients and let’s get started on making your very own delicious treats.
You can enhance your culinary skills with detailed tutorials on sites like Serious Eats or discover more about ingredient sourcing on Food52.
Ingredients for Homemade Reese’s Peanut Butter Cups
Creating your own homemade Reese’s peanut butter cups is a delightful adventure! You’ll only need a few simple ingredients, but each plays a vital role in achieving that dreamy flavor and texture. Let’s break it down.
Essential Ingredients for the Chocolate Shell
For that perfect chocolate shell, you’ll need:
- Chocolate Chips: Dark or milk chocolate chips work beautifully—choose your favorite!
- Coconut Oil or Butter: Adding a tablespoon or two helps to give the chocolate a smooth, glossy finish.
Having these on hand allows you to whip up that decadent chocolate coating in no time. If you’re curious about the health benefits of dark chocolate, check out this Healthline article.
Essential Ingredients for the Peanut Butter Filling
Now, let’s talk about that rich, creamy filling. Gather these staples:
- Peanut Butter: Use creamy for an uber-smooth texture, or crunchy for a little excitement.
- Powdered Sugar: Sweetens and thickens the filling, giving it that trademark Reese’s sweetness.
- Salt: A pinch enhances the flavors brilliantly!
With these ingredients, you’re just a few steps away from indulging in your own homemade Reese’s peanut butter cups! The combination is nothing short of magical—so get ready to impress your friends (or just yourself)!
Step-by-step Preparation of Homemade Reese’s Peanut Butter Cups
Making your own homemade Reese’s peanut butter cups is not only a fun kitchen project, but it also allows you to put your own spin on this beloved treat. Let’s dive right into the preparation with easy-to-follow steps.
Gather your ingredients and tools
First things first: get your kitchen prepped. You’ll need a few simple ingredients and tools to get started. Here’s what you’ll need:
Ingredients:
- 1 cup of semi-sweet chocolate chips (or milk chocolate if you prefer)
- 1 cup of creamy peanut butter (go for natural for healthier options)
- 1/2 cup of powdered sugar
- 1/2 teaspoon of vanilla extract
- A pinch of salt
Tools:
- A microwave-safe bowl
- A whisk or spatula
- A muffin tin (with cupcake liners)
- A small saucepan (for melting chocolate)
Having everything within reach makes the whole process smoother—a little prep can go a long way!
Prepare the chocolate shell
Now, let’s get that delicious chocolate shell ready. You can choose to melt your chocolate chips in a saucepan or the microwave, depending on your preference:
- Microwave: Place your chocolate chips in a microwave-safe bowl. Heat them in 30-second intervals, stirring after each, until they are fully melted and smooth. Be careful not to overheat!
- Stovetop: If you prefer more control, use a double boiler. Simply place the chocolate in a heatproof bowl over a pot of simmering water, stirring constantly until melted.
Once your chocolate is ready, spoon about a tablespoon into the bottom of each cupcake liner, making sure to smooth it out to cover the base.
Make the creamy peanut butter filling
Next, let’s whip up that dreamy peanut butter filling! This step is quick and easy:
- In a mixing bowl, combine the creamy peanut butter, powdered sugar, vanilla extract, and a pinch of salt.
- Mix with a spatula or whisk until you have a smooth, creamy consistency. The combination of flavors is simply irresistible.
If you want to lighten things up, consider checking out some healthier alternatives for peanut butter from Healthline.
Assemble the cups
Here comes the fun part! It’s time to assemble your homemade Reese’s peanut butter cups.
- After adding the chocolate base into the liners, allow it to set by chilling it in the fridge for about 10 minutes until it’s firm.
- Once set, take your peanut butter mixture and scoop about 1-2 teaspoons into each cup, ensuring it’s centered and not touching the sides.
- Finally, drizzle the remaining melted chocolate over the peanut butter layer, covering it completely.
Smooth the top for an even finish—every little detail counts!
Chill and set the cups
Your homemade Reese’s peanut butter cups are almost ready! The last step is crucial for that perfect texture:
- Place the assembled cups back in the fridge for at least 30 minutes to set. This will help the chocolate harden beautifully.
- Once they’re chilled and firm, carefully peel the cupcake liners away. Your cups are now ready to devour!
Pro Tip: Store any leftovers in an airtight container in the fridge, where they can last for about a week (if they last that long!).
Enjoy your delightful homemade snack, and feel free to share them with friends—or keep them all to yourself. After all, who could resist such a tasty treat? Happy cooking!
Variations on Homemade Reese’s Peanut Butter Cups
Dark chocolate homemade Reese’s peanut butter cups
If you’re a fan of rich flavors, dark chocolate is your new best friend. Swapping out traditional milk chocolate for dark chocolate not only elevates the taste but brings a touch of sophistication to your homemade Reese’s peanut butter cups. The slightly bitter notes of dark chocolate pair beautifully with the creamy sweetness of peanut butter. You can easily find high-quality dark chocolate at local markets, or try sustainable brands like Alter Eco for an eco-friendly choice.
Nut-free version
Allergy concerns shouldn’t keep anyone from enjoying these delicious treats. For a nut-free version, simply replace peanut butter with sun butter or soy nut butter. These alternatives recreate that creamy texture with a different flavor profile while still being kid-friendly and delicious. Just be sure all your ingredients are certified nut-free, which is essential to keep this treat safe for everyone. Did you know that over 3 million children in the U.S. have food allergies? This variation not only tastes great but makes your homemade delights more inclusive.
Flavored peanut butter fillings
Why stick to plain when you can explore? Experimenting with flavored peanut butter fillings can turn your homemade Reese’s peanut butter cups into a delightful adventure. Consider mixing in ingredients like coconut, chia seeds, or even a sprinkle of cinnamon for a unique twist. You could also blend in some melted chocolate chips or a dash of vanilla extract for a flavor boost that’ll make your taste buds dance. Not sure where to find fun recipes? Check sites like AllRecipes for inspiration!
These variations are not just fun; they’re a great way to customize your treats for everyone. Which one are you excited to try first?
Cooking Tips and Notes for Homemade Reese’s Peanut Butter Cups
Tips for melting chocolate perfectly
Melting chocolate for your homemade Reese’s peanut butter cups can be a bit tricky. Here’s a foolproof way to do it:
- Use the Double Boiler Method: Fill a pot with water and place another bowl on top, ensuring it doesn’t touch the water. This indirect heat melts your chocolate evenly.
- Microwave Caution: If you’re short on time, melt chocolate in the microwave at 30-second intervals, stirring in between. This prevents overheating, which can cause graininess.
Remember, high-quality chocolate makes a difference in taste! Brands like Ghirardelli or Callebaut yield fantastic results.
How to avoid mess during assembly
Keeping things tidy while making these delicious homemade treats can save you time and stress. Here are some handy tips:
- Pre-measure Ingredients: Gather and measure everything before you begin. This way, you’ll minimize spills and distractions.
- Use Cupcake Liners: Instead of pouring the chocolate directly into a mold, line muffin tins with cupcake liners. They make for easy handling and cleanup.
Have fun with it, and don’t hesitate to experiment! You might just find your own perfect twist on a classic favorite. For more guidance on dessert assembly, check out this helpful resource.

Serving Suggestions for Homemade Reese’s Peanut Butter Cups
Creative Ways to Present the Cups
When it comes to showcasing your homemade Reese’s peanut butter cups, presentation is key! Consider placing them in colorful cupcake liners for a festive touch. You could also stack them on a decorative platter, alternating layers with cookies or edible flowers. For a fun twist, drizzle some melted chocolate or white chocolate over the top to add flair. How about creating a themed dessert charcuterie board? Mix your cups with fresh fruit, nuts, and assorted candies for an eye-catching and delicious display.
Pairing Suggestions for a Sweet Treat Experience
To elevate your sweet treat experience, think about pairing your homemade Reese’s peanut butter cups with refreshing options. A tall glass of cold almond milk or a velvety hazelnut coffee complements the rich flavor perfectly. If you’re feeling adventurous, try serving them alongside some turkey bacon or a slice of creamy cheesecake for contrasting textures and flavors. A scoop of vanilla ice cream can also take your dessert to the next level! For inspiration, check out Bon Appétit for creative pairing ideas that will impress friends and family alike.
Time Breakdown for Homemade Reese’s Peanut Butter Cups
Preparation time
Getting started on your homemade Reese’s peanut butter cups is a breeze! Expect to spend around 15-20 minutes gathering your ingredients and mixing that delightful peanut butter filling. Make sure to measure everything accurately for the perfect balance of flavors.
Chilling time
Once you’ve crafted your delicious treats, they need a little downtime in the fridge. Plan for about 30 minutes to chill, allowing the chocolate to set nicely and the flavors to meld together. This is a great time to create a cozy spot to enjoy your finished creation later!
Total time
In total, you’re looking at roughly an hour from start to finish. That’s just enough time for a quick coffee break! With minimal effort, you’ve got a sweet, rich dessert that’s sure to impress. So grab those ingredients and dive into the delightful world of homemade Reese’s peanut butter cups!
If you’re curious about the science behind chocolate tempering or want to explore more about baking techniques, check out resources from Serious Eats or King Arthur Baking for even more delicious inspiration.
Nutritional Facts for Homemade Reese’s Peanut Butter Cups
When indulging in homemade Reese’s peanut butter cups, it’s essential to know what you’re treating yourself to. Here’s a brief breakdown:
Calories per cup
Each delightful cup typically contains around 90-120 calories, depending on ingredient choices. Using dark chocolate can slightly alter this, offering a richer flavor and health benefits.
Protein content
These tasty treats provide about 3-4 grams of protein per cup, thanks to the peanut butter. It’s a nice boost that makes your dessert feel a bit more substantial.
Sugar levels
While they are undeniably delicious, be mindful that these cups have about 10-12 grams of sugar each. If you’re keeping an eye on your sugar intake, consider this when enjoying your creations.
Experiment with modifications, like using natural sweeteners or a low-sugar chocolate option, to make your homemade Reese’s peanut butter cups even healthier! For more nutritional information, you can check out the USDA FoodData Central.
FAQ about Homemade Reese’s Peanut Butter Cups
Creating your own homemade Reese’s peanut butter cups can be a delightful kitchen adventure, but you might have some questions along the way. Let’s dive into some common queries!
How long can I store homemade Reese’s Peanut Butter Cups?
Once you’ve whipped up a batch of these delicious treats, you’ll want to know how to keep them fresh. Homemade Reese’s peanut butter cups can be stored in an airtight container at room temperature for about a week. If you prefer longer storage, pop them in the fridge where they can last up to two weeks. For even longer shelf life, you can freeze them for 2-3 months. Just make sure to wrap each cup individually to prevent freezer burn.
Can I use different nut butters?
Absolutely! While peanut butter is the classic choice for homemade Reese’s peanut butter cups, feel free to experiment with other nut butters like almond or cashew. Just make sure that the texture is similar, as this will help maintain that creamy filling. According to Healthline, alternatives like sunflower seed butter can also be a great option for those with nut allergies.
What’s the best way to melt chocolate?
Melting chocolate perfectly can be tricky! The best method is to use a double boiler, which helps distribute heat evenly. If you don’t have one, you can create a makeshift double boiler using a heatproof bowl over a pot of simmering water. Stir the chocolate frequently until it’s smooth and fully melted. Alternatively, you can melt it in the microwave in short bursts (15-20 seconds), stirring in between. Just be careful not to overheat it, as burnt chocolate is a bummer!
Feel free to reach out with more questions or share your experiences; cooking is always more fun when you can connect with others!
Conclusion on Homemade Reese’s Peanut Butter Cups
Recap of the Joys of Homemade Treats
Creating homemade Reese’s peanut butter cups isn’t just about satisfying a sweet tooth; it’s a delightful journey to rediscovering your love for treats. The process invites you into the kitchen, where you can blend creamy peanut butter with decadent chocolate, inviting warmth into your home. Plus, these treats are customizable! Want to introduce a sprinkle of sea salt or mix in some chopped nuts? Go for it!
Not only do these homemade delights bring a cozy, nostalgic vibe, but they also allow you to control ingredients for a guilt-free indulgence. For tips on food safety while cooking, check out the USDA website for more insights. So, gather your friends, enjoy a cup of coffee, and indulge in the joy of creating something special together! Consider sharing this experience with others or gifting a few to those you love—after all, homemade is always better.
PrintHomemade Reese’s Peanut Butter Cups: Easy and Indulgent Treats

Enjoy the rich, creamy flavor of Homemade Reese’s Peanut Butter Cups without the guilt. These easy-to-make treats are perfect for satisfying your sweet tooth.
- Prep Time: 15 minutes
- Cook Time: 10 minutes
- Total Time: 45 minutes
- Yield: 12 servings 1x
- Category: Dessert
- Method: No-Bake
- Cuisine: American
- Diet: Vegetarian
Ingredients
- 1 cup creamy peanut butter
- 1 cup powdered sugar
- 2 cups chocolate chips
- 1 tablespoon coconut oil
Instructions
- Melt the chocolate chips with the coconut oil in a microwave-safe bowl, stirring every 30 seconds until smooth.
- In a separate bowl, mix the peanut butter and powdered sugar until well combined.
- Pour a layer of melted chocolate into each cupcake liner, then add a scoop of the peanut butter mixture on top.
- Cover the peanut butter with more melted chocolate.
- Refrigerate for about 30 minutes until set.
Notes
- For a crunchier texture, add chopped nuts to the peanut butter mixture.
- Feel free to use dark, milk, or white chocolate based on your preference.
Nutrition
- Serving Size: 1 cup
- Calories: 180
- Sugar: 12 grams
- Sodium: 50 mg
- Fat: 10 grams
- Saturated Fat: 4 grams
- Unsaturated Fat: 5 grams
- Trans Fat: 0 grams
- Carbohydrates: 20 grams
- Fiber: 2 grams
- Protein: 4 grams
- Cholesterol: 0 mg
Keywords: Homemade Reese’s Peanut Butter Cups