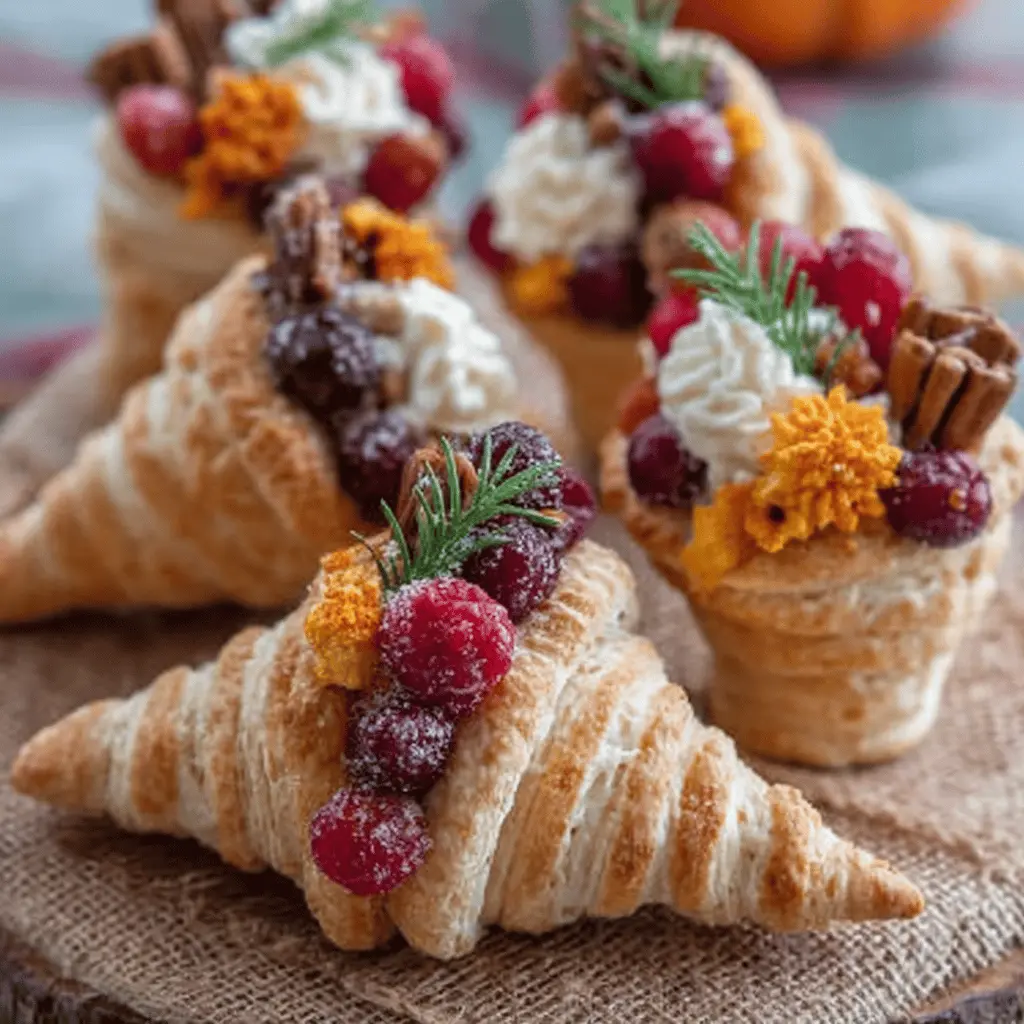
Introduction to How to Make the Cutest Cornucopia Cups
With the holiday season just around the corner, it’s the perfect time to tap into your creativity and whip up some delightful treats. Enter the adorable cornucopia cups! These charming edible creations mimic the traditional cornucopia shape, brimming with festive goodies that are perfect for any celebration, from Thanksgiving dinners to casual get-togethers with friends. But what makes cornucopia cups truly special is their versatility—whether you fill them with sweet delights or savory snacks, they never fail to impress.
Why Cornucopia Cups Are Perfect for Celebrations
Cornucopia cups are not only delightful to look at but also incredibly practical. As young professionals, we often seek ways to impress our guests without breaking a sweat in the kitchen. These cups allow you to combine artistry and function effortlessly.
Here are some reasons why they shine at celebrations:
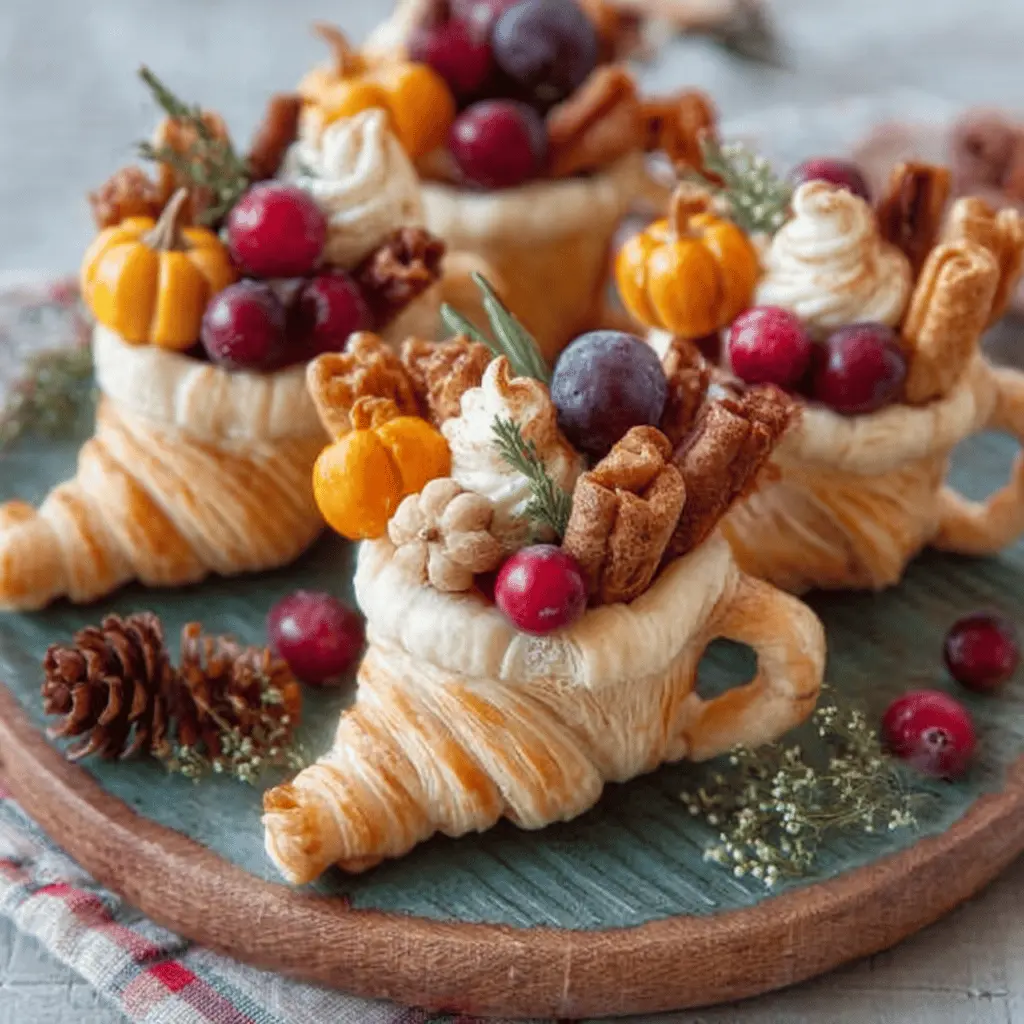
- A Visual Feast: The sight of these cute cups filled with colorful fruits, nuts, or even turkey bacon bites can instantly elevate your table setup.
- Customizable: You can tailor the fillings to suit different tastes—whether your crowd prefers sweet or savory, there’s something for everyone. Think mini fruit salads, candy, or a mix of veggies and chicken ham for a savory kick!
- Interactive Eating: Guests love to grab and go, and these cornucopia cups let you create a fun, hands-on experience. Everyone can pick their treat without any fuss.
For inspiration, you might want to check out this guide on creative appetizers that sparks ideas for fillings and presentations as you learn how to make the cutest cornucopia cups. There’s even a variety of decorative designs online that could provide you with a unique twist on the classic look!
So, as we delve into this fun project, remember that the sky’s the limit when it comes to flavors and fillings. Are you ready to gather your ingredients and impress your friends and family? Let the creativity flow, and soon you’ll be serving these adorable, tasty cornucopia cups that are bound to become the highlight of your holiday spread. Stay tuned for the full recipe below!
Ingredients for Cornucopia Cups
Essential ingredients for the cutest cornucopia cups
Creating delightful cornucopia cups starts with the right ingredients to capture that festive charm. Here’s a list of essentials you’ll need:
- Miniature waffle cones: These serve as the foundation of your cups, giving them a delightful crunch.
- Turkey bacon: Deliciously crispy and easy to shape, this adds a savory note to your cups.
- Chicken ham: Slices of this tender meat complement the flavors perfectly.
- Beef crumbles: Rich and hearty, beef crumbles bring a satisfying texture to your creation.
- Cream cheese: For an irresistible creamy layer inside, cream cheese will bind everything beautifully.
- Colorful veggies: Cherry tomatoes, sweet bell peppers, and fresh herbs not only enhance the flavor but also brighten up the presentation.
Alternative ingredients for personalization
Want to personalize your cornucopia cups? Here are some fun substitutions that might tickle your taste buds:
- Swap turkey bacon for crispy tofu for a vegetarian option.
- Use hummus instead of cream cheese for a healthier spread.
- Try different fillings like roasted vegetables or even a sweeter mix of fruits and yogurt.
These alternatives allow you to explore various flavors while still embracing the festive spirit! If you’re interested in some inspiration, check out this easy guide on customizing classic recipes.
Now that you’re equipped with the right ingredients, you’ll be well on your way to learning how to make the cutest cornucopia cups that not only taste great but also look picture-perfect!
Step-by-Step Preparation of Cornucopia Cups
Creating the cutest cornucopia cups is not only a fun activity but also a great way to impress your friends or family during festive gatherings. With the right preparation and a step-by-step approach, you’ll be well on your way to crafting these delightful edible decorations. Let’s dive in!
Prepare Your Workspace and Ingredients
Before you begin, it’s essential to set up a clean and organized workspace. Gather the following essentials:
-
Ingredients:
-
Pre-made dough (puff pastry or pie crust works well)
-
Cooking spray
-
1 egg (for egg wash)
-
Optional: seasonings (like salt or herbs) for flavor
-
Equipment:
-
Aluminum foil
-
Rolling pin (if using dough that needs to be rolled out)
-
Knife or pizza cutter
-
Baking sheet
Having everything on hand will streamline the entire process, keeping it stress-free and enjoyable. It might also be helpful to refer to guides on how to make dough if you’re looking to make it from scratch!
Roll Out or Unroll the Dough
If you’re using pre-made dough, unroll it onto a clean surface. For those making their own, roll out your dough to about 1/8-inch thick. This thickness will ensure your cups are sturdy yet flaky. Using a rolling pin creates a nice even surface, which is key to getting perfect cups.
Cut the Dough into Strips
Next, it’s time to cut the dough into strips. Use a knife or pizza cutter to slice the dough into strips that are about 1 inch wide and 6-8 inches long. These strips will add texture and make your cornucopia visually appealing. Aim for consistency; varied widths can lead to uneven cooking!
Create the Foil Cornucopia Shape
For the structure, we’ll use aluminum foil. Take a sheet and mold it into a cornucopia shape—this often resembles a cone that flares out. If you’re unsure how to shape it, think of a traditional horn, and be sure to twist the end for a more whimsical look. Many people find tutorials helpful; check out DIY videos online for inspiration and tips!
Wrap the Dough Around the Foil Shape
Once your shape is ready, it’s time to wrap the dough around. Start at the wider end, overlapping each strip slightly as you work your way down towards the pointed tip. This overlap ensures a strong structure while providing that beautiful rustic finish. Isn’t it amazing how simple dough can transform?
Apply Egg Wash and Finalize the Wrapping
To achieve a golden brown finish, beat the egg in a bowl and brush it over the dough. This egg wash not only adds color but also gives it a lovely shine. At this stage, make sure that all edges are sealed; if they aren’t, you might find your cornucopia cups losing their shape while baking.
Bake and Cool the Cornucopia Cups
Preheat your oven to 375°F (190°C) and generously spray the baking sheet to prevent sticking. Place your wrapped foil shapes on the sheet and bake for about 20-25 minutes, or until golden brown. Keep an eye on them—no one wants overly crispy cornucopias! Once done, allow them to cool slightly before carefully removing the foil.
Take a moment to admire your stunning creations. These cornucopia cups are not only adorable but versatile too; fill them with savory options like turkey bacon, chicken ham, or seasonal veggies, or even delve into sweet fillings like fruits or custards.
And there you have it—a step-by-step guide on how to make the cutest cornucopia cups! Whether for Thanksgiving or any gathering, these delightful cups will surely impress. Enjoy your crafting!

Variations on Cornucopia Cups
When you’re learning how to make the cutest cornucopia cups, the variations you can explore are endless! Let’s dive into a couple of exciting ways to personalize these charming edible creations.
Unique Charcuterie Fillings
While traditional fillings are always delightful, think outside the box! Consider using:
- Turkey Bacon strips for that savory crunch, adding a smoky flavor.
- Chicken Ham slices rolled with cream cheese and herbs for extra creaminess.
- Seasonal cheeses, such as sharp cheddar or tangy goat cheese, offer a rich contrast.
- Fresh fruits like grapes, figs, or pomegranate seeds not only add sweetness but also a pop of color.
These combinations will not only tantalize taste buds but also make for a stunning presentation. And don’t forget to sprinkle in some nuts or seeds for added texture—flavor and variety are key!
Seasonal Ingredients to Switch It Up
Embracing seasonal ingredients can keep your cornucopia cups fresh and exciting. Here are a few suggestions:
- Autumn: Use roasted butternut squash or Brussels sprouts for a hearty feel.
- Winter: Incorporate dried cranberries or pears for that festive touch.
- Spring: Fresh peas or radishes can add a crisp bite that’s perfect for warmer weather.
- Summer: Swap in vibrant cherry tomatoes and basil for a refreshing twist.
Harvesting flavors that align with the seasons not only enhances your dish’s taste but also connects you to the bounty around you. For even more inspiration, check out Seasonal Food Guide for tips on what’s in season year-round.
By thinking creatively about fillings and seasonal ingredients, you’ll find that you can easily elevate your cornucopia cups for any gathering! Happy crafting!
Cooking Tips and Notes for Cornucopia Cups
Tips for the Perfect Golden Crust
Achieving that ideal golden crust for your Cornucopia Cups is easier than you might think. Here are some simple strategies to ensure your pastry turns out flaky and delicious:
- Chill the Dough: Make sure your dough is cold when it goes in the oven. This helps create a flaky texture. If you find it gets warm while working, just pop it back in the fridge for a few minutes.
- Egg Wash: Brushing the outer layer with a beaten egg before baking gives that beautiful golden hue. It not only enhances the color but also adds a slight gloss.
For more pastry tips, consider checking out resources like King Arthur Baking for expert advice.
Suggestions for Ensuring Easy Removal from the Foil
The foil can be a tricky but essential component in how to make the cutest cornucopia cups. To help with easy removal, follow these handy tips:
- Use Non-Stick Foil: If you have it, using non-stick foil can significantly reduce sticking.
- Grease Lightly: Before shaping your dough into cups, lightly grease the foil. This little step can make a big difference in ensuring your cups come out intact.
- Cool Before Removing: Let your Cornucopia Cups cool for a few minutes before peeling off the foil. It not only helps them set but also makes removal smoother.
With these tips, your Cornucopia Cups will be the star of any gathering! For more delightful recipes, check out sites like Food Network.
Serving Suggestions for Cornucopia Cups
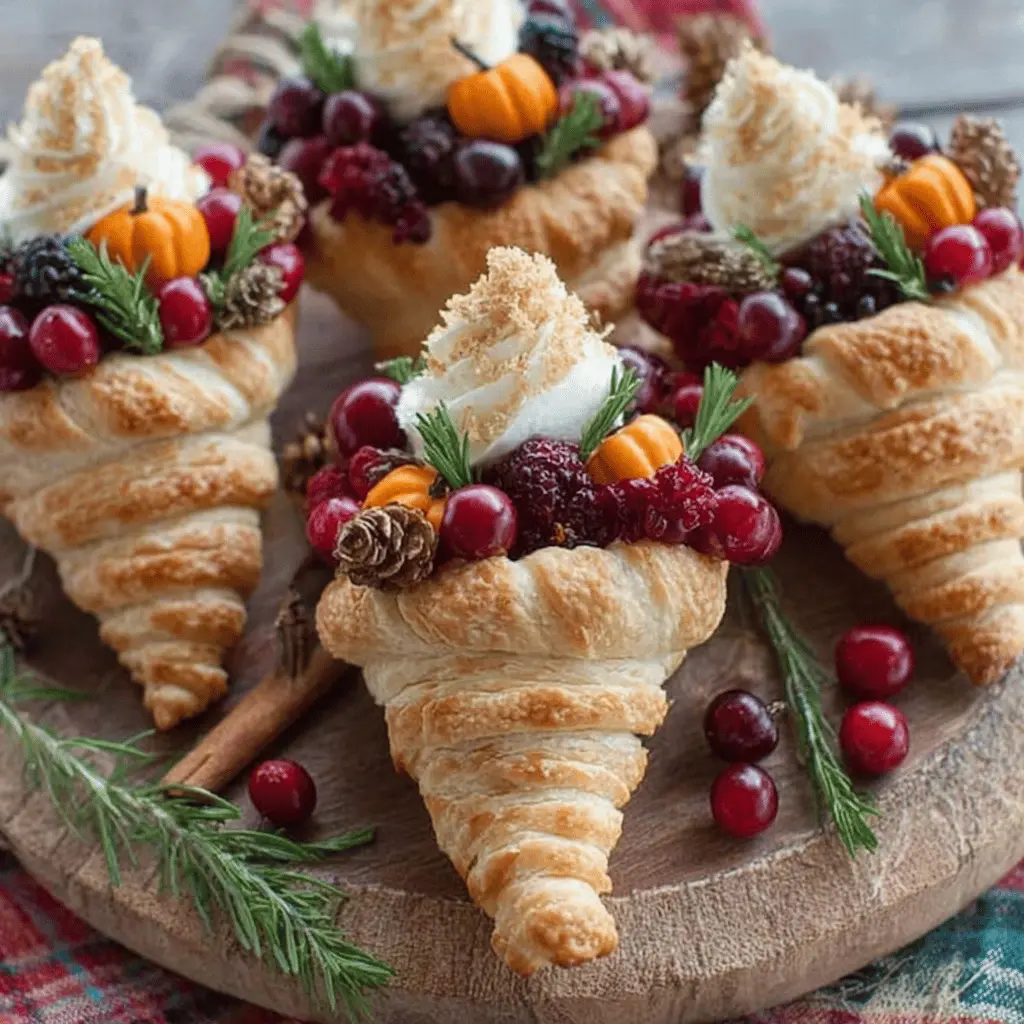
Creative ways to present your cornucopia cups
When figuring out how to make the cutest cornucopia cups, presentation can take your creation to the next level! Consider using mini burlap bags or rustic wooden trays for serving. You can layer fresh greens or colorful autumn leaves beneath each cup, adding a comforting touch. A cute tag with a fun fact about the contents or recipe can engage your guests even further.
Why not elevate the experience by adding personalized napkins or coasters that match the season? Get creative with the arrangement—stack the cups in a pyramid shape for a stunning centerpiece.
Pairing ideas for different occasions
Tailoring your cornucopia cups to specific gatherings makes them even more memorable!
- Thanksgiving: Serve with cranberry apple cider for a festive treat.
- Autumn brunch: Pair with chai lattes to warm your guests.
- Game day: Complement with spicy pumpkin-flavored popcorn; it’s a surprising twist!
Whichever way you choose to serve, these cornucopia cups are a delightful addition to any occasion!
Time Breakdown for Making Cornucopia Cups
Preparation Time
Getting ready to make your cornucopia cups is a breeze! You’ll want to allocate about 30 minutes for prep. This includes gathering ingredients, assembling your tools, and prepping any fillings. If you need ideas for perfect autumn fillings, check out this guide on seasonal ingredients.
Cooking Time
The cooking process is pretty quick, taking around 15 minutes. This is when the magic happens: bake your edible cornucopias until they’re golden and crisp. You’ll be amazed at how quickly they come together.
Total Time from Start to Finish
So, if you add it all up, you’re looking at roughly 45 minutes from start to finish. That’s right — in less than an hour, you can impress your friends and family with these adorable cornucopia cups! Perfect for gatherings, they’ll become a favorite for sure!
Nutritional Facts for Cornucopia Cups
Estimated calories per serving
When you’re considering how to make the cutest cornucopia cups, you might be curious about the nutritional aspects. Each serving of these delightful little treats contains approximately 250 calories. This makes them a perfect option for a light snack or an appealing appetizer for gatherings.
Breakdown of key nutrients
These Cornucopia Cups aren’t just cute; they also pack a nutritious punch! Here’s a closer look at what’s inside:
- Protein: With turkey bacon and chicken ham, you’ll get a hearty serving of protein, which is essential for muscle repair and overall health.
- Fiber: The veggies contribute to your daily fiber intake, promoting digestive health and keeping you feeling full longer.
- Vitamins & Minerals: Expect a boost of vitamins A and C from the fresh produce added to your cups, which helps support your immune system.
Incorporating these cups into your diet can be a fun way to explore new flavors. Check out the USDA’s Nutritional Database for more details on nutrition! By balancing taste and health, you’ll enjoy every bite without compromising your wellness goals.
FAQ About Cornucopia Cups
How can I store leftover cornucopia cups?
Leftover cornucopia cups can be a delightful treat for days to come! If you have any you’d like to save, simply store them in an airtight container in the refrigerator for up to three days. To keep the shells crispy, it’s best to store the filling separately and assemble them just before serving. This way, you’ll ensure that the delightful crunch remains intact for your next snack or gathering!
Can I make the dough from scratch?
Absolutely! If you’re feeling adventurous and want to know how to make the cutest cornucopia cups from the ground up, making the dough from scratch is a wonderful idea. Combine flour, butter, salt, and a splash of water to create a delicious, flaky pastry. There are many excellent resources online—check out this homemade pastry dough guide for tips and techniques. Just remember that the dough must be rolled thinly for the best results.
What are some alternative fillings if I’m vegetarian?
No worries! There are plenty of vegetarian alternatives for your cornucopia cups. Here are some ideas to get you started:
- Roasted vegetables: Think bell peppers, zucchini, and sweet potatoes.
- Cheese blends: Try a mix of feta and mozzarella for a tangy twist.
- Great grains: Quinoa or farro can add a hearty texture.
- Beans: Black beans or chickpeas can provide great protein and flavor.
With these suggestions, your cornucopia cups will be flavorful for everyone, no matter their dietary preferences!
Feeling inspired? Don’t hesitate to get creative with your fillings! The options are truly endless.
Conclusion on Making Cornucopia Cups
Creating your own delectable cornucopia cups is not just a delightful culinary project; it’s a celebration of homemade joy and creativity. From choosing the right ingredients to assembling your edible masterpieces, this process invites you to engage fully in the experience.
Remember, the fun lies in experimenting with fillings like turkey bacon, chicken ham, or even veggies, allowing your imagination to run wild. As you explore how to make the cutest cornucopia cups, relish the time spent in the kitchen, and consider sharing your creations with friends or family.
For more inspiration, visit Food Network for additional recipes and tips to enhance your food-making skills!
PrintHow to Make the Cutest Cornucopia Cups for a Festive Feast

Learn how to create adorable cornucopia cups that are perfect for your festive celebrations!
- Prep Time: 20 minutes
- Total Time: 20 minutes
- Yield: 12 servings 1x
- Category: Desserts
- Method: No-Bake
- Cuisine: American
- Diet: Vegetarian
Ingredients
- 12 mini sugar cones for the cornucopia
- 1 cup chocolate chips
- 1 cup assorted candies (e.g., gummy fruits, chocolate covered nuts)
- 2 cups whipped cream or whipped topping
- 1 tablespoon edible gold or silver glitter (optional)
Instructions
- Melt the chocolate chips in a microwave-safe bowl until smooth.
- Dip the rim of each mini sugar cone into the melted chocolate, then let it sit to set.
- Once set, fill each cone with whipped cream.
- Decorate the tops with assorted candies.
- If desired, sprinkle with edible glitter for a festive touch.
Notes
- Consider using seasonal candies for an autumn theme.
- These cups can be prepared a few hours in advance.
Nutrition
- Serving Size: 1 cornucopia cup
- Calories: 150
- Sugar: 15g
- Sodium: 10mg
- Fat: 7g
- Saturated Fat: 3g
- Unsaturated Fat: 4g
- Trans Fat: 0g
- Carbohydrates: 21g
- Fiber: 1g
- Protein: 1g
- Cholesterol: 5mg
Keywords: cornucopia cups, festive treats, holiday snacks