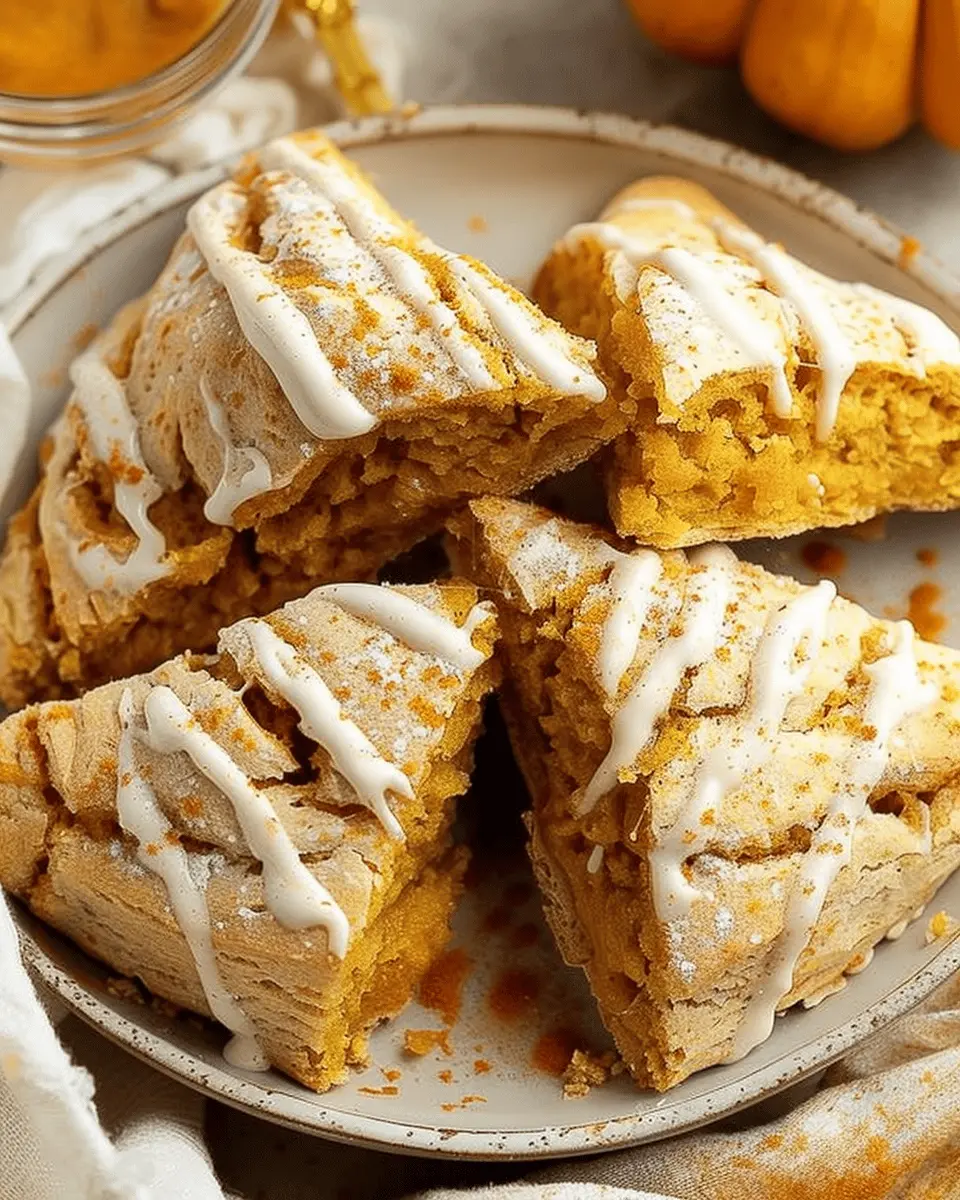
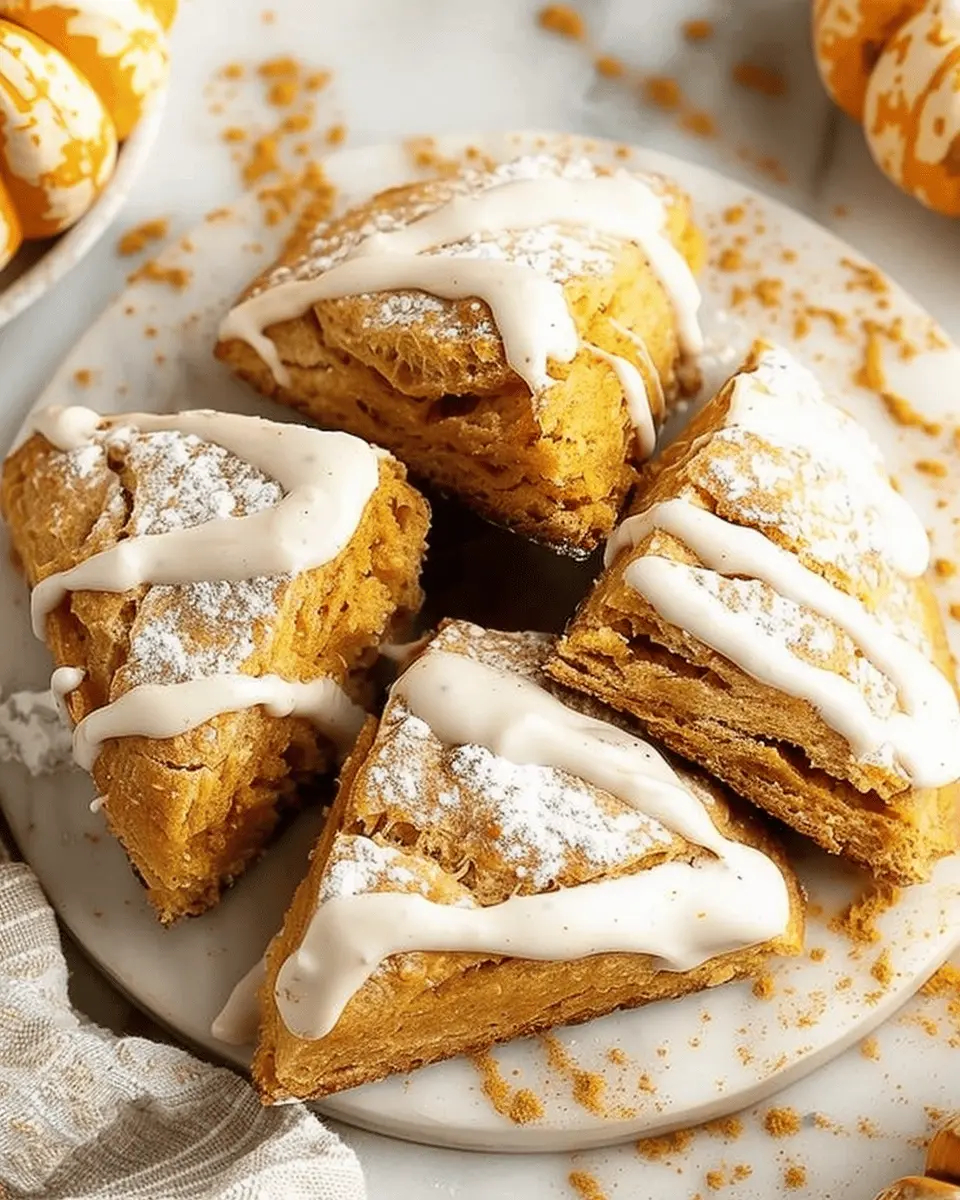
Introduction to Pumpkin Scones
As the leaves turn and the air crisps up, there’s nothing quite like indulging in the delightful flavors of fall. Enter pumpkin scones, a delicious treat that embodies the essence of the season. But what makes these pastries such a perfect match for autumn? Let’s dig into that, shall we?
Why Pumpkin Scones Are Perfect for Fall
When you think of pumpkin scones, it’s hard not to imagine cozy mornings with a warm cup of coffee or tea. The flavors of cinnamon, nutmeg, and cloves are synonymous with the season, making these scones a fantastic go-to for breakfast or an afternoon snack. There’s something remarkably comforting about a freshly baked scone, especially one that highlights the richness of pumpkin.
-
Seasonal Ingredients: Pumpkin is in high demand during fall, and for good reason. Not only is it a versatile ingredient, but it’s also loaded with health benefits. This rich source of vitamins A, C, and E can help boost your immune system during those cooler months.
-
A Culinary Canvas: The beauty of pumpkin scones lies in their adaptability. You can enhance them with a variety of mix-ins, such as chocolate chips, nuts, or even turkey bacon for a savory twist.
-
Perfect for Gatherings: Hosting a brunch or a cozy get-together? Pumpkin scones are charming and impressive, yet easy to whip up. Just imagine your friends delighting in the aroma wafting through your kitchen!
Additionally, the preparation process can be a fun, bonding experience. Cooking together naturally brings people closer, and who doesn’t love a reason to gather around the kitchen?
Incorporating pumpkin scones into your fall routines can also set the stage for cherished traditions. Whether you enjoy them on a leisurely weekend or during a hectic weekday morning, these delicious bites can easily become a staple in your life. If you’re looking to learn more about the nutritional aspects of pumpkin, check out the benefits outlined by the Harvard Health Blog.
Ready to embrace the flavors of fall? Let’s dive into the recipe and get baking!
Ingredients for Pumpkin Scones
Essential ingredients for the perfect scones
Creating pumpkin scones that turn out fluffy and flavorful starts with a few key ingredients. Here’s what you’ll need:
- All-purpose flour: The backbone of your scone, providing structure.
- Granulated sugar: A little sweetness elevates the pumpkin flavor beautifully.
- Pumpkin puree: Fresh or canned works! It’s the star of this recipe.
- Baking powder and baking soda: These leavening agents ensure your scones rise perfectly.
- Salt: A pinch is essential to balance the sweetness.
- Spices: Think warm flavors like cinnamon, nutmeg, and ginger for that cozy fall taste.
- Butter: Cold and cubed, it creates those desirable flaky layers.
- Heavy cream or buttermilk: This adds richness and moisture for a tender crumb.
Optional ingredients to customize your taste
Feel like mixing things up? Here are some optional ingredients to add your personal touch to those pumpkin scones:
- Chocolate chips or nuts: Add a sweet or crunchy texture.
- Dried fruit: Raisins or cranberries can provide a delightful contrast.
- Glaze or frosting: A simple sugar glaze can take your scones to the next level.
Whether you stick to the essentials or play with flavors, your pumpkin scones will surely impress friends and family. Ready to bake? Check out our recommended tips on measuring ingredients here!
Preparing Pumpkin Scones
Autumn is knocking on the door, and what better way to embrace the season than with delicious, homemade pumpkin scones? They’re moist, flavorful, and perfect for pairing with a hot beverage. Whether you’re hosting a gathering or just treating yourself, these scones will surely impress. Let’s walk through the steps to create these delightful treats!
Gather Your Ingredients
Before diving into the baking process, it’s essential to gather all your ingredients. For pumpkin scones, you’ll need:
- 2 cups all-purpose flour
- 1/2 cup granulated sugar
- 1 tablespoon baking powder
- 1/2 teaspoon baking soda
- 1/2 teaspoon salt
- 1 teaspoon ground cinnamon
- 1/2 teaspoon ground nutmeg
- 1/2 cup cold unsalted butter (cubed)
- 1 cup canned pumpkin puree (not pumpkin pie filling)
- 1/4 cup half-and-half or milk
- 1 large egg
- 1 teaspoon vanilla extract
Make sure everything is at hand! This way, you can speed through the process without the last-minute kitchen scavenger hunts.
Whisk Dry Ingredients Together
In a mixing bowl, whisk together the flour, sugar, baking powder, baking soda, salt, cinnamon, and nutmeg. This step is essential for evenly distributing the leavening agents and spices throughout the batter. As you whisk, take a moment to inhale the warm, inviting aroma of the spices—it’s like a hug from autumn itself!
Incorporate Butter into the Mixture
Next, it’s time to incorporate the cold butter into your dry mixture. Using a pastry cutter or your fingertips, cut the butter into the flour mixture until it resembles coarse crumbs. The cold butter creates those lovely flaky layers in your scones. If you want a little geeky baking knowledge, cold fat in pastries is crucial for that perfect texture!
Blot and Mix Pumpkin with Wet Ingredients
In a separate bowl, mix the pumpkin puree, half-and-half or milk, egg, and vanilla extract until you have a lovely homogenous blend. Make sure to blot the pumpkin to reduce excess moisture, ensuring your scones are not too wet. Think about it—who wants a soggy scone?
Combine Wet and Dry Ingredients
Now comes the fun part—combine your wet and dry ingredients! Pour the wet mixture into the dry ingredients and gently fold them together with a spatula until just combined. Be careful not to overwork the dough; a few lumps are perfectly fine.
Shape and Cut the Scones
On a floured surface, turn out the dough. Shape it into a circle about 1-inch thick. Use a sharp knife or a bench scraper to cut your dough into 8-12 wedges. If you’re feeling fancy, you can use cookie cutters to create fun shapes!
Chill and Prepare for Baking
Transfer your scone wedges to a parchment-lined baking sheet. For best results, chill them in the fridge for about 30 minutes. This step helps maintain that flaky texture during baking, so don’t skip it!
Bake the Scones to Golden Perfection
Preheat your oven to 400°F (200°C). Once your scones have chilled, pop them in the oven and bake for 15-20 minutes or until they’re golden brown. Your kitchen will soon be filled with a heavenly scent that makes everyone wonder what’s cooking.
Make the Glazes
While the scones are baking, you can prepare the optional glaze. Simply whisk together powdered sugar with a little milk and vanilla extract until smooth. Want an extra kick? You can add a hint of maple syrup or some spices like cinnamon for a more festive flair.
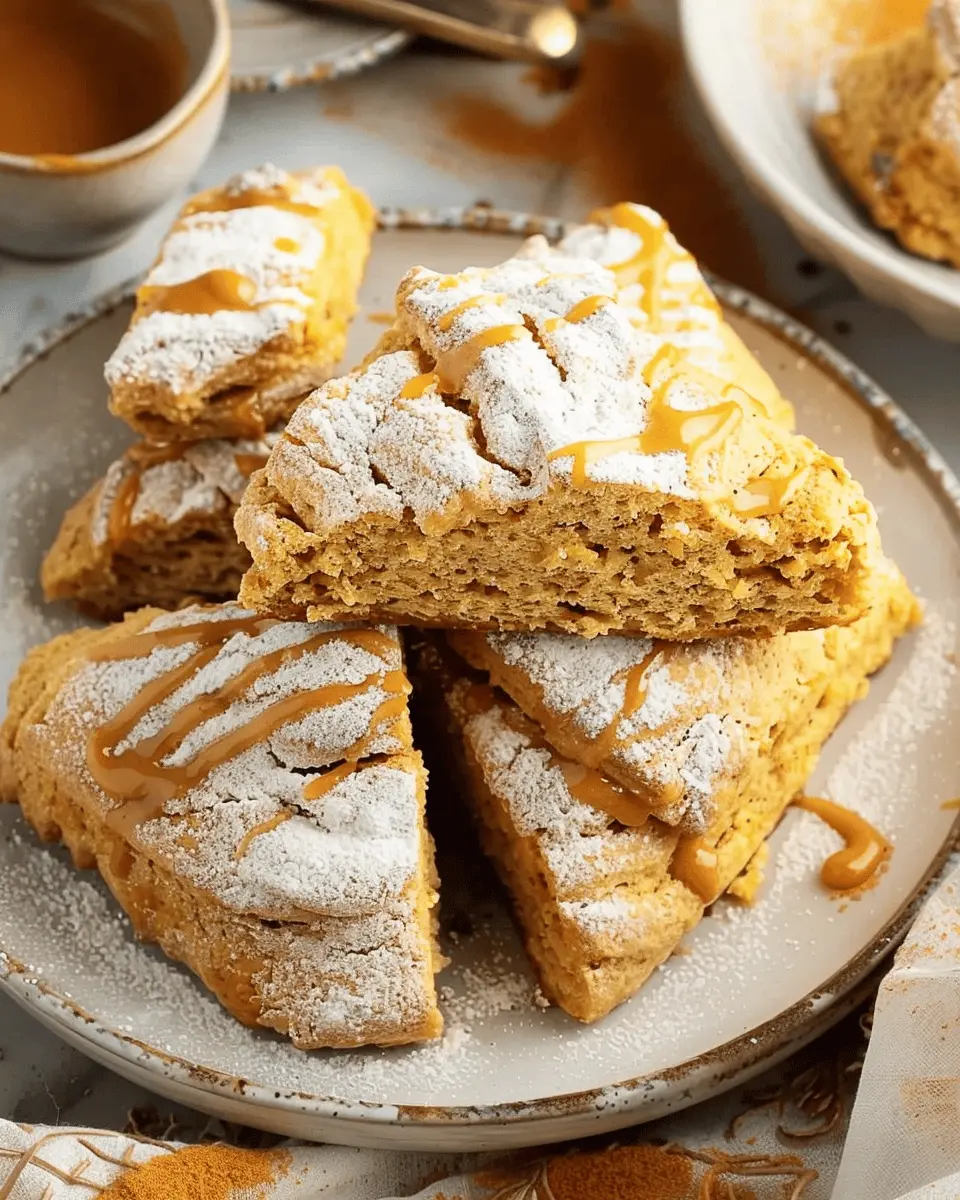
Glaze and Finish Your Scones
Once the scones are out of the oven and have cooled slightly, drizzle your glaze over them. Let it set for a few minutes before digging in. You can also top with some toasted pumpkin seeds or chopped pecans for added texture.
There you have it—your delicious pumpkin scones are ready to be enjoyed! Whether served warm for breakfast or as an afternoon snack, they are bound to become a seasonal favorite. For more tips on baking techniques and delicious recipes, feel free to explore resources like the BBC Good Food or America’s Test Kitchen. Happy baking!
Variations on Pumpkin Scones
When it comes to pumpkin scones, the beauty of this recipe lies in its versatility! You can easily tailor your scones to match your cravings or complement your favorite seasonal flavors. Let’s dive into some fun variations!
Adding nuts or chocolate
One delightful way to elevate your pumpkin scones is by incorporating nuts or chocolate.
- Nuts: Chopped pecans or walnuts add a great crunch and flavor, balancing the softness of the scone. Toasting the nuts beforehand can really enhance their aroma.
- Chocolate: If you’re in the mood for something sweet, consider folding in chocolate chips or chunks. Dark chocolate pairs wonderfully with pumpkin, while white chocolate offers a sweeter contrast.
These additions not only add flavor but also provide different texture experiences. People often rave about how a bit of crunch from nuts can change the entire scone dynamic!
Creating different flavored glazes
Don’t stop at the scone itself; the glaze can be just as thrilling.
- Maple Glaze: A classic choice, just mix powdered sugar with pure maple syrup and a splash of milk.
- Spiced Cream Cheese Glaze: Blend cream cheese, powdered sugar, and a touch of cinnamon for a tangy twist.
- Honey Drizzle: For a healthier option, simply drizzle honey over your warm scones for a subtle sweetness.
Experimenting with these glazes can take your pumpkin scones from ordinary to extraordinary! The right glaze can really tie together the flavors and make your treat feel extra special.
Whether you’re sprinkling in some nuts, melting in chocolate, or drizzling a delightful glaze, you’re guaranteed to impress yourself and your guests. Ready to get baking? For more tips on transforming your baked goods, check out this inspiring article from Bon Appétit.
Baking Notes for Pumpkin Scones
Common Mistakes to Avoid
When crafting your pumpkin scones, there are a few pitfalls you want to steer clear of to ensure your scones turn out perfectly. One common mistake is overworking the dough, which can lead to tough scones. Remember, mix just until the ingredients come together! Additionally, be cautious with your baking powder; using stale or expired powder can result in dense, flat scones.
Another tip? Don’t skip the chilling step! Allowing the dough to rest in the fridge helps the flavors meld and yields a flakier texture.
Adjusting for Altitude or Humidity
Baking at higher altitudes can affect the moisture and rise of your pumpkin scones. If you’re over 3,000 feet, you might need to adjust your flour and liquid ratios. Reducing the amount of flour slightly while increasing the liquid can help maintain the right texture. Similarly, if you’re dealing with high humidity, you might need to add a bit more flour to absorb excess moisture.
For accurate adjustments, consider consulting this guide on high-altitude baking for expert advice. Happy baking!
Serving Suggestions for Pumpkin Scones
Pairing with Beverages
When it comes to enjoying your pumpkin scones, the right beverage can elevate the experience. Pair these delightful treats with a comforting cup of coffee or a rich, spiced chai tea. The blend of warm spices in these drinks complements the scones beautifully, enhancing the flavors. For something more refreshing, consider a pumpkin spice latte or freshly brewed apple cider. These options not only harmonize with the flavors of your scones but also create a cozy atmosphere, perfect for an autumn afternoon.
Creative Serving Presentation Ideas
Presentation matters, especially when you’re sharing your pumpkin scones. Try stacking them on a tiered serving stand for a touch of elegance or place them on a rustic wooden board with small bowls of honey or maple syrup for dipping. Garnish with a sprinkle of cinnamon or a dusting of powdered sugar to add a visual pop. You could also wrap some scones in parchment paper tied with twine for a charming, homemade gift idea.
These simple yet effective ideas can take your scone experience from ordinary to extraordinary. For more creative tips on presentation, check out this article from Martha Stewart.
Tips for Making Perfect Pumpkin Scones
Importance of Ingredient Temperature
When crafting your pumpkin scones, ingredient temperature can significantly impact the final texture and flavor. Always use cold butter; this is crucial to achieving that flaky, tender crumb. Cold butter creates pockets of air while baking, giving your scones their delightful texture. Similarly, if you’re incorporating cold milk or cream, it helps maintain that temperature balance in your dough. Remember, warm ingredients can turn your scones dense and chewy—definitely not what you’re aiming for!
How to Know When They’re Baked Perfectly
Perfectly baked pumpkin scones should be golden brown and firm to the touch. Here are some tips to ensure they’re just right:
- Color: Look for a rich, golden hue that evokes autumn vibes.
- Touch: Gently press the top; it should bounce back slightly without leaving an indentation.
- Toothpick Test: Insert a toothpick into the center—if it comes out clean or with just a few crumbs, you’re good to go!
Don’t forget about the aroma! The scent of warm spices and pumpkin will fill your kitchen; if that hasn’t enveloped you yet, give them a few more minutes. For more tips on baking, visit King Arthur Baking or check out Bon Appétit for additional advice! Happy baking!
Time Breakdown for Pumpkin Scones
When it comes to whipping up delightful pumpkin scones, getting your timing right is essential for that perfect bake. Let’s break down the time needed for these tasty treats.
Preparation time
First off, set aside about 15 minutes to gather your ingredients and mix them together. It’s a great time to enjoy your favorite podcast or a cup of coffee—multi-tasking at its finest!
Baking time
Next, let those pumpkin scones bake in the oven for about 20-25 minutes. Keep an eye on them; that golden-brown top means they’re practically calling your name!
Total time
In total, you’re looking at approximately 35-40 minutes from start to finish. Perfect for a weekend brunch or a cozy afternoon snack. If you’re keen on more PM suggestions, consider pairing these with a warm apple cider for that extra fall vibe!
For more tips on baking times, check out resources like the King Arthur Baking Company, where they delve into the science of baking. Enjoy your pumpkin scones!
Nutritional Information for Pumpkin Scones
Calories per serving
Each serving of these delightful pumpkin scones contains approximately 220 calories. This makes them a fantastic choice for a treat that won’t completely derail your healthy eating goals.
Key nutritional details
Let’s break down some essential nutritional factors to help you enjoy your pumpkin scones mindfully:
- Carbohydrates: About 32g per scone. This offers a nice energy boost, ideal for a morning snack or afternoon pick-me-up.
- Fat: Around 8g, predominantly from butter, which contributes richness without overwhelming flavor.
- Protein: With roughly 2g per serving, combining scones with a source of protein like Turkey Bacon or a yogurt can make for a well-rounded meal.
- Fiber: Approximately 1g, thanks to the pumpkin puree, which aids digestion.
For those keeping an eye on their nutrients, pumpkin scones can be a delightful addition to your diet. You might also be interested in learning more about the health benefits of pumpkin, which is packed with vitamins and minerals. Check out this insightful article on pumpkin’s nutritional benefits for more information!
Whether enjoyed alone or served with a warm beverage, knowing the nutritional content can help you savor every bite responsibly. What’s your favorite way to enjoy scones?
FAQs about Pumpkin Scones
Can I substitute ingredients?
Absolutely, experimenting with ingredients in your pumpkin scones can lead to delicious variations! Some popular substitutes include:
- Flour: You can use whole wheat flour for a healthier option or gluten-free flour if you’re avoiding gluten.
- Pumpkin puree: If you don’t have canned pumpkin, homemade puree works just as well; just make sure it’s properly drained and smooth.
- Butter: Coconut oil or a quality vegetable oil can create a lovely vegan version.
- Sweeteners: Feel free to swap white sugar for brown sugar or even maple syrup for a delightful twist.
For more tips on substitutions, check out BBC Good Food.
How do I store leftover scones?
If you find yourself with leftover pumpkin scones (rare, but it happens!), you’ll want to keep them fresh.
- Room Temperature: Store them in an airtight container for up to two days.
- Refrigeration: For longer storage, place them in the fridge for up to a week.
Just make sure they’re wrapped tightly to prevent them from getting stale!
What’s the best way to reheat them?
Reheating pumpkin scones can restore their fresh-baked taste. Here’s how:
- Oven: Preheat your oven to 350°F (175°C). Place the scones on a baking sheet and warm for about 5-10 minutes.
- Microwave: If you’re in a hurry, pop one scone in the microwave for about 15-20 seconds. Just be careful not to overdo it, as they can turn rubbery!
Enjoy your perfectly warmed pumpkin scones with a nice cup of tea or coffee for an inviting treat!
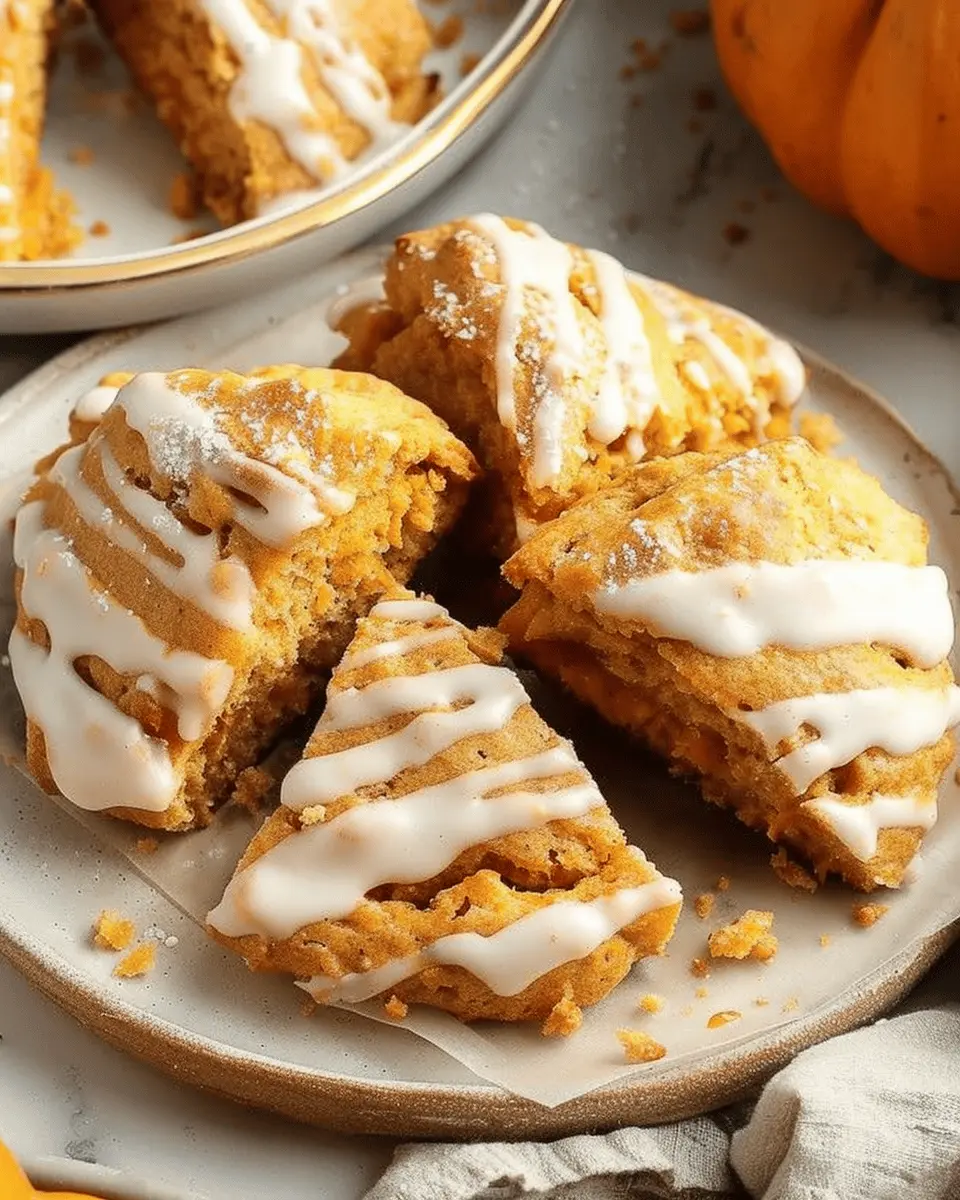
Conclusion on Pumpkin Scones
Recap of the pumpkin scone experience
As we wrap up our delightful journey with pumpkin scones, it’s clear that these treats are perfect for any occasion. From cozy fall mornings to festive gatherings, every bite bursts with warm spices and rich pumpkin flavor. Whether you enjoy them plain or drizzled with a creamy glaze, these scones never fail to impress.
Remember, creating pumpkin scones isn’t just about baking; it’s about crafting memories with friends and family. Curious to try out variations? Consider adding nuts or cranberries for an added crunch! Also, check out this link to discover more delicious scone recipes. Embrace the season and enjoy every crumb!
PrintPumpkin Scones: Easy Recipe for Cozy Autumn Treats at Home
Enjoy a delightful and easy recipe for pumpkin scones that perfectly capture the flavors of autumn.
- Prep Time: 15 minutes
- Cook Time: 25 minutes
- Total Time: 40 minutes
- Yield: 12 scones 1x
- Category: Baked Goods
- Method: Baking
- Cuisine: American
- Diet: Vegetarian
Ingredients
- 2 cups all-purpose flour
- 1 cup pureed pumpkin
- 1/2 cup brown sugar
- 1/4 cup butter, softened
- 1/2 cup milk
- 1 tablespoon baking powder
- 1 teaspoon cinnamon
- 1/2 teaspoon nutmeg
- 1/4 teaspoon salt
- 1 egg
Instructions
- Preheat the oven to 350°F (175°C).
- In a bowl, mix the dry ingredients together.
- In another bowl, combine pumpkin, butter, milk, and egg.
- Gradually add wet ingredients to the dry ingredients until combined.
- Shape the dough and place on a baking sheet.
- Bake for 20-25 minutes or until golden brown.
Notes
- For an extra touch, add chocolate chips or nuts.
- Serve warm with butter for a delicious treat.
Nutrition
- Serving Size: 1 scone
- Calories: 200
- Sugar: 8g
- Sodium: 150mg
- Fat: 8g
- Saturated Fat: 5g
- Unsaturated Fat: 2g
- Trans Fat: 0g
- Carbohydrates: 30g
- Fiber: 1g
- Protein: 3g
- Cholesterol: 30mg
Keywords: Pumpkin Scones