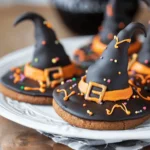
Introduction to Witch Hat Cookies
Witch Hat Cookies are not just delightful treats; they’re a fun nod to the spooky season that both kids and adults can enjoy. Imagine gathering around with friends or family, crafting these simple yet charming cookies as part of your Halloween celebrations. They make for perfect snacks at themed parties, classroom treats, or even casual get-togethers. With just a few ingredients, you can create a batch that will impress your guests and delight your taste buds.
Why Witch Hat Cookies Are a Festive Favorite
So, why are Witch Hat Cookies such a staple during Halloween? For starters, their whimsical shape resembles traditional witch hats, making them an irresistible sight on any dessert table. Furthermore, they are easy to bake and decorate, which invites creativity—perfect for those who may not have a lot of baking experience but still want to contribute something fun to the occasion. Plus, who doesn’t love edible treats that spark nostalgia for childhood Halloween costumes?
Studies show that festive foods, like Halloween treats, can evoke positive emotions and bring people together (source: Psychology Today). Think about how sharing these cookies can create moments of joy, laughter, and connection.
Ingredients and Simplicity
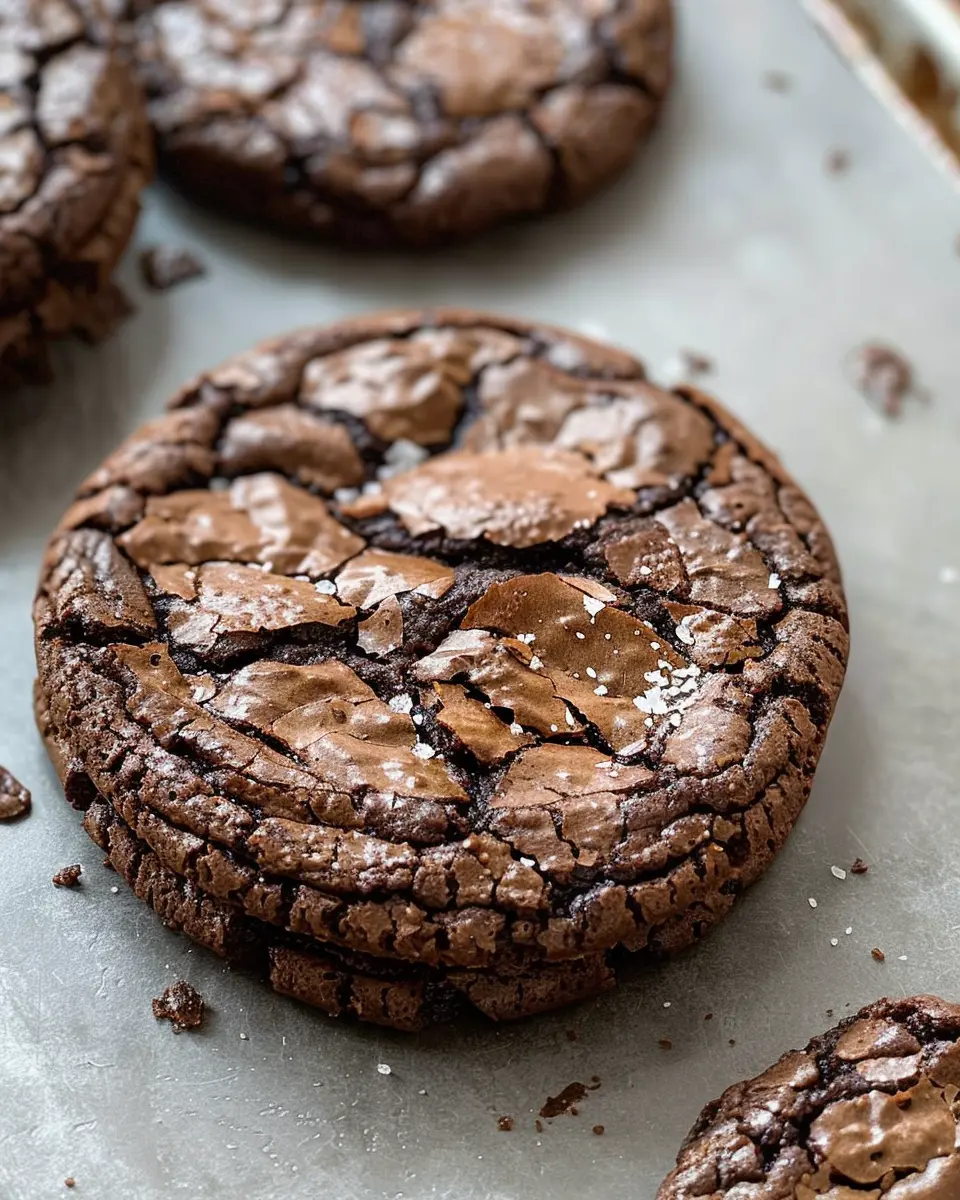
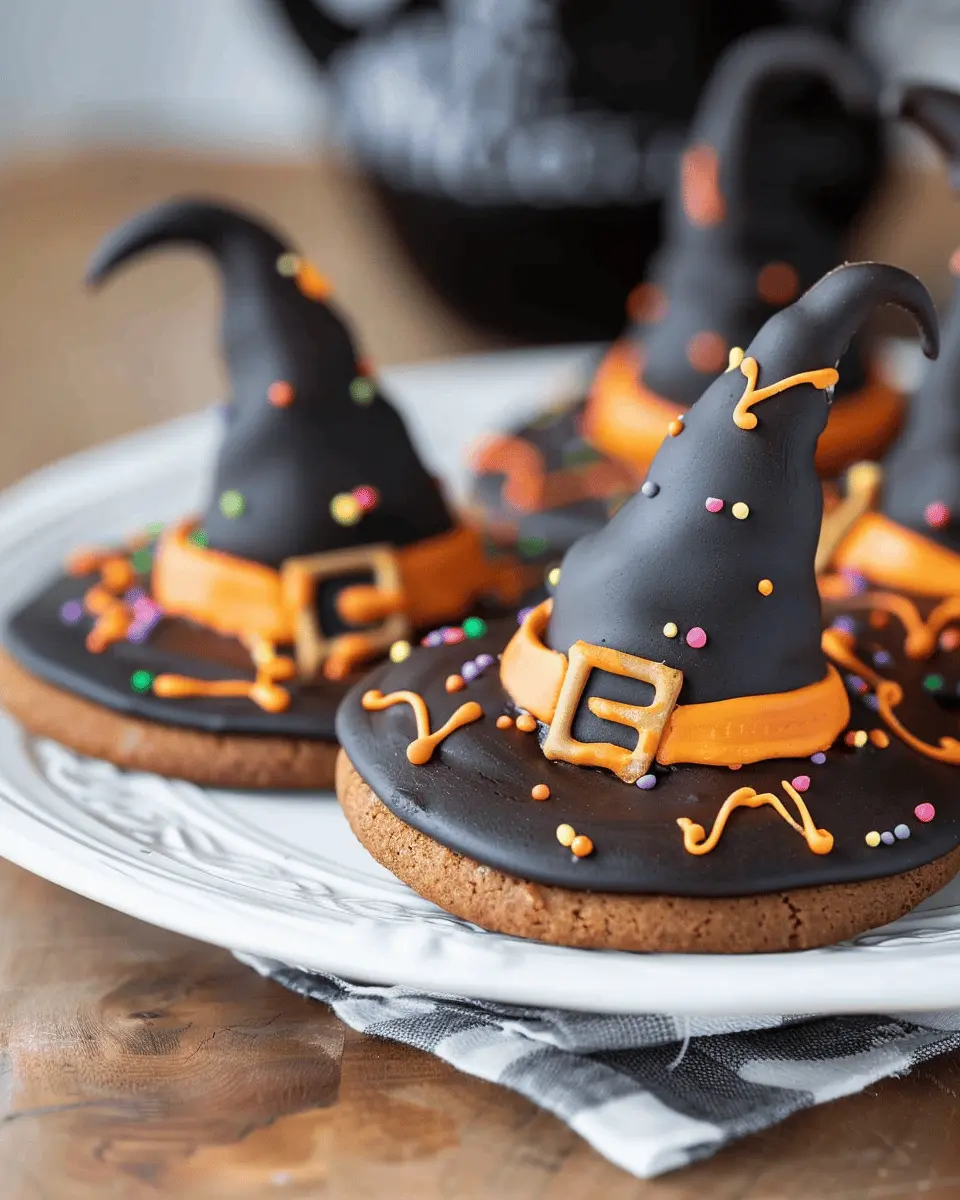
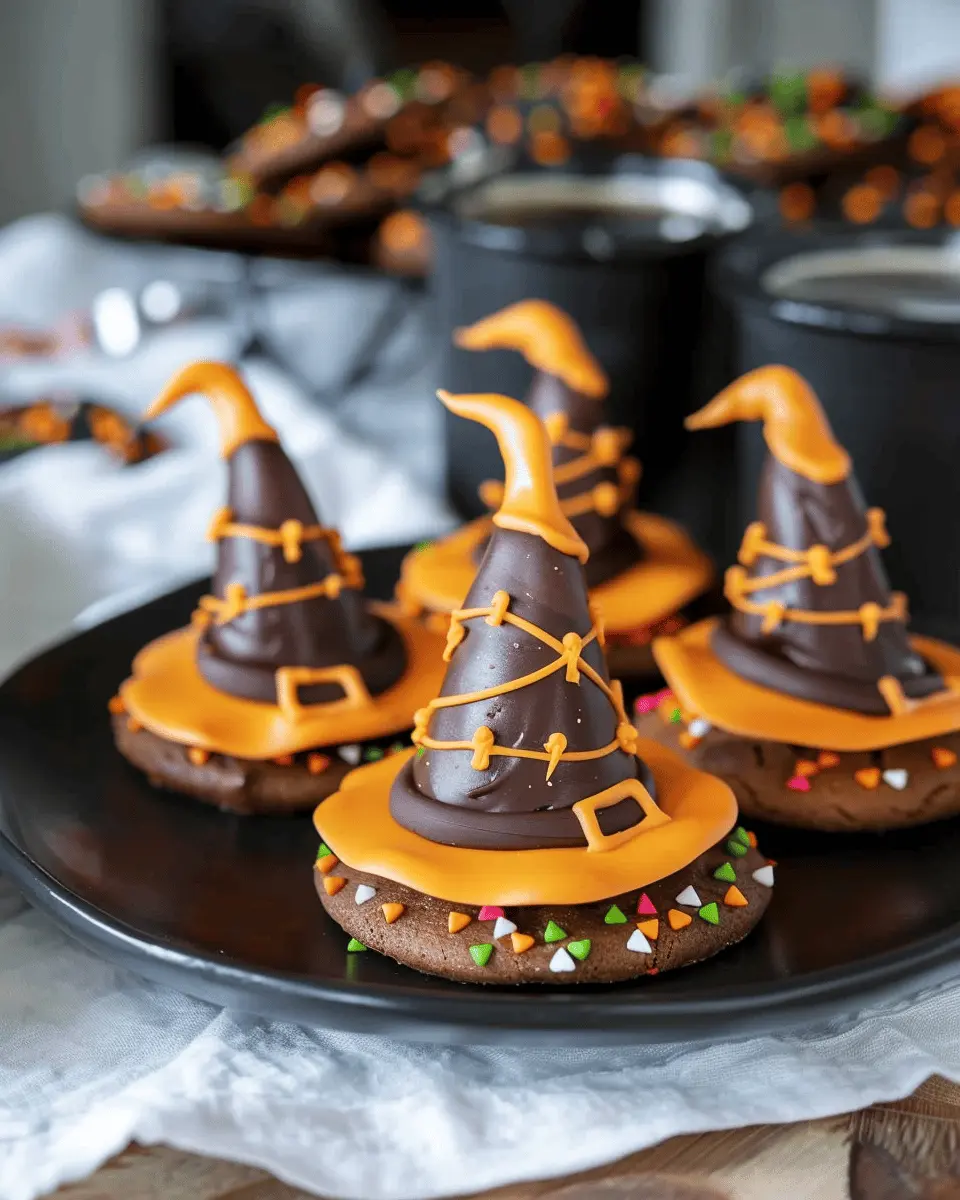
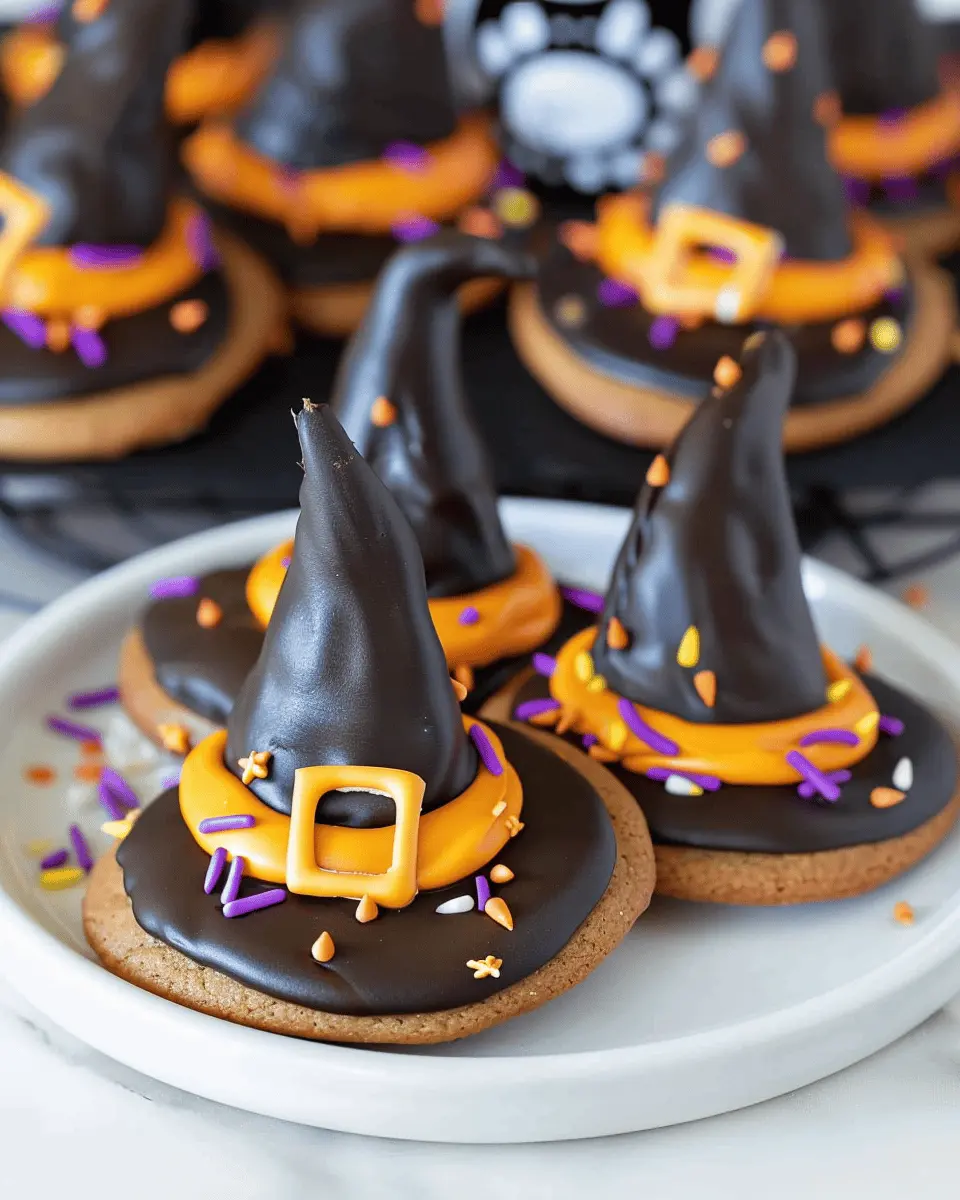
The beauty of Witch Hat Cookies lies in their simplicity. You don’t need an extensive list of unusual ingredients. Typically, you’ll start with sugar cookies or a chocolate cookie base, topped with a chocolate Hershey’s Kiss to form the hat’s peak. Use orange or purple candy melts as ‘glue’ for the decorations, throwing in some candy corn for that extra spooky touch.
If you’re looking for alternatives, you could even consider using chocolate-covered pretzels as a base—delicious and crunchy! This recipe can be customized based on dietary preferences; the options are virtually endless.
Get Creative!
Don’t hesitate to add your own spin! Incorporating sprinkles, unique candy decorations, or even food colorings can turn this already fun cookie into a personal masterpiece. It’s all about sparking imagination and enjoying the baking process.
For more Halloween inspiration and other fun recipes, check out food blogs like Bakerella for ideas that blend creativity and cuisine. In the spirit of the season, let’s get those ovens preheating and start making some Witch Hat Cookies that everyone will remember!
Ingredients for Witch Hat Cookies
Creating Witch Hat Cookies is not just about baking; it’s about crafting delightful treats that bring a festive spirit to your gatherings. To whip up these enchanting cookies, gather the following ingredients, which you might already have in your pantry. Here’s what you’ll need:
- Sugar Cookies: Start with a batch of your favorite sugar cookies. You can make these from scratch or use store-bought dough for convenience.
- Chocolate Kisses: The star of the show! Choose classic chocolate kisses to create the “hats.”
- Chocolate Frosting: A rich chocolate frosting will help secure the kisses and add a delicious layer of flavor.
- Candy Corn: Get colorful with some candy corn, which you’ll use for decoration.
- Black Sprinkles or Edible Glitter: These will add a touch of magic to your witch hats.
Don’t forget to check your local stores for unique sprinkles to elevate your Witch Hat Cookies! Ready to get started? Let’s cast a sweet spell in your kitchen!
Preparing Witch Hat Cookies
Making Witch Hat Cookies is a delightful experience, perfect for any Halloween gathering or festive get-together. These charming little treats will add a touch of whimsy and creativity to your dessert spread, and they’re surprisingly simple to make! Let’s dive into the steps that will help you craft these adorable cookies, ensuring they turn out just as enchanting as you envision.
Gather Your Ingredients
The first step in preparing your Witch Hat Cookies is to gather the right ingredients. Here’s what you’ll need:
- Chocolate Cookies: You can use store-bought chocolate cookies or make your own from scratch.
- Hershey’s Kisses: These will form the hat’s pointy top.
- Chocolate Frosting: A versatile frosting is ideal for gluing the ‘hats’ onto the cookies.
- Candy Corn or Violet Hard Candies: These will serve as decoration and add an extra pop of color.
- Sprinkles: Get creative! Opt for Halloween-themed sprinkles like orange and black or any fun mixture you fancy.
Make sure to have all your ingredients measured and ready to go before you begin. An organized workspace allows the magic of baking to flow smoothly, minimizing last-minute scrambles!
Assemble the Witch Hat Cookies
Once you’ve gathered your ingredients, it’s time to assemble your Witch Hat Cookies. This is where the fun truly begins! Here’s how to do it:
-
Prepare Your Workspace: Lay down parchment paper on a clean counter or baking sheet to set up your cookies. It helps keep the area tidy and allows for easy transport of your finished cookies.
-
Frost the Bases: Take your chocolate cookies and place a generous amount of chocolate frosting on top. This frosting is essential as it acts as the glue for the Hershey’s Kisses.
-
Make the Hats: Unwrap your Hershey’s Kisses and place one on top of each frosted cookie. Gently press down to ensure they stay in place. This step should be done carefully to prevent the cookie from breaking.
-
Add the Candy Corn: For an added touch of charm, place a piece of candy corn or a violet hard candy on the base of the chocolate kiss. This gives an adorable contrast of color and completes the witch hat look.
-
Let Them Set: Allow the frosting to set a bit if you feel it is too loose. It’ll help in keeping everything intact when you move on to decorating.
If you want to brush up on the science behind baking and get more tips on cookie-making, check out this informative guide from King Arthur Baking. Their advice on mixing techniques and baking temperatures can elevate your cookie game!
Decorate with Sprinkles
Now that your Witch Hat Cookies are assembled, it’s time to unleash your creativity with sprinkles. This step isn’t just about looks; it’s about personal expression. Here’s what to focus on:
-
Choose Your Sprinkles: Opt for a mix of colors that resonate with the Halloween theme. Think spooky vibes with black and orange, or get whimsical with other festive colors you may have on hand.
-
Sprinkle Away: Lightly sprinkle your chosen toppings over the cookies. Aim for an even distribution, and remember that less is sometimes more!
-
Add a Personal Touch: If you’re feeling particularly artistic, consider drizzling a little extra chocolate frosting on top of your sprinkles for an even more intricate design.
Once decorated, let your cookies rest for a short while to allow the frosting to harden slightly. This will make your cookies presentable and easier to serve!
By following these steps, you’ll master the art of creating Witch Hat Cookies. Friends, family, and coworkers alike will adore these whimsical treats, which are sure to disappear faster than you can say “Boo!” So, grab your baking supplies, put on your favorite Halloween playlist, and get ready to impress with these charming cookies. Happy baking!
Variations on Witch Hat Cookies
Using Different Types of Cookies
One of the best features of Witch Hat Cookies is their versatility! While the classic chocolate cookie is delightful, trying out different bases can add a fun twist. Consider using:
- Peanut Butter Cookies: Their rich flavor pairs beautifully with chocolate kisses and adds an extra layer of deliciousness.
- Sugar Cookies: A simple yet sweet option that allows the chocolate topping to shine. Plus, they can be easily decorated with colorful icing for added flair.
- Gingerbread Cookies: Perfect for fall vibes, the spicy warmth of gingerbread can bring a unique twist to your Halloween festivities.
Experimenting with your cookie base can elevate your Witch Hat Cookies to new levels of flavor!
Adding Unique Toppings or Fillings
To make your Witch Hat Cookies truly one-of-a-kind, consider interesting toppings or fillings. Here are a few ideas to spark your creativity:
- Nut Butters: A dollop of almond or cashew butter under the chocolate kiss adds creaminess and a nutty flavor.
- Sprinkles: Jazz up your cookies with Halloween-themed sprinkles or edible glitter for that festive touch.
- Fruits: Try adding a slice of dried figs or cranberries for a sweet and chewy surprise that contrasts nicely with the chocolate.
By mixing and matching these variations, you’ll create Witch Hat Cookies that not only taste incredible but also look spectacular. So go ahead—experiment with these options, and let your creativity flow! For more inspiration, check out Food Network for amazing cookie recipes and variations.
Baking Tips for Witch Hat Cookies
Ensure Freshness of Ingredients
When making Witch Hat Cookies, the freshness of your ingredients can genuinely make or break your cookies. For the best flavor and texture, always use fresh flour, baking soda, and chocolate. If possible, check the dates on your pantry staples to ensure they’re still good. It might seem trivial, but using aged ingredients can lead to lackluster cookies. As a bonus tip, think about using high-quality chocolate chips; they bring a richer taste that pairs beautifully with the cookie base.
Storage Suggestions for Optimal Taste
To keep your Witch Hat Cookies tasting scrumptious for days, proper storage is key. Place your cookies in an airtight container at room temperature. This helps maintain their chewy texture and prevents them from going stale too quickly. If you’re making them ahead of time for a celebration, consider freezing them. Just layer them with parchment paper in an airtight bag; they’ll stay fresh for up to three months!
For more insights on ingredient freshness, check out this resource from The Kitchn. Happy baking!

Serving Suggestions for Witch Hat Cookies
Perfect Pairings for Halloween Parties
When serving Witch Hat Cookies, consider pairing them with some fun Halloween-themed snacks. Think pumpkin spice popcorn or creepy-crawly gummy worms to keep the spooky spirit alive. You might also complement these cookies with a creamy pumpkin pie dip, perfect for dipping and sharing. A vibrant punch, perhaps a blood orange spritzer, can also create a festive ambiance that delights both kids and adults alike.
Creative Ways to Present Your Cookies
Presentation matters, especially for Witch Hat Cookies. Get creative by arranging them on a black or orange platter, perhaps adding a few faux spider webs for a macabre touch. You can even create a mini “witch’s cauldron” display by stacking the cookies with some edible glitter or candy eyes for an extra scare factor. For an interactive twist, consider having a cookie-decorating station where guests can customize their own hats with colorful icing or sprinkles—this idea not only engages but provides a great conversation starter!
For further inspiration, check out this guide on Halloween party snacks that can complement your Witch Hat Cookies perfectly!
Time Breakdown for Witch Hat Cookies
Preparation Time
Making Witch Hat Cookies is a delightful experience that requires just 15 minutes of preparation time. During this phase, you’ll gather your ingredients and create your batty cookie dough. Don’t forget to preheat your oven; this will save you time later!
Total Time from Start to Finish
From start to finish, expect to spend about 30 minutes whipping up these whimsical treats. After the preparation, the baking will take approximately 10-15 minutes. This quick turnaround makes them perfect for any last-minute Halloween gathering or cozy night in.
Want to dive deeper into cookie creation? Check out this helpful baking guide for tips on perfecting your baking skills!
Nutritional Facts for Witch Hat Cookies
Calories and Nutritional Overview
Witch Hat Cookies are a delightful treat perfect for any festive occasion. Each cookie contains approximately 150 calories, primarily from sugar, butter, and chocolate. While they’re not a health food, they can fit into a balanced diet when enjoyed in moderation. A standard serving of two cookies will provide about:
- Calories: 300
- Total Fat: 15g
- Saturated Fat: 8g
- Sugar: 20g
- Protein: 2g
For a fun and tasty snack, consider pairing them with your favorite beverage!
Dietary Considerations
If you’re curious about whether Witch Hat Cookies can accommodate various dietary needs, here’s what you should know:
- Vegetarian Friendly: These cookies can easily be made vegetarian by using plant-based chocolate and butter alternatives.
- Gluten-Free Option: For those with gluten sensitivities, swap traditional flour with a gluten-free blend.
- Nut Allergies: Always check for nut-free chocolate options if allergies are a concern.
By making these simple adjustments, you can enjoy Witch Hat Cookies while feeling good about your choices. For more insights into healthy baking alternatives, check out resources from the American Heart Association.
FAQs About Witch Hat Cookies
How Long Do Witch Hat Cookies Last?
Once you’ve conjured up a batch of delightful Witch Hat Cookies, you’ll want to know how long you can enjoy them. Typically, these cookies last about 5 to 7 days at room temperature when stored in an airtight container. If you want them to last even longer, consider freezing them! Wrapped tightly, they can be stored in the freezer for up to three months. Just let them thaw at room temperature, and they’ll be ready to delight your taste buds again.
Can I Use Gluten-Free Cookies?
If you or someone you know has dietary restrictions, the good news is that you can absolutely use gluten-free cookies for your Witch Hat Cookies. There are many delicious gluten-free cookie mixes available that will work beautifully. Just make sure the mix includes ingredients that allow the cookies to hold their shape when baked. This ensures that your witch hats look as enchanting as they taste! Check out resources like the Gluten-Free Certification Organization for reliable product recommendations.
What Other Holidays Can I Make These For?
While Witch Hat Cookies are perfect for Halloween, their charm isn’t limited to just one holiday. You can easily adapt the design for various festive occasions! Use different colored candies or sprinkles to transform them for:
- Thanksgiving: Swap the chocolate kisses for pumpkin-shaped candies.
- Christmas: Use holiday-themed candies to create a festive touch.
- Birthday Parties: Customize frosting and decorations to match party themes.
Get creative and let your imagination run wild!
For more unique seasonal cookie ideas, check out sites like AllRecipes and Food Network. Happy baking!
Conclusion on Witch Hat Cookies
Embracing Homemade Fun with Witch Hat Cookies
In wrapping up our delightful journey into the world of Witch Hat Cookies, it’s clear these treats are more than just a Halloween dessert; they’re a gateway to creativity and connection. Perfect for gatherings, family fun, or a simple night in, these cookies invite you to embrace your inner child while impressing your friends with your culinary skills.
Imagine the delight on everyone’s faces as they bite into these whimsical confections, blending rich chocolate, crunchy cones, and vibrant candies. As you make them, don’t forget to share your experience! For tips and variations, check out sites like Food Network and Serious Eats. So, gather your ingredients and let the festivities begin with your very own Witch Hat Cookies!
PrintWitch Hat Cookies: Easy and Fun Treats for Halloween Celebrations
Delightful Witch Hat Cookies perfect for Halloween festivities that are easy to make and fun to enjoy.
- Prep Time: 20 minutes
- Cook Time: 12 minutes
- Total Time: 32 minutes
- Yield: 12 cookies 1x
- Category: Dessert
- Method: Baking
- Cuisine: American
- Diet: Vegetarian
Ingredients
- 1 cup all-purpose flour
- 1/2 cup cocoa powder
- 1/2 cup sugar
- 1/2 cup butter, softened
- 1 egg
- 1 teaspoon vanilla extract
- 1/4 teaspoon salt
- 1 cup chocolate frosting
- 12 candy corn
Instructions
- Preheat your oven to 350°F (175°C).
- In a bowl, cream together the butter and sugar until light and fluffy.
- Add the egg and vanilla extract, mixing well.
- In a separate bowl, combine the flour, cocoa powder, and salt.
- Gradually add the dry ingredients to the wet mixture, stirring until fully combined.
- Roll the dough into small balls and place them on a baking sheet.
- Bake for 10-12 minutes, then cool completely.
- Once cooled, pipe chocolate frosting on top and add a piece of candy corn to resemble a witch’s hat.
Notes
- Ensure the cookies are completely cool before frosting to prevent melting.
- Use different colored candy for a fun twist on the witches’ hats.
Nutrition
- Serving Size: 1 cookie
- Calories: 150
- Sugar: 10g
- Sodium: 50mg
- Fat: 7g
- Saturated Fat: 4g
- Unsaturated Fat: 2g
- Trans Fat: 0g
- Carbohydrates: 20g
- Fiber: 1g
- Protein: 2g
- Cholesterol: 20mg
Keywords: Witch Hat Cookies, Halloween Treats, Easy Cookies