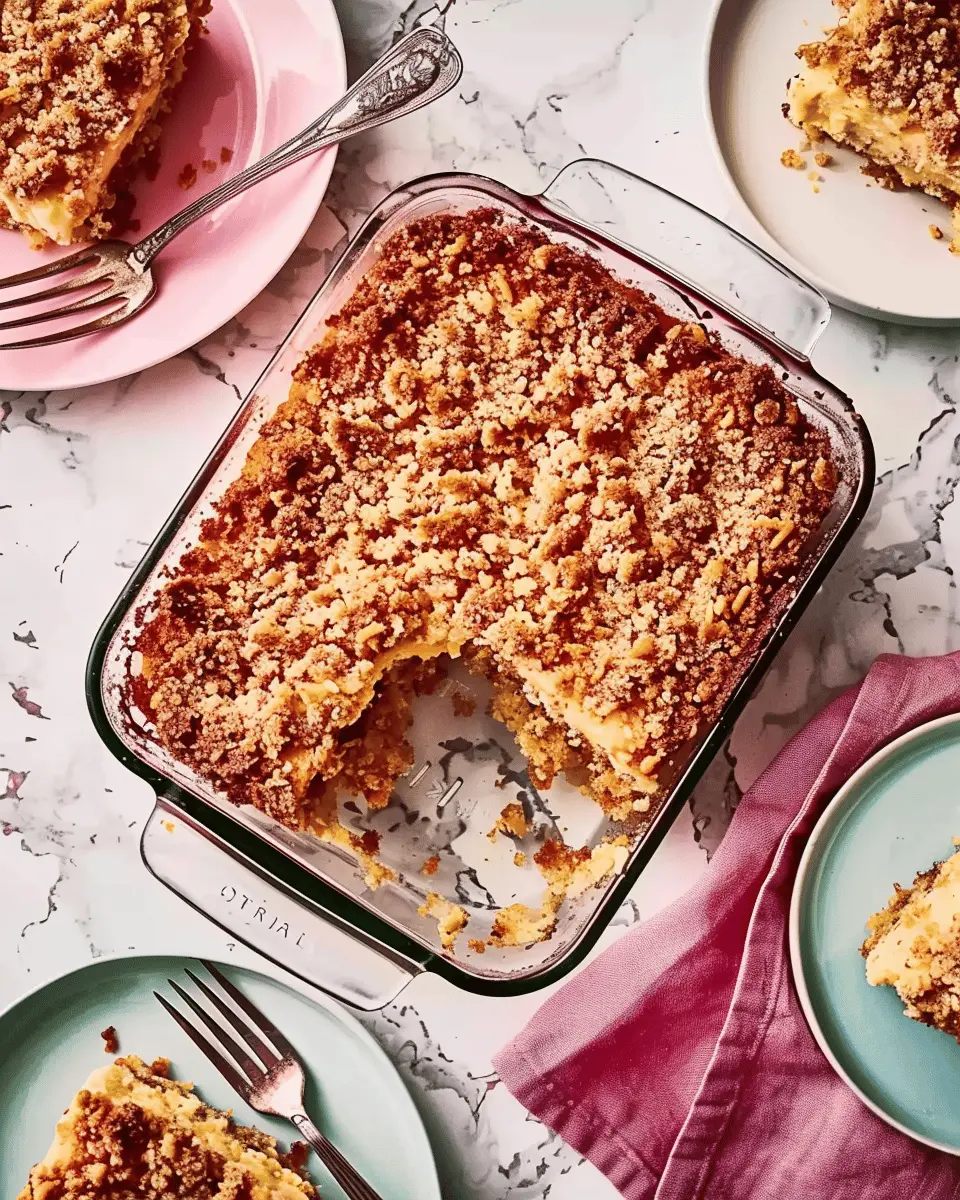
Introduction to Easy Retro Cake
If you’re anything like me, you probably have fond memories of your mom or grandma whipping up delicious cakes from scratch on lazy Sunday afternoons. Enter the easy retro cake, a nostalgic treat that’s making a delightful comeback in our contemporary kitchens. But what exactly is an easy retro cake, and why is it gaining popularity among young bakers?
What is an Easy Retro Cake, and Why is it Making a Comeback?
An easy retro cake typically refers to those timeless recipes from the mid-20th century, known for their simplicity and ability to evoke warm memories. Think of classic recipes like pineapple upside-down cake, Bundt cakes, and simple one-bowl cakes. What’s exciting about these desserts is how they allow for creativity while requiring basic ingredients — often ones you already have in your pantry.
The resurgence of the easy retro cake can be attributed to our collective desire for comfort food, especially during uncertain times. According to a study by the American Psychological Association, baking can invoke feelings of nostalgia and happiness, reminding us of simpler times. With many millennials and Gen Z turning to their ovens for solace, the easy retro cake fits the bill perfectly. It’s about creating joy without the stress — and who doesn’t want that?
Why else is it making waves? Social media platforms like Instagram and TikTok are overflowing with visuals of beautifully textured cakes topped with fresh fruits and pastel icings. Baker influencers are showcasing retro cake recipes, fueling a vibrant baking community eager to share and replicate these charming classics. You can easily find inspiration by checking out pages dedicated to vintage recipes or even exploring local baking classes.
Key Ingredients and Techniques
When you dive into baking an easy retro cake, expect to rely on basic staples like flour, sugar, eggs, and butter. The beauty is in its simplicity! Here are a few tips to get started:
- Quality Ingredients: Opt for fresh, high-quality ingredients for a better flavor profile.
- Use Creative Add-ins: Don’t hesitate to jazz things up! Try adding spices like cinnamon or cardamom for that extra warmth.
- Experiment with Frostings: Simple buttercream or a drizzle of icing can take your cake to the next level.
Get ready to bake your own piece of nostalgia and create new memories in the kitchen!
Ingredients for Easy Retro Cake
Essential ingredients for a classic retro cake
When you’re making an easy retro cake, having the right ingredients is key to capturing that nostalgic flavor and texture. Here’s a straightforward list that will get you started:
- All-purpose flour: The foundation of any great cake, providing structure.
- Granulated sugar: For that lovely sweetness, giving your cake its signature taste.
- Baking powder: Ensures your cake rises perfectly, fluffy and light.
- Salt: Just a pinch enhances all the flavors.
- Butter: Adds richness and moistness—don’t skimp on the good stuff!
- Eggs: The binding agent that keeps everything together.
- Milk: For that tender crumb and extra moisture.
These staples are easy to find, so you’re just a quick trip to the grocery store away from crafting your delightful cake!
Optional ingredients for a personalized twist
Looking to make your easy retro cake uniquely yours? Consider adding some optional ingredients! A few fun additions could elevate your cake to a new level:
- Vanilla extract: A splash for a warm, inviting aroma.
- Cocoa powder: Turn it into a rich chocolate cake with just a few tablespoons.
- Chopped nuts: For a delightful crunch.
- Fresh fruits: Think berries or bananas mixed in for added flavor and moisture.
To learn more about adapting cake recipes, check out The Flavor Bender for tips on ingredient substitutions!
Preparing Easy Retro Cake
Baking an easy retro cake is not just about following a recipe; it’s about reliving cozy memories and creating new ones in your kitchen. Whether you’re a seasoned baker or just starting your culinary journey, this guide will have you whipping up a classic delight in no time. Let’s roll up our sleeves and get started!
Gather your ingredients and tools
First things first: you’ll want to have everything you need within arm’s reach. Here’s your shopping list:
-
Dry ingredients:
-
2 cups all-purpose flour
-
1 cup granulated sugar
-
2 teaspoons baking powder
-
1 teaspoon baking soda
-
1/2 teaspoon salt
-
Wet ingredients:
-
1 cup milk (or a non-dairy alternative)
-
1/2 cup vegetable oil or melted butter
-
3 large eggs
-
1 teaspoon vanilla extract
-
Optional add-ins:
-
Chocolate chips, nuts, or fresh berries for added flavor
-
Tools:
-
Mixing bowls
-
Measuring cups and spoons
-
A whisk or electric mixer
-
A 9×13-inch baking pan
-
Parchment paper (for easier removal)
Feeling overwhelmed? Don’t be! Just take a deep breath, have fun with it, and enjoy the process.
Preheat the oven and prepare the baking pan
Now that you have everything ready, let’s set the stage for your easy retro cake. Preheat your oven to 350°F (175°C). This step might seem minor, but it’s crucial for achieving a perfectly baked cake.
While the oven heats up, take your baking pan and grease it with cooking spray or butter. To ensure your cake comes out smoothly, consider lining the bottom with parchment paper. This little trick makes a world of difference and saves you from any potential spills.
Mix the dry ingredients for the cake base
In a large mixing bowl, combine all your dry ingredients: flour, sugar, baking powder, baking soda, and salt. Whisk them together until they’re blended well. This not only ensures an even rise but also removes any lumps, leading to a fluffier texture in your easy retro cake. You’d be surprised how much difference this simple step can make!
Combine wet ingredients for the perfect cake batter
In a separate bowl, mix your wet ingredients: milk, oil, eggs, and vanilla extract. Whisk this ensemble until smooth and slightly frothy. The key ingredient here is the love you put into it—yes, love can indeed be a secret ingredient!
Pro tip: If you want to switch things up, consider adding a splash of almond extract for a unique twist on flavor.
Bring it all together and pour into the pan
Now that your two mixtures are ready, it’s time to combine them. Pour the wet mixture into the dry ingredients and gently fold with a spatula or whisk. Be careful not to overmix; a few lumps are perfectly fine. Remember, this is an easy retro cake, not rocket science!
Once well combined, pour the batter into your prepared baking pan, spreading it evenly.
Bake and check for doneness
Slide your cake into the preheated oven and set a timer for 30-35 minutes. Since every oven is slightly different, it’s a good idea to start checking for doneness around the 25-minute mark.
To check, insert a toothpick into the center of the cake; if it comes out clean or with a few crumbs attached, you’re good to go. If not, give it a few extra minutes.
Once done, allow your cake to cool in the pan for about 10-15 minutes before transferring it to a wire rack.
And there you have it! Baking an easy retro cake is not just about creating delicious dessert; it’s about making memories, enjoying the process, and, of course, sharing a slice with friends or family. So go ahead, slice that cake, serve it with your favorite beverage, and relish the flavors!
For more baking tips and tricks, check out King Arthur Baking or Joy of Baking for a wealth of baking knowledge!
Variations on Easy Retro Cake
When it comes to easy retro cake, the possibilities are endless! Let’s explore some delightful variations that can make this classic treat even more fun and personalized.
Indulgent Easy Retro Chocolate Cake
If you’re a chocolate lover, why not transform your retro cake into a luscious easy retro chocolate cake? Simply replace a portion of the all-purpose flour with unsweetened cocoa powder (about one-third), and add in some chocolate chips for extra decadence. For a finishing touch, how about drizzling a silky ganache on top? It’s a sure way to impress at any gathering. If you’re curious about the science behind baking with cocoa, check out this helpful guide on cocoa types.
Fruity Bliss: Easy Retro Fruit Cake
Feeling fruity? You can easily incorporate seasonal fruits into your cake! Chopped apples, pears, or even berries can add delicious flavor and moisture. Just fold in about a cup of diced fruit into the batter for a delightful twist. For an even more vibrant display, top your cake with a fresh fruit glaze made from natural fruit juice mixed with a bit of powdered sugar. This simple change brings a whole new level of excitement to your easy retro cake.
Cream Cheese Frosting Options
Frosting is where creativity shines! Instead of the traditional buttercream, why not try cream cheese frosting? It pairs beautifully with both chocolate and fruit cakes. For a unique spin, consider adding flavors such as vanilla bean or lemon zest. You can even swap in a touch of maple syrup for a hint of earthy sweetness. This versatile frosting can elevate your easy retro creations and make them stand out on any dessert table.
By exploring these variations, you’ll discover just how adaptable and fun your easy retro cake can be!
Cooking tips and notes for Easy Retro Cake
Common mistakes to avoid when baking a retro cake
Baking an easy retro cake can be fun but also fraught with pitfalls. One common mistake is overmixing the batter. This can lead to a tough cake instead of a tender one. Remember, mix only until the ingredients are just combined. It’s also crucial to avoid using cold ingredients straight from the fridge; letting your butter and eggs reach room temperature helps the cake rise nicely. Lastly, don’t open the oven door too often! Each peek lets precious heat escape.
How to achieve the perfect cake texture
The secret to the perfect easy retro cake lies in the balance of ingredients. Use a precise measuring technique to ensure you’re not adding too much flour or sugar. Consider sifting your flour to aerate it, making the cake fluffier. An excellent tip is to add a touch of sour cream or yogurt; it enriches the flavor and moisture. This article on cake baking techniques can provide you with extra insights for making a stunning cake every time.
Delve into these tips and get ready to impress your friends and family!
Serving suggestions for Easy Retro Cake
When it comes to your easy retro cake, the right garnishes and accompaniments can elevate it from ordinary to extraordinary. Let’s dive into some delightful serving suggestions!
Ideas for garnishing your retro cake
First impressions matter! Here are some fun and colorful garnishing ideas for your cake:
- Fresh Berries: Top your cake with strawberries, blueberries, and raspberries for a burst of color and flavor.
- Shredded Coconut: Add a sprinkling of coconut for a tropical vibe that pairs wonderfully with the cake’s sweetness.
- Powdered Sugar: A light dusting just before serving provides a charming touch, making your cake look like it came straight out of a vintage bakery.
Best pairings for serving your cake
Completing the experience with the right drinks and sides can make your gathering memorable:
- Coffee or Tea: Pair your easy retro cake with a rich coffee or soothing herbal tea for that perfect sweet balance.
- Fruit Salad: A light fruit salad can be a refreshing side that complements the cake’s flavors beautifully.
- Ice Cream: A scoop of vanilla or chocolate ice cream adds a creamy dimension to your cake, making it an indulgent treat for any occasion.
Whether you’re hosting a casual brunch or looking to impress guests at a dinner party, these suggestions will ensure your easy retro cake is a hit! For more tips on hosting, check out The Kitchn for fun entertaining ideas.
Time breakdown for Easy Retro Cake
When you’re ready to bake the easy retro cake, having a clear timeline can make the process seamless. Here’s how to break it down:
Preparation time
The prep time is around 20 minutes. Gather your ingredients, preheat your oven, and get things organized. This part can be rather therapeutic—think of it as your creative warm-up.
Baking time
Once you pour your batter into the prepared pan, it takes about 30-35 minutes to bake. You’ll know it’s done when a toothpick inserted in the center comes out clean.
Total time
From start to finish, you’re looking at approximately an hour. Not too shabby, right? In less than an hour, you can present a delightful easy retro cake to your friends and family. For more on cake baking tips, check out this helpful guide that covers everything from ingredient quality to ideal mixing techniques.
This timeline makes it feasible even on busy weekdays, so why not give the easy retro cake a try?
Nutritional facts for Easy Retro Cake
Calories per slice
Curious about the calorie content of your beloved easy retro cake? Each slice typically contains around 200-250 calories, making it a delightful treat that won’t completely derail your diet. Enjoying it in moderation can allow you to savor those classic flavors without guilt!
Key nutrients and health considerations
This nostalgic dessert brings more to the table than just sweetness. Here’s a quick look at the key nutrients you can expect in a slice of easy retro cake:
- Carbohydrates: A good source of quick energy, perfect for a mid-afternoon pick-me-up.
- Fats: While the cake does contain fats, opting for healthier oils can elevate the nutritional profile.
- Protein: Adding eggs will not only enhance the flavor but also provide essential amino acids.
When indulging, consider pairing your cake with a cup of herbal tea or a side of fresh fruit to boost vitamines and create a well-rounded snack. For more detailed nutritional insights, check out resources from the USDA FoodData Central. Enjoying a slice now and then is all about balance!
FAQ about Easy Retro Cake
What is the best way to store leftover retro cake?
To keep your easy retro cake fresh and delicious, store any leftovers in an airtight container at room temperature. If you live in a particularly humid area, placing it in the fridge can help, but make sure to let it come back to room temperature before serving for that perfect, soft texture. If you want it to last longer, you can cover it with plastic wrap and stash it in the freezer. Just remember to consume it within three months for the best flavor!
Can I bake this cake in advance and freeze it?
Absolutely! In fact, baking your easy retro cake in advance is a fantastic time-saver. Just allow the cake to cool completely and then wrap it tightly in plastic wrap. You can also use foil for extra protection. When you’re ready to enjoy it, just let it thaw overnight in the fridge or at room temperature for several hours. This way, you’ll always have a delightful treat on hand!
How can I make my retro cake more flavorful?
If you’re looking to up the flavor of your easy retro cake, consider these tips:
- Add spices: Cinnamon, nutmeg, or even a hint of ginger can give your cake a warm depth.
- Incorporate extracts: Vanilla is classic, but almond or lemon extract can brighten the flavor profile.
- Mix in zest: Citrus zest from oranges or lemons adds a lovely freshness.
- Experiment with fillings: A layer of fruit preserves or a drizzle of honey can give it a sweet, unexpected twist.
For more ideas on enhancing flavors, check out this guide.
Feel free to get creative—you might just discover a new favorite version of this nostalgic dessert!
Conclusion on Easy Retro Cake
Why you should give easy retro cake a try!
If you’re looking for a delightful dessert that packs nostalgia and flavor, the easy retro cake is a must-try. It’s not just a treat; it’s an experience that whisks you back to simpler times.
- Quick and Simple: This recipe is designed for busy lives while still delivering on taste.
- Versatile: Customize it with your favorite toppings or fillings.
- Crowd-Pleaser: Perfect for gatherings, this cake appeals to all ages.
So why not whip one up? Dive into this flavorful adventure and enjoy a slice of cake that’s as easy to make as it is to love. For more baking inspiration, check out BBC Good Food or Food Network for tips and tricks that will elevate your baking game.
PrintEasy Retro Cake: An Indulgent Treat Anyone Can Make at Home

The Easy Retro Cake is a delightful dessert that combines nostalgia with simple baking techniques, making it accessible for bakers of all levels.
- Prep Time: 20 minutes
- Cook Time: 35 minutes
- Total Time: 55 minutes
- Yield: 8 servings 1x
- Category: Dessert
- Method: Baking
- Cuisine: American
- Diet: Vegetarian
Ingredients
- 2 cups all-purpose flour
- 1 1/2 cups granulated sugar
- 1 cup unsalted butter, softened
- 1 cup milk
- 3 large eggs
- 2 teaspoons baking powder
- 1 teaspoon vanilla extract
- 1/2 teaspoon salt
Instructions
- Preheat the oven to 350°F (175°C).
- In a large bowl, cream together the butter and sugar until light and fluffy.
- Add eggs, one at a time, beating well after each addition.
- Stir in the vanilla extract.
- In another bowl, whisk together the flour, baking powder, and salt.
- Gradually add the dry ingredients to the wet mixture, alternating with milk, until just combined.
- Pour the batter into a greased cake pan and smooth the top.
- Bake for 30-35 minutes, or until a toothpick inserted into the center comes out clean.
- Let the cake cool before serving.
Notes
- For an extra indulgent touch, frost with your favorite chocolate or cream cheese frosting.
- This cake also pairs beautifully with fresh fruit on top.
Nutrition
- Serving Size: 1 slice
- Calories: 350
- Sugar: 20g
- Sodium: 150mg
- Fat: 18g
- Saturated Fat: 11g
- Unsaturated Fat: 5g
- Trans Fat: 0g
- Carbohydrates: 42g
- Fiber: 1g
- Protein: 4g
- Cholesterol: 70mg
Keywords: Easy Retro Cake, dessert, baking, simple recipes