
Introduction to Gluten Free Pop Tarts
If you’ve ever craved a nostalgic snack that combines sweet and flaky goodness, then gluten free pop tarts are the perfect solution for you! Whether you have dietary restrictions or simply want to indulge in a healthier treat, making your own pop tarts at home can be a fun and rewarding experience.
Why Gluten Free Pop Tarts are a Game Changer for Homemade Snacks
Imagine waking up on a busy morning, and instead of reaching for processed snacks filled with artificial ingredients, you can enjoy warm, homemade gluten free pop tarts! This homemade approach allows you to control every ingredient, ensuring a delightful experience that’s free from gluten and full of flavor.
Making gluten free versions of classic snacks not only caters to those with celiac disease or gluten intolerance but can also be a healthier choice for anyone looking to make better dietary decisions. A study by the National Institutes of Health shows that many people perceive gluten-free options as healthier, even if they aren’t always lower in calories. This makes creating your own wholesome treats all the more enticing!
When you whip up your own gluten free pop tarts, you can experiment with flavors and fillings that align with your taste preferences or dietary needs. For instance, the combination of peanut butter and jelly is a timeless classic. You can also consider alternatives like almond butter or honey to switch things up.
Here are a few benefits of choosing homemade gluten free pop tarts:
- Control Over Ingredients: Avoid additives and preservatives often found in store-bought options.
- Customization: Tailor fillings and dough to suit your palate or dietary restrictions.
- Cost-Effective: Ingredients often cost less than pre-packaged items!
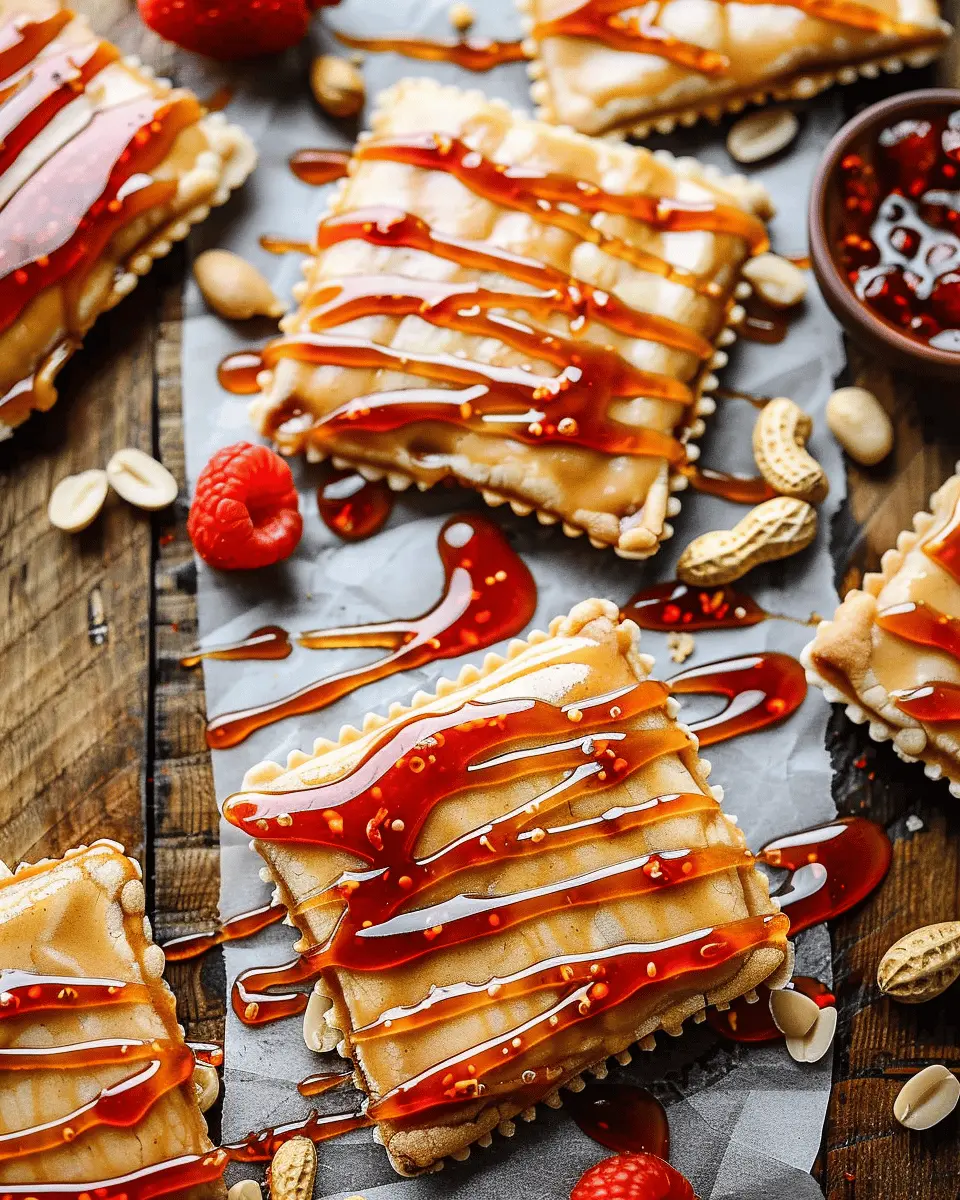
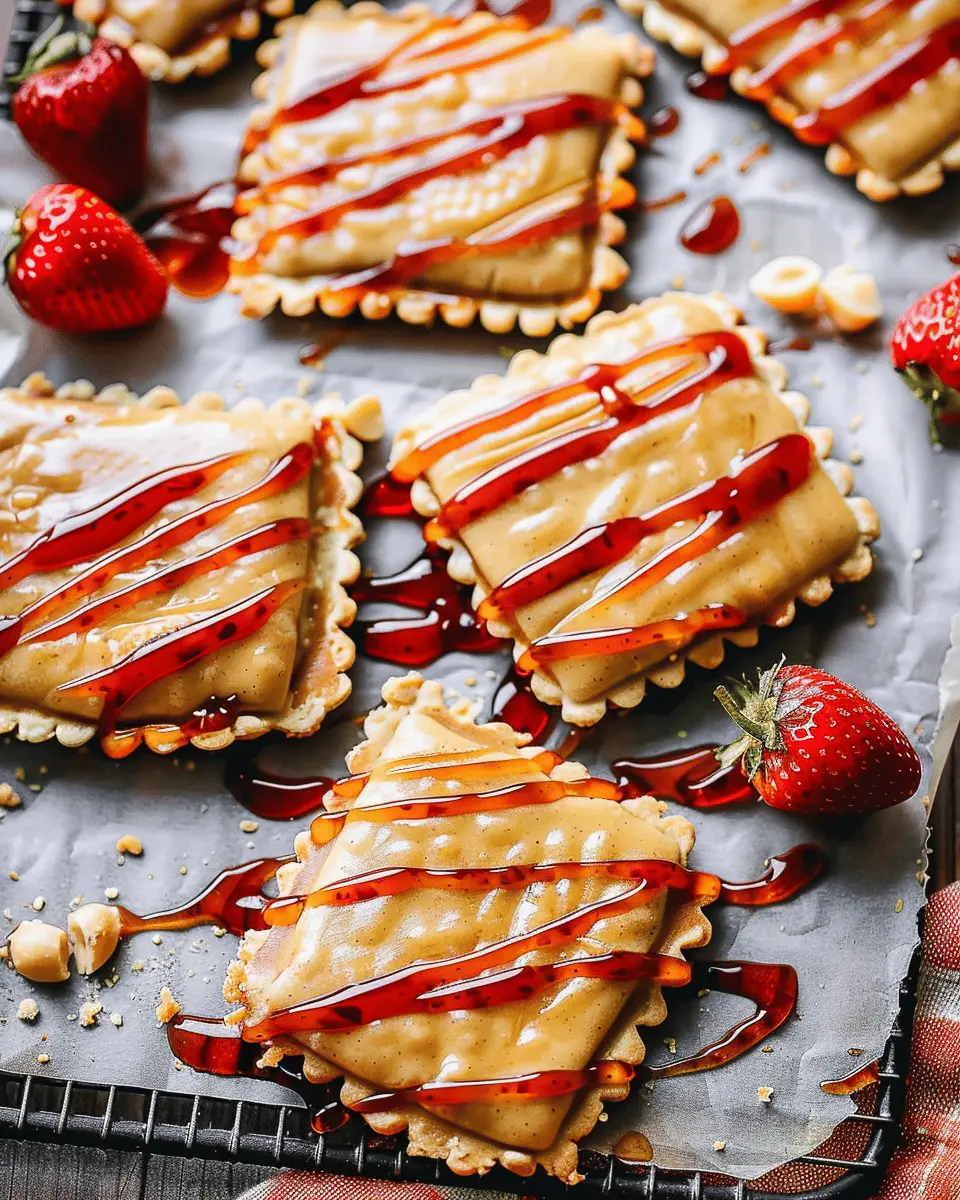
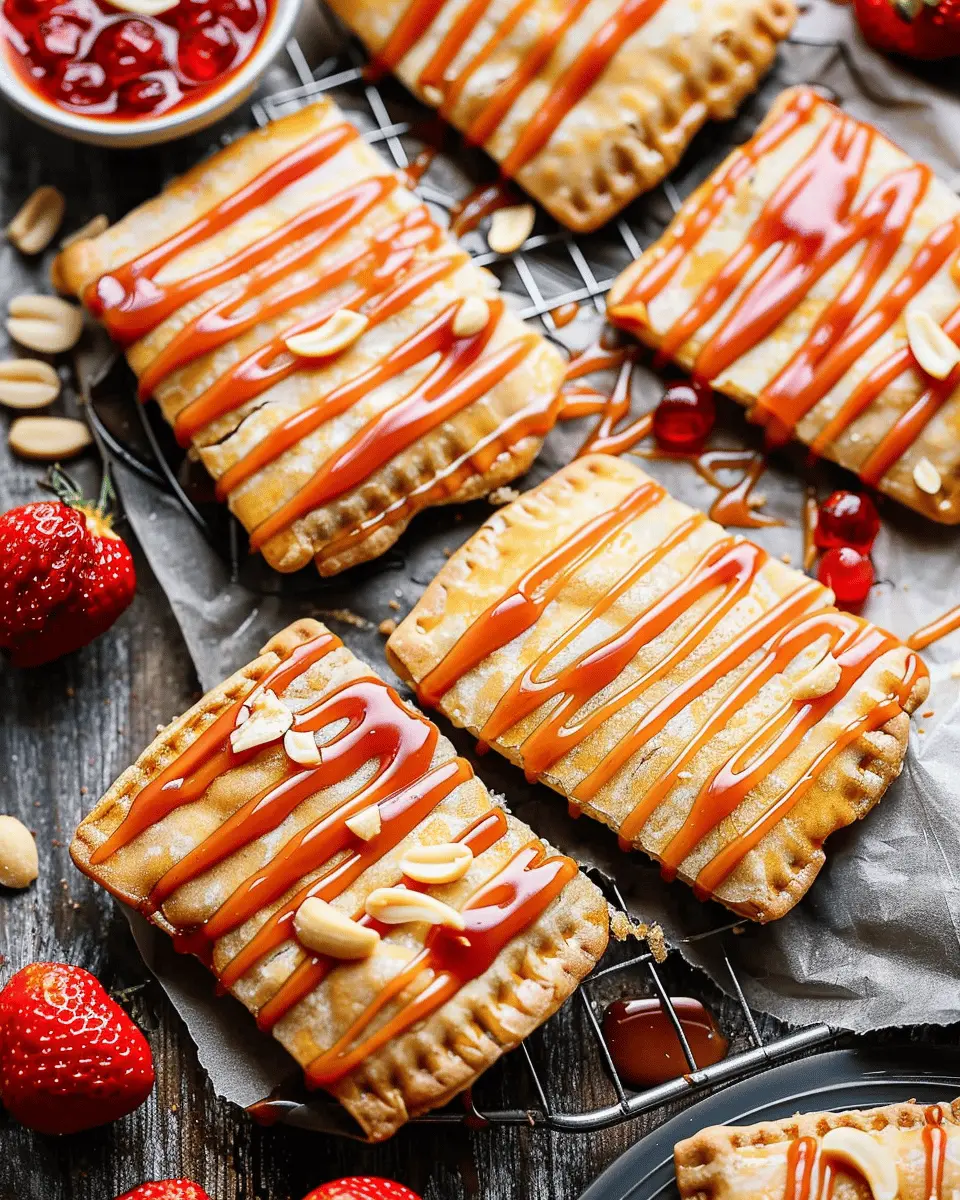
Making gluten free pop tarts at home is not just about satisfying hunger; it’s about the joy of creating something delicious and nourishing. In our recipe for Gluten Free Peanut Butter and Jelly Pop Tarts, you’ll find a step-by-step guide that highlights how easy and enjoyable this process can be. Who’s ready to dive in?
For further reading on gluten-free diets, check out resources from the Celiac Disease Foundation here.
Ingredients for Gluten Free Pop Tarts
Essential ingredients for the dough
Making gluten free pop tarts starts with the right dough, which is both silky and resilient. Key ingredients include:
- Gluten-Free All-Purpose Flour: This is your foundation. Look for a blend that includes xanthan gum for elasticity.
- Butter or Coconut Oil: Choose unsalted butter for richness or coconut oil for a dairy-free option.
- Sugar: A touch of granulated sugar sweetens the dough and balances flavors.
- Egg: This binds the mixture and helps create a tender crust.
- Milk or Dairy-Free Alternative: Adds moisture; almond milk or oat milk works great!
With these ingredients in hand, you’re well on your way to creating a delightful crust that’s perfect for your pop tarts.
Filling options for your pop tarts
The filling is where you can let your creativity shine! While peanut butter and jelly are a classic combo, consider these alternatives:
- Nut Butters: Almond or cashew butter provide a different nutty flavor.
- Fruits: Fresh or fruit preserves like strawberry or blueberry can add a burst of sweetness.
- Chocolate: A spread like Nutella or melted chocolate can satisfy your sweet tooth!
Don’t be afraid to mix and match! These delicious fillings will complement the gluten free pop tarts perfectly, making for a delightful breakfast or snack. Check out more filling ideas on Minimalist Baker.
Preparing Gluten Free Pop Tarts
Creating gluten free pop tarts might seem daunting at first, but with a little preparation, you’ll find it’s a fun and rewarding process! You’ll love this homemade take on the classic treat that combines the nostalgia of childhood snacks with the wholesome goodness of homemade ingredients. So, roll up your sleeves, and let’s get started!
Gather Your Ingredients
Before diving into the making of your delicious gluten free pop tarts, the first step is to gather all your ingredients. Here’s what you’ll need:
-
For the Dough:
-
2 cups gluten free all-purpose flour (look for a blend that includes xanthan gum)
-
1/4 cup granulated sugar
-
1/2 teaspoon salt
-
1/2 cup cold butter, cut into small cubes
-
1 large egg
-
1-2 tablespoons cold water (as needed)
-
For the Filling:
-
1/2 cup peanut butter (smooth or crunchy, based on your preference)
-
1/4 cup jelly or jam (your favorite flavor)
-
For the Topping:
-
1 egg, beaten (for egg wash)
-
Optional: Sprinkles for that fun finish!
Having everything laid out will not only make the process smoother but will make you feel like a pro right from the start. If you’re unfamiliar with gluten free ingredients, consider checking out this gluten free baking guide for tips.
Make the Gluten-Free Dough
Making the dough for your gluten free pop tarts is straightforward. In a large mixing bowl, combine the gluten free flour, sugar, and salt. Use a pastry cutter or your fingers to work in the cold butter until the mixture resembles coarse crumbs. It might feel different from regular dough, but that’s perfectly normal!
Once blended, add the egg and mix until combined. If the mixture seems too dry, slowly add a tablespoon of cold water at a time until the dough holds together. This will give you the texture needed for your pop tarts.
Roll Out the Dough
Now comes the fun part—rolling out the dough! On a well-floured surface (using more gluten free flour, of course), divide the dough into two sections for easier handling. Roll out one portion into a rectangle about 1/8 inch thick. With gluten free dough, it’s crucial to handle it gently, as it can be a bit more fragile than traditional dough.
Make sure to dust your rolling pin and work surface with flour to prevent sticking. If a piece tears, don’t stress! You can easily patch it up. Use a knife or a pizza cutter to trim the edges, making them nice and tidy.
Prepare the Filling
Now that your dough is ready, it’s time to prepare the filling. In a small bowl, mix together your peanut butter and jelly until fully combined. The taste buds will thank you! Feel free to customize this by using different nut butters or jams—there’s no rules when it comes to taste! Just remember to keep an eye on the consistency; you want it spreadable but not too runny.
Assemble the Pop Tarts
Take your rolled-out dough and slice it into rectangles—about 3×4 inches. On half of the rectangles, spread about one tablespoon of the peanut butter and jelly mixture in the center, leaving a bit of space around the edges to seal. Use the other half of the dough rectangles to cover the filled halves.
Press down the edges gently with a fork to seal, and make a few small slits in the top to allow steam to escape. This step is crucial for achieving that delicious flaky texture that we all love.
Bake Your Pop Tarts
With your pop tarts assembled, it’s time to bake! Preheat your oven to 350°F (175°C) and place your assembled pop tarts on a baking sheet lined with parchment paper. Brush the tops with the beaten egg for that lovely golden finish and sprinkle with colorful sprinkles for added flair!
Bake for 15-20 minutes or until they’re beautifully golden brown. Allow them to cool slightly before indulging—it builds the anticipation!
Making gluten free pop tarts may require a few more steps than popping a store-bought one in the toaster, but the joy of creating your own treat is worth every minute. Take your time and enjoy the process. Happy baking!
Variations on Gluten Free Pop Tarts
When it comes to gluten free pop tarts, the possibilities are as endless as your cravings. Here are a few delightful variations that cater to every taste, from sweet to savory!
Indulgent Chocolate-Filled Delights
If you have a sweet tooth, you’ll love chocolate-filled gluten free pop tarts. Simply melt some dark chocolate or use your favorite chocolate spread as your filling. Adding a touch of sea salt can enhance the chocolate flavors and create a delightful contrast. Pair these with a cup of hot coffee or almond milk for a perfect treat any time of day. You can even try using flavored chocolate, like orange or raspberry, for a unique twist.
Fruity Strawberry Jam Options
For a classic taste, opt for strawberry jam gluten free pop tarts. Use homemade or store-bought jam with no added sugars to keep it healthy. You can make these even more nutritious by incorporating a layer of fresh strawberries inside before sealing your pastry. It’s the perfect balance of tart and sweet, and it can take you back to simpler days with every bite. Consider using different jams like blueberry or apricot for a fun variation!
Savory Pop Tarts with Chicken Ham
Savory gluten free pop tarts are an inventive take on this classic treat. Stuff yours with shredded chicken ham, cheese, and a dash of mustard for a unique lunchtime option. The flaky pastry pairs beautifully with the savory filling, making it a delightful choice when you’re looking for something different. You could also experiment with adding vegetables like spinach or mushrooms for added nutrition.
With these variations, your gluten free pop tarts can be a culinary adventure! Whether you’re indulging in something sweet or savory, there’s a flavor for every palate. For more creative recipes, check out sources like Healthline or Epicurious for fresh kitchen inspiration!
Cooking Tips and Notes for Gluten Free Pop Tarts
Importance of Chilling the Dough
Chilling your dough is essential when making gluten free pop tarts. It helps to solidify the fat which contributes to a flaky, tender crust. Aim to chill the dough for at least 30 minutes. This not only makes it easier to handle but also helps prevent shrinking during baking. If you’re short on time, try popping it in the freezer for about 15 minutes—just enough to firm it up!
Tips for Avoiding Soggy Bottoms
A soggy bottom can be a real disappointment, but there are simple ways to prevent it:
- Pre-bake the crust: This step can ensure a crisp base. Just bake the pastry for a few minutes before adding your filling.
- Use a parchment paper layer: Lining the baking tray with parchment paper can help moisture escape, creating a barrier between the filling and the crust.
With these tips, you’ll be on your way to delicious, perfectly baked gluten free pop tarts. Check out more on baking techniques at Serious Eats for additional insights!
Serving Suggestions for Gluten Free Pop Tarts
Pairing with Homemade Whipped Cream
Imagine carefully biting into a warm, flaky gluten free pop tart, only to find it perfectly complemented by a dollop of homemade whipped cream. It’s surprisingly easy to whip up! Just whisk heavy cream until it forms gentle peaks, then add a touch of vanilla and sugar to taste. The lightness of the whipped cream balances the rich peanut butter and sweet jelly, elevating your snack to a decadent dessert. Serve this combo at brunch or for a cozy movie night. It’s a sweet reminder that gluten-free doesn’t mean sacrificing flavor!
Enjoying with a Side of Fresh Fruit
For a refreshing twist, pair your gluten free pop tarts with a side of fresh fruit. Think bright slices of strawberries or blueberries that not only add a burst of color but also provide a juicy contrast to the crunchy pastry. Did you know that berries are rich in antioxidants? They’re not just tasty—they’re a healthy addition! This pairing not only rounds out the meal but also helps keep your palate clean and your snack guilt-free. You’ll feel energized and satisfied, without the post-snack slump.
By adding these delicious elements to your plate, you can enjoy your homemade gluten free peanut butter and jelly pop tarts in delightful new ways!
Time breakdown for Gluten Free Pop Tarts
When you’re eager to enjoy homemade gluten free pop tarts, knowing how much time you’ll need can make a big difference. Here’s the breakdown to streamline your baking journey.
Preparation time
For these delightful treats, you’ll want to set aside about 15 to 20 minutes for prep. This includes gathering your ingredients, rolling out the dough, and assembling your pop tarts. If you have everything ready, this part can be quite quick!
Baking time
Once prepped, baking those gluten free pop tarts takes approximately 20 to 25 minutes. You’ll want to keep an eye on them to ensure a golden-brown finish that’s simply irresistible.
Total time
In total, you’re looking at around 35 to 45 minutes from start to finish. Whether you’re making these for a leisurely weekend brunch or an after-work snack, you’ll have delicious pop tarts ready in no time!
For more inspiration on gluten-free baking, check out this comprehensive guide on mastering gluten-free recipes! Enjoy baking and indulging in your homemade sweets!
Nutritional facts for Gluten Free Pop Tarts
When it comes to enjoying gluten free pop tarts, it’s essential to understand their nutritional profile. Here’s a breakdown to help you indulge wisely.
Calories
A serving of gluten free pop tarts typically contains around 200 to 250 calories. This makes them a convenient treat without completely derailing your daily calorie goals.
Carbohydrates
These tasty delights pack about 35 to 40 grams of carbohydrates per serving. While this is a decent energy source, it’s always good to balance your carb intake with other nutrients throughout the day.
Protein
You’ll find that gluten free pop tarts include roughly 2 to 3 grams of protein. To boost your protein intake, consider enjoying them alongside a source of lean protein, like turkey bacon or yogurt.
Understanding these figures can help you make informed choices about your snacking habits. For further reading, check out the U.S. Department of Agriculture for detailed nutritional analysis on various food products.
FAQs about Gluten Free Pop Tarts
Can I use regular flour instead of gluten-free flour?
If you’re looking to savor the delightful taste of gluten free pop tarts, sticking with gluten-free flour is essential. Regular flour contains gluten, which is what many people with gluten sensitivities or celiac disease need to avoid. Using gluten-free flours like almond, coconut, or a blend of gluten-free all-purpose flour can give you a similar texture and taste without the gluten woes. Just ensure that any flour you choose is certified gluten-free to avoid cross-contamination.
How do I store my gluten free pop tarts?
Storing your gluten free pop tarts properly can make a big difference in keeping them fresh. Here’s how:
- Room Temperature: If you plan to eat them within a week, store them in an airtight container at room temperature.
- Refrigerator: For longer preservation, you can keep them in the fridge. This will help them last up to two weeks.
- Freezer: If you’re a batch maker and want to save some for later, wrap them individually in plastic wrap, then store them in a freezer bag. They can last for up to three months!
Are gluten free pop tarts healthier than regular ones?
This largely depends on the ingredients used. Many store-bought gluten free pop tarts can be high in sugar and preservatives, just like traditional versions. However, when making them at home, you control the ingredients, making it possible to create a healthier alternative. Utilizing whole foods and natural sweeteners can help; plus, many homemade recipes allow you to sneak in nutrients!
For more insight on gluten-free diets, check out Celiac Disease Foundation or Gluten Free Watchdog.
Conclusion on Gluten Free Pop Tarts
Recap the joy of homemade gluten free delights
Creating your own gluten free pop tarts is not just about food. It’s an experience that sparks joy in both the kitchen and at the table. As you unwrap these delightful pastries, packed with your favorite peanut butter and jelly, you’ll find that they have a warmth that store-bought options simply can’t replicate.
Homemade treats allow you to control ingredients, ensuring they are not only gluten-free but also aligned with your dietary preferences, whether that includes organic or non-GMO options. Plus, sharing them with friends and family can create meaningful memories.
For tips on gluten-free baking, consider checking out resources like the Gluten Intolerance Group or Celiac Disease Foundation to enhance your skills. Happy baking!
PrintGluten Free Pop Tarts: Indulgent Peanut Butter and Jelly Delight

Delicious peanut butter and jelly pop tarts that are gluten-free and perfect for a sweet treat.
- Prep Time: 20 minutes
- Cook Time: 20 minutes
- Total Time: 40 minutes
- Yield: 8 pop tarts 1x
- Category: Dessert
- Method: Baking
- Cuisine: American
- Diet: Gluten-Free
Ingredients
- 1 cup gluten-free flour
- 1/4 cup powdered sugar
- 1/2 cup peanut butter
- 1/4 cup jelly or jam of choice
- 1/4 cup cold butter
- 1/4 teaspoon salt
- 1 teaspoon vanilla extract
- 2 tablespoons cold water
Instructions
- Preheat your oven to 350°F (175°C).
- In a bowl, combine gluten-free flour, powdered sugar, and salt.
- Add cold butter and peanut butter, mixing until crumbly.
- Stir in vanilla extract and cold water until a dough forms.
- Roll out the dough and cut into rectangles.
- Place a spoonful of jelly on half of the rectangles, then cover with the other half.
- Seal the edges with a fork.
- Bake for 15-20 minutes or until golden brown.
- Let cool before serving.
Notes
- For a crunchier texture, add chopped nuts to the filling.
- Experiment with different flavors of jam.
Nutrition
- Serving Size: 1 pop tart
- Calories: 180
- Sugar: 10g
- Sodium: 150mg
- Fat: 8g
- Saturated Fat: 3g
- Unsaturated Fat: 5g
- Trans Fat: 0g
- Carbohydrates: 25g
- Fiber: 2g
- Protein: 4g
- Cholesterol: 15mg
Keywords: Gluten Free Peanut Butter and Jelly Pop Tarts